J-BusinessDirectory Extensions
There are several modules that come together with the J-BusinessDirectory to enhance the functionality and user experience. Each module has a specific function and layout.
They are presented in the section below.
J-BusinessDirectory Listing Search module
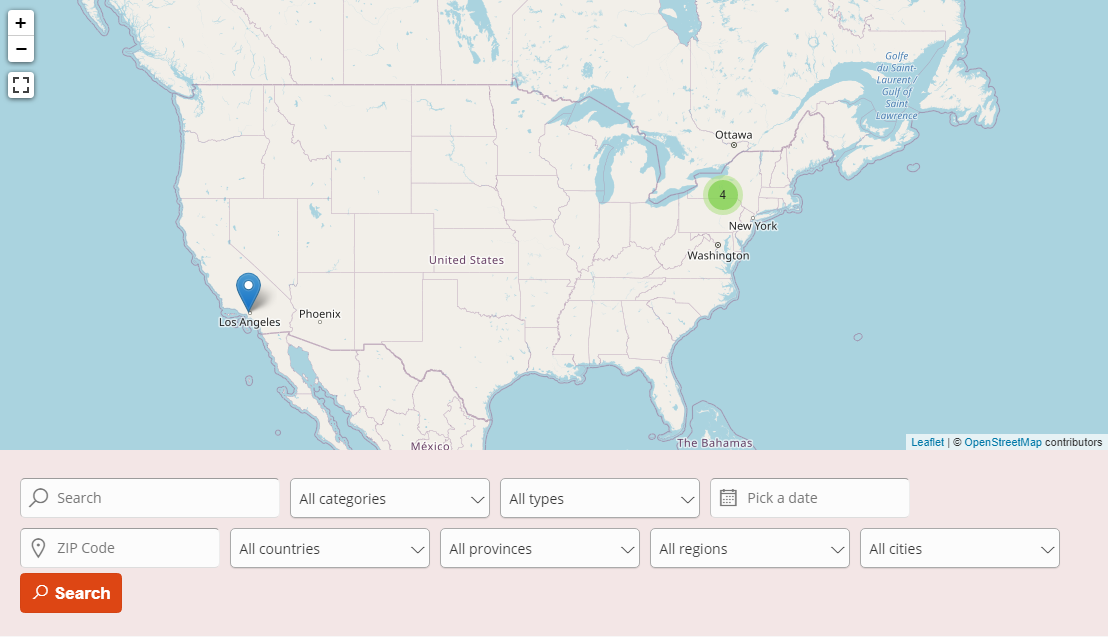
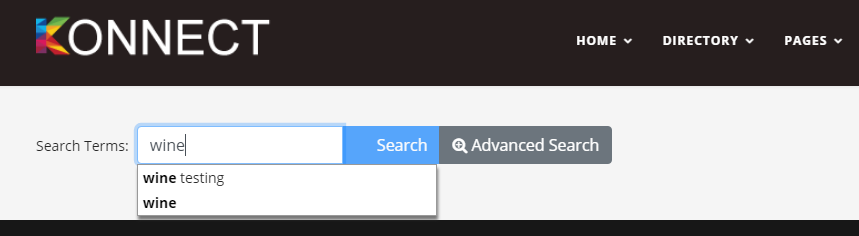
The JBusinessDirectory module allows your visitors to search through the existing companies. It provides different search parameters that will be explained in the following section.
If a field is selected mandatory the search will not be done unless the field is complete.
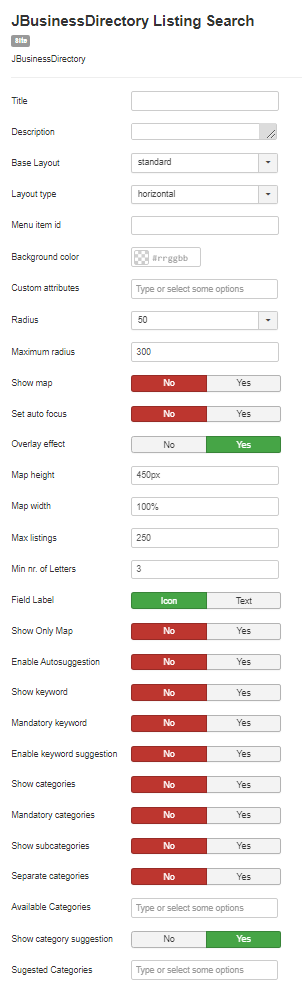

Title – the title of module that will be displayed in front-end
Description – text that will be displayed on front-end
Base Layout – base layout of the module
Layout type – the orientation of search fields. It can be horizontal or vertical.
Menu item id – set the menu item id that is associated with the search. The menu item will be selected when the search is done.
Background color - define the background color of the listing search module
Custom attributes – dropdown of custom attributes that will be shown on front-end
Radius – set the default radius for the search
Maximum radius – the maximum radius that will appear on slider
Show map – show a map with result business listing above the search fields
Set auto focus – enable/disable auto focus
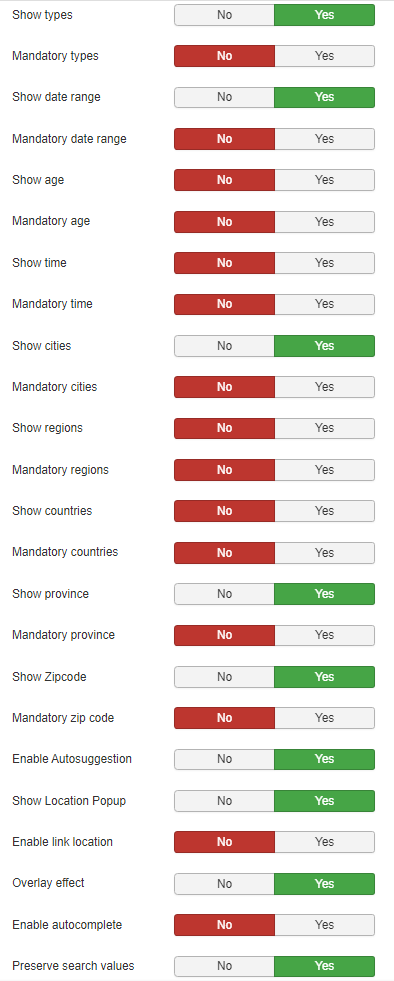
Overlay effect – add an overlay offect when the search input field receives the focus
Map height – set the height of the map
Map width – set the width of the map
Max listings – determine the max number of map markers, when there are no search results.
Min number of letters – minimum number of letters required for the search
Field Label – switch the label of the fields between text and icons
Show only map – show only map on search module
Enable Autosuggestion –enables the location autosuggestion
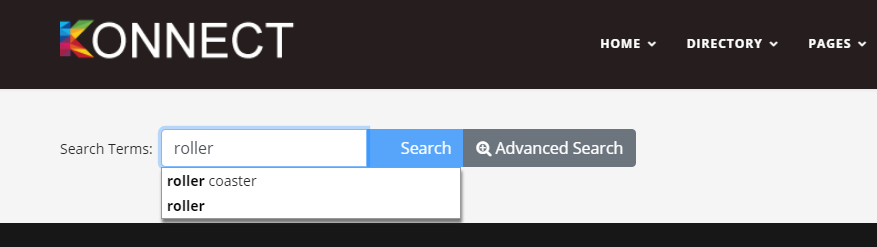
Show keyword - show the keyword input
Mandatory keyword – set the keyword mandatory
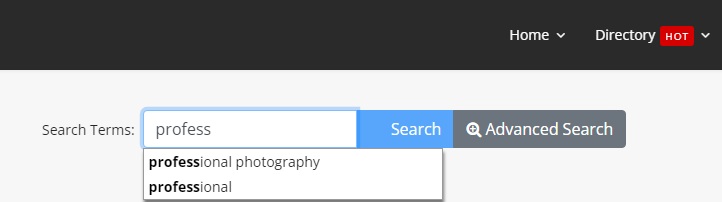
Enable keyword suggestion – enables suggestions (categories or company names) while searching on keyword
Show categories – show categories dropdown
Mandatory categories – set categories mandatory
Show subcategories – show subcategories dropdown
Separate categories – separates categories and subcategories on different select boxes
Available categories – the admin can decide which categories to display in the search module
Show category suggestion - if the setting is set to yes, all the categories below will be shown on the search filter
Suggested Categories - select the categories to show on the filter as suggested
Show types – show business listing type
Mandatory types - set the business listing type mandatory
Available Types – You can add the business types that are available
Show cities – show cities
Mandatory cities – set cities mandatory
Show regions – show regions
Mandatory regions – set regions mandatory
Show countries – show countries
Mandatory countries – set countries mandatory
Show Zipcode – show zip code
Mandatory zipcode – set zipcode mandatory
Enable location suggestion - if set to yes, all the suggested locations will show
Show Location Popup – show/hide the location popup that is shown when clicking on the zip code field
Mandatory location autosuggestions - force the user to select a value from the location autosuggestions
Show province – show province
Mandatory province – set province mandatory
Show bookmark – show bookmark
Enable autocomplete – enable autocomplete functionality on select boxes
Enable autolocation – enable auto location functionality on browsers
Enable link location – enable link location functionality between countries, regions and cities.
Preserve search values – enable/disable preserving values between searches

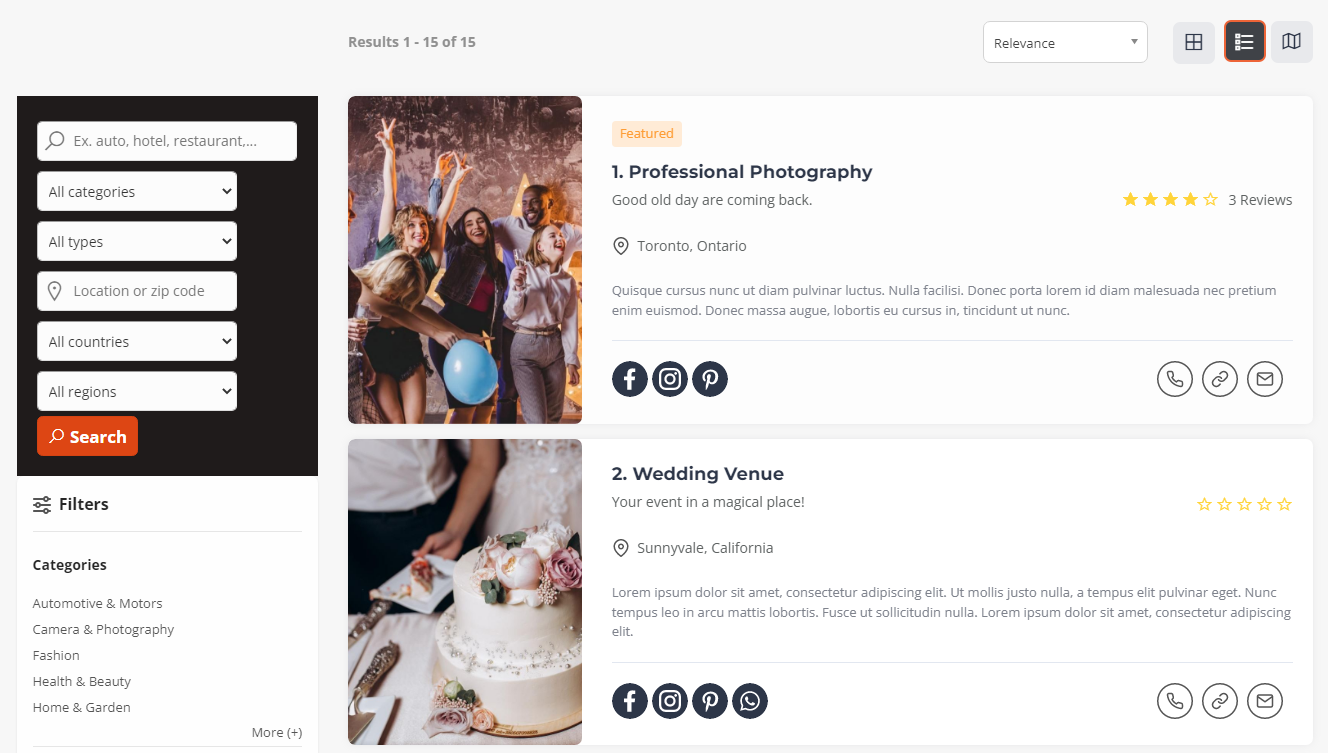
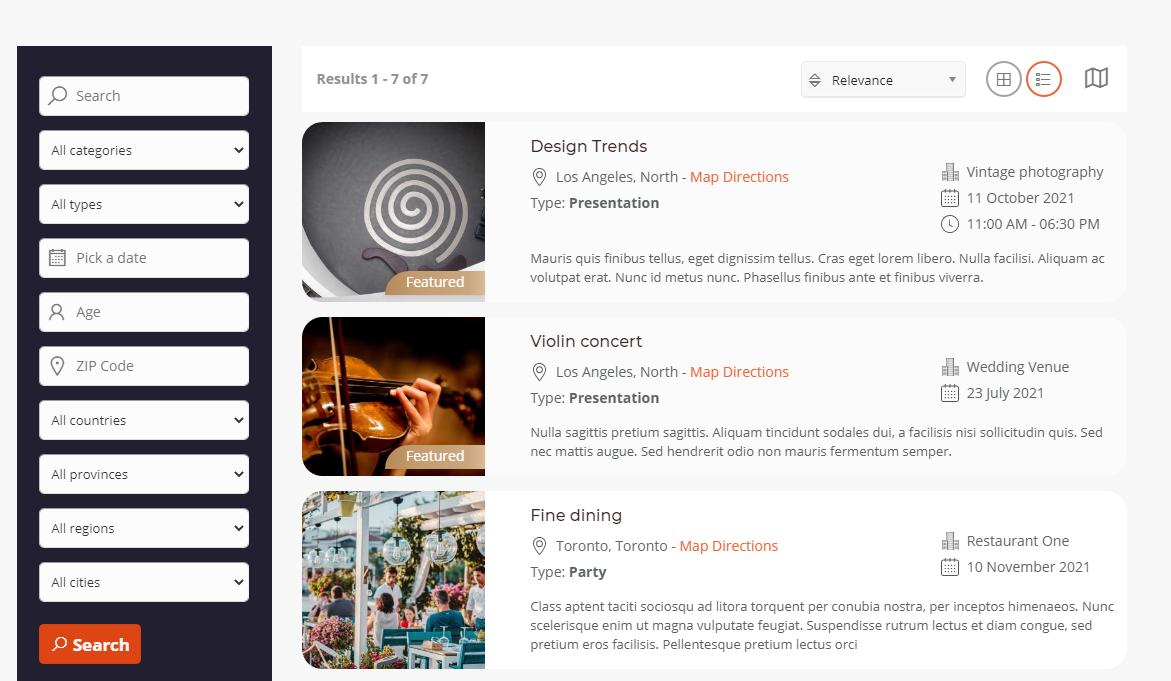
If the search module is set in the new position dir–search-listing-top, it will display on the left side of the site, on top of the search filter.
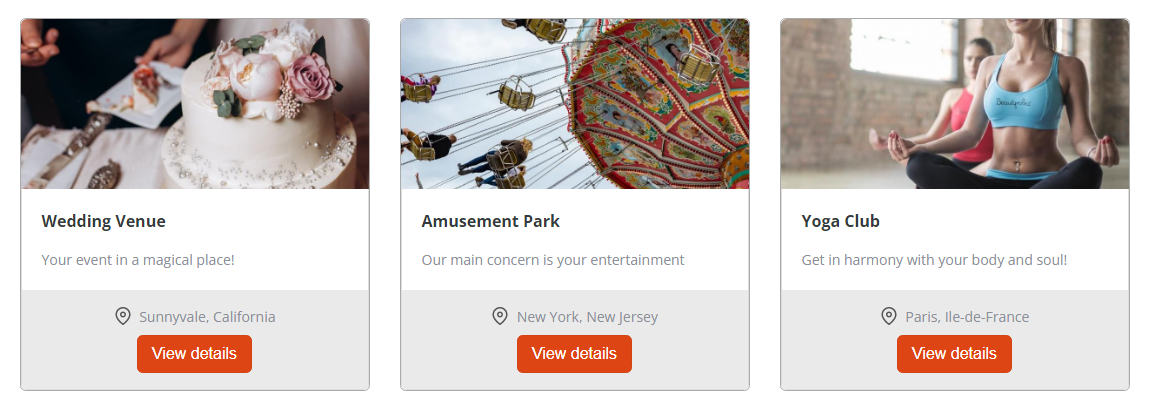
J-BusinessDirectory - Business Listings
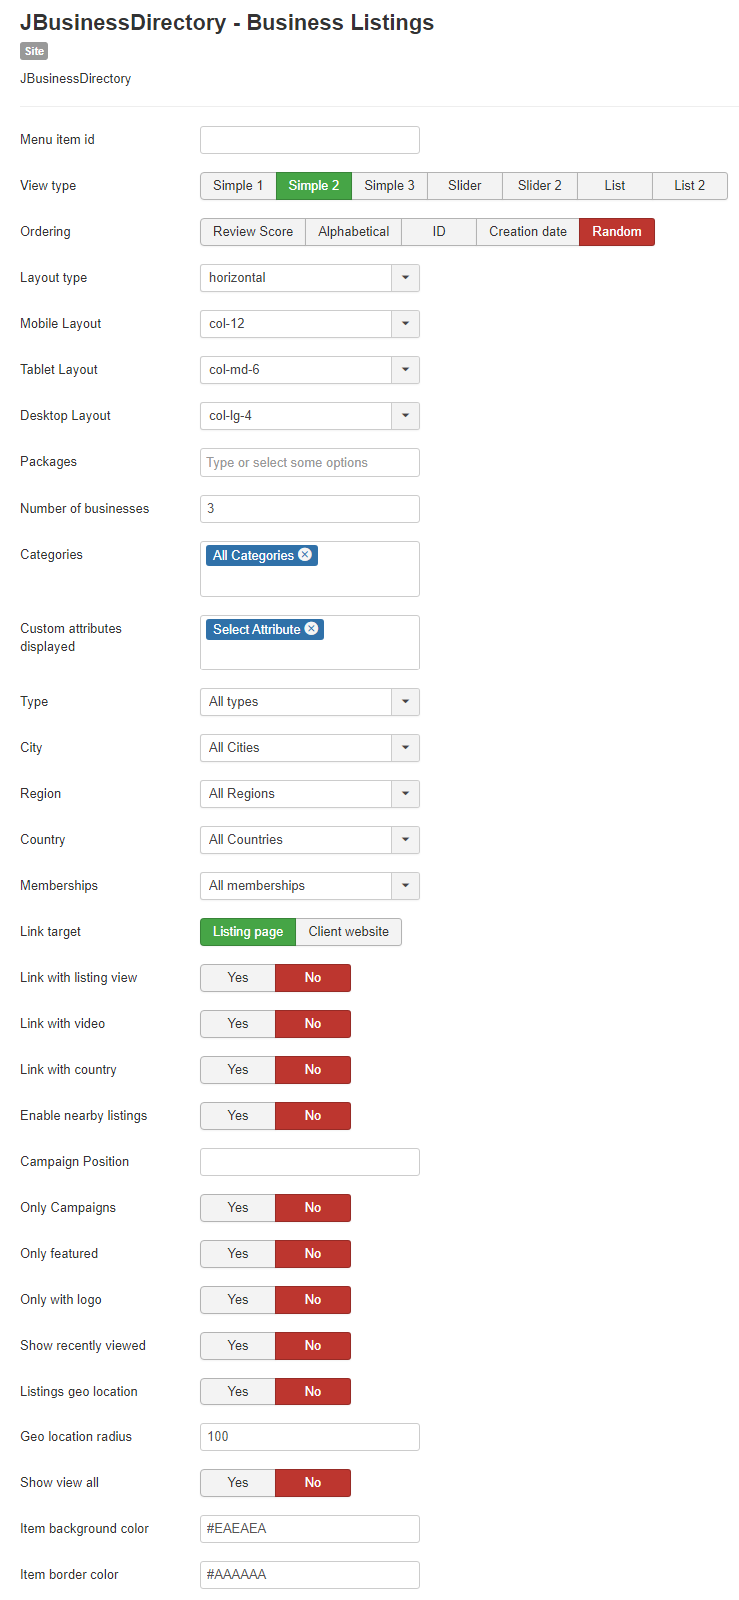
Shows the latest business listings added based on category, featured attributes.
Menu item id – the menu item that will be associated with the view all link
View type – the layout in which the listings will be displayed
Ordering – set the default ordering for the listings
Layout type – set the layout type. For list view type the layout will be always vertical.
Mobile Layout – layout for the mobile devices
Tablet Layout – layout for the tablet devices
Desktop Layout – layout for the desktops
Title characters - set the number of characters for the title
Packages - you can choose to display only the listings that belong to the set packages
Number of businesses – set the max number of events to display on the module
Categories – you can choose to display only the listings that belong to the set categories
Custom Attributes Displayed - you can choose to display only the listing that belong to the set custom attributes (only for style simple 2)
Type - you can choose to display only the listings that belong to the set type
City – you can choose to display only the listings that belong to the set city
Region - you can choose to display only the listings that belong to the set region
Country - you can choose to display only the listings that belong to the set country
Memberships – filter the displayed listings by the selected memberships
Link target – Associate the item link with the listing page or with the listing website
Link with listing view - Link with listing category, display related listings that have the same category.Used to display related items.
Link with video – display listings that are in the category with the same name as the video category
Link with country – display items from the country selection from the country module
Enable nearby listings – enable or disable nearby listings
Campaign Position – sets the campaign plans that are used for displaying the listings
Only Campaigns - show only campaign businesses
Only featured – choose the possibility to whether display or not only the featured listings
Only with logo – display or not only the businesses with logo
Show recently viewed - display only recently viewed listings. Other conditions are applied too.
Listings geo location – display businesses based on the listing location- this will do a refresh of the page and the coordinates will be added on the current URL
Geo location radius – show listings based on the radius set
Show view all – set whether to display or not the “View all” button, which will redirect the user to set categories above
Item background color - set the background color of latest listings
Item border color - set the border color of the latest listings
J-BusinessDirectory Listing Search plugin
After installation you can access the plugins section of Joomla administration and filter by search plugins. You should be able to see the J-BusinessDirectory Listing Search plugin and you can click on it to access the settings.
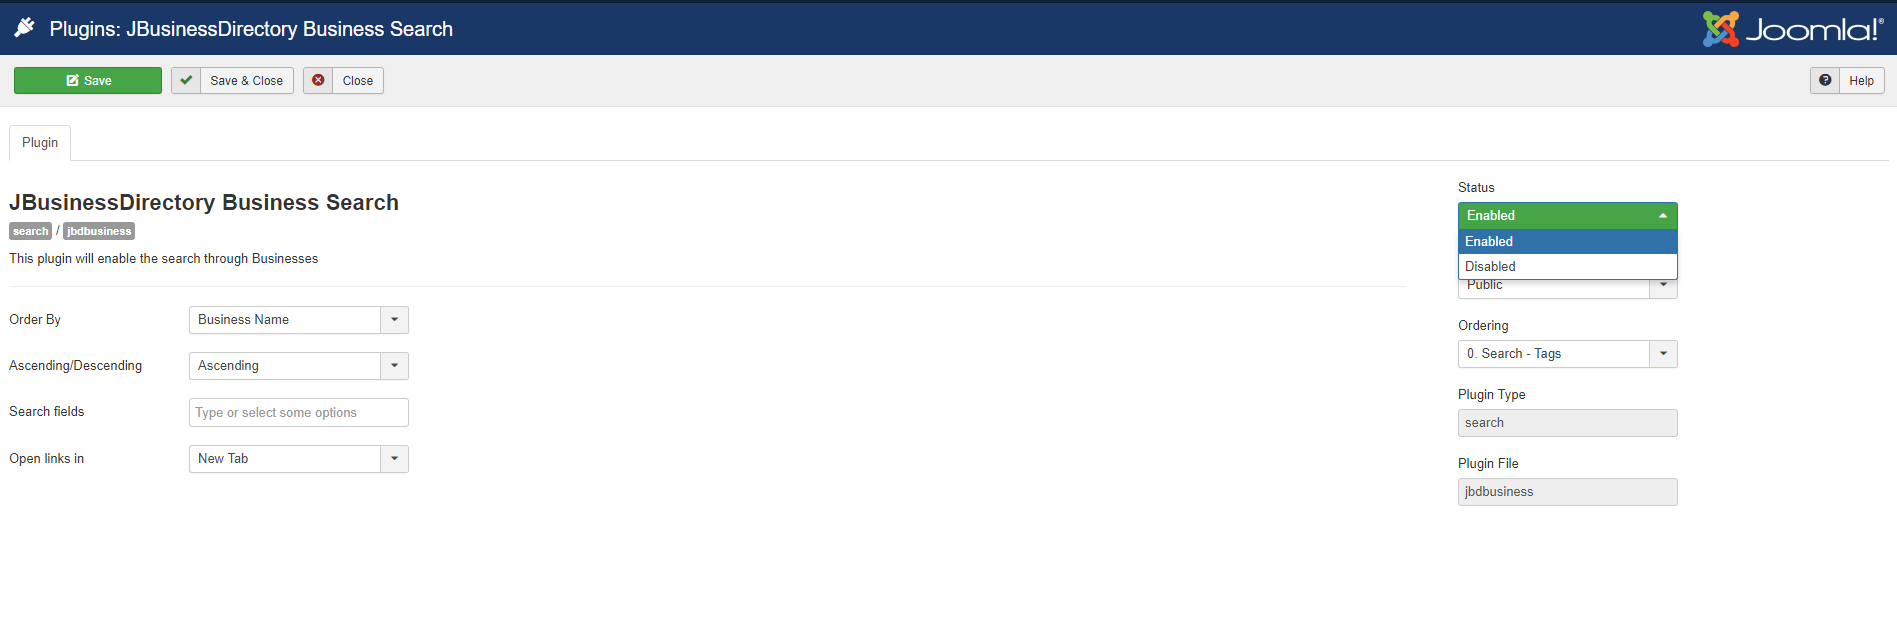
On the settings page you can choose to enable the plugin.
Order by – the listings are ordered by the business name
Ascending/Descending – the listings can be ordered in an ascending or descending order
Search fields – the user can set where s/he wants to search the submitted data (business listing or category)
Open links in – the links can be open in the same tab or in a new one
J-BusinessDirectory Business Finder plugin
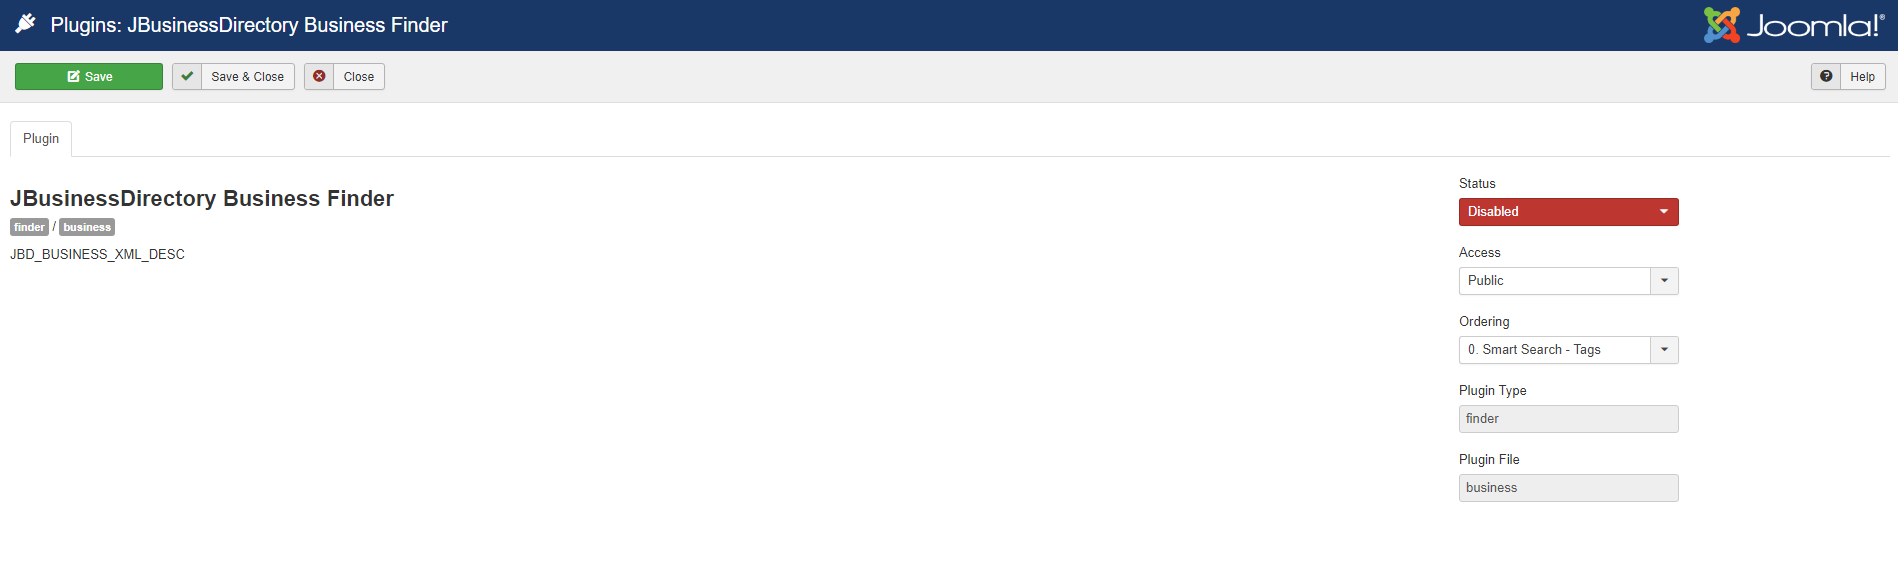
After installation you access the plugins section of Joomla administration and filter by content plugins. You should be able to see the J-BusinessDirectory Business Finder plugin and you can click on it to access the settings.
On the settings page you can choose to enable the plugin.
Functionality
Joomla Smart Search Extension
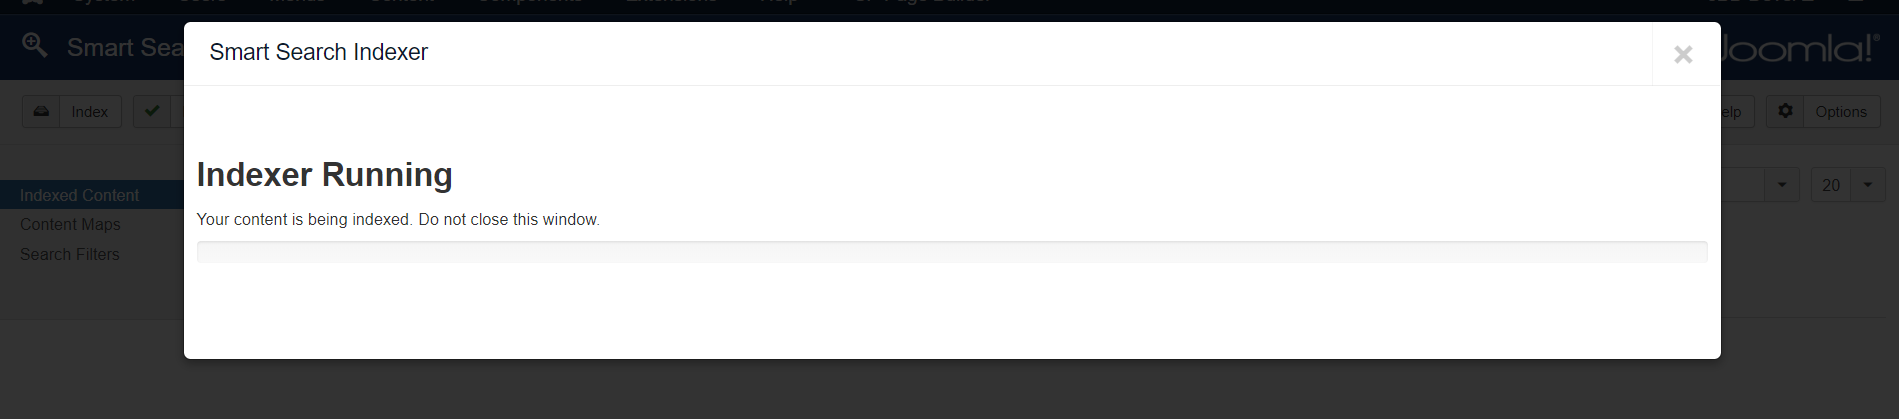
After installing and enabling the plugin, you will have to access the Smart Search extension and press the index button, in order for the directory listings to be indexed.
When the indexing of the listings is finished, a new option will be shown on the search tools type of content, the business type. So, after selecting the business type from the search filter, all the existing directory listings will be shown.
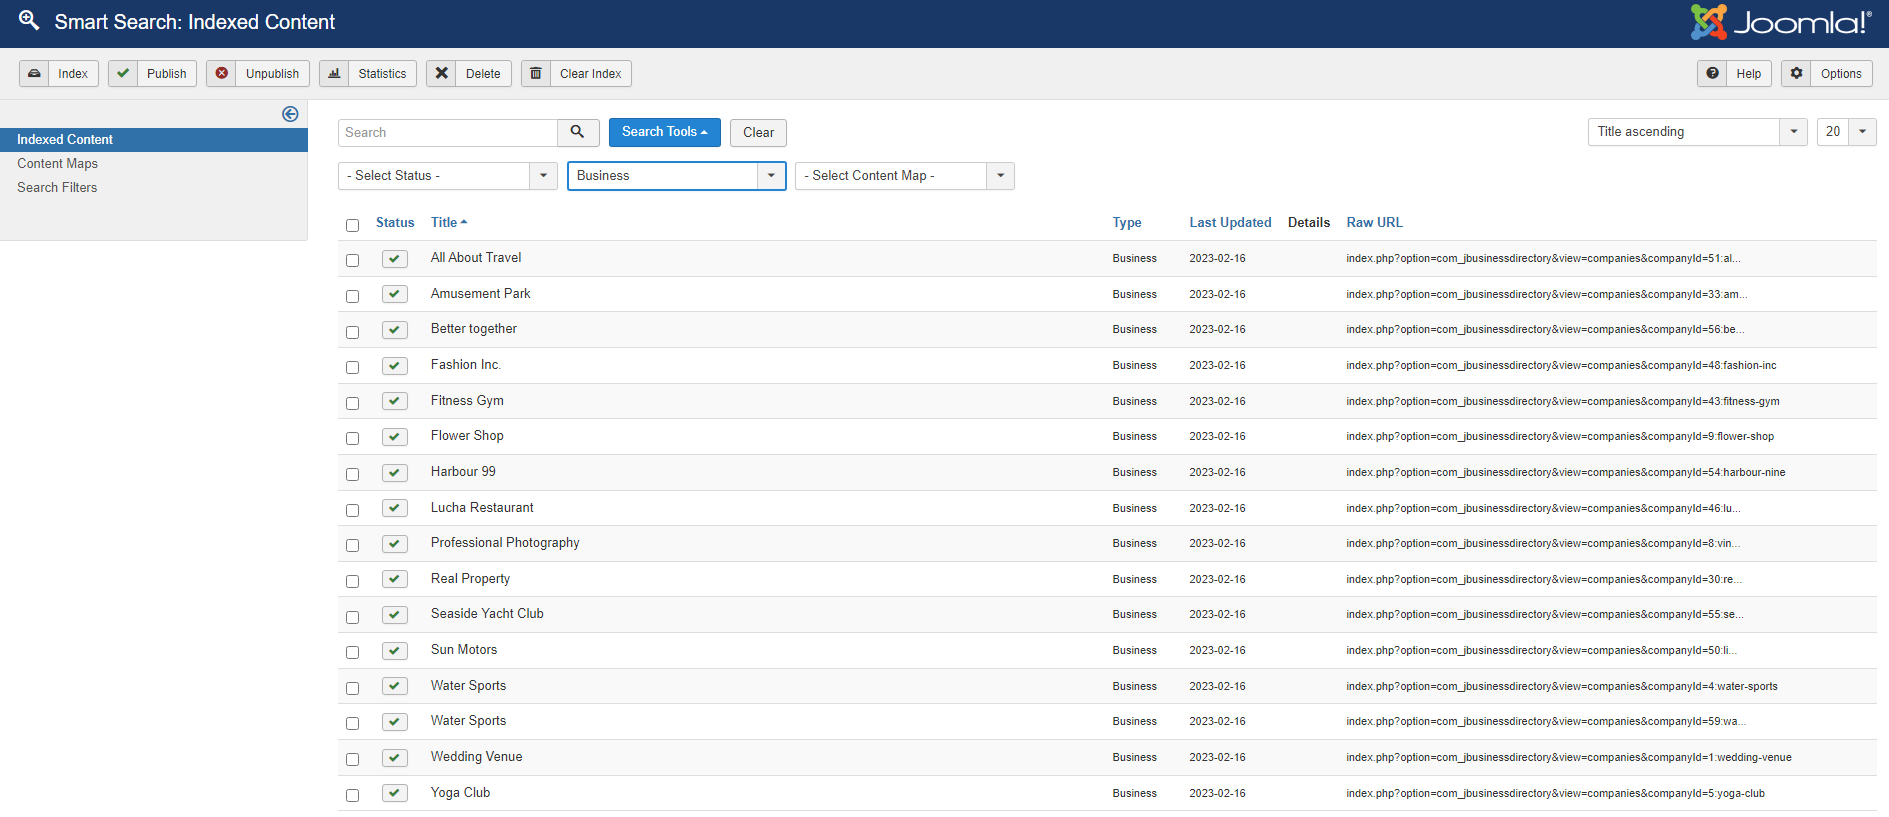
Only in this way, the listings can be accessed by the smart search.
The site administrator can create a new menu item available for the smart search and assign it to his/her own convenience and search the listings.
J-BusinessDirectory Offer Search module

Title – the title of module that will be displayed in front-end
Description – text that will be displayed on front-end
Menu item id – set the menu item id that is associated with the search. The menu item will be selected when the search is done.
Layout type – the orientation of search fields. It can be horizontal or vertical.
Background color - define the background color of the offer search module
Max Offers – max number of map markers, when there are no search results.
Min number of letters – minimum number of letters required for the search
Custom attributes - dropdown of custom attributes that will be shown on front-end
Search filter distance – set the default distance in case of a zip code search
Show map – show a map with result business listing above the search fields
Show only map – show only map on search module
Map height – set the height of the map
Map width – set the width of the map
Show keyword - show the keyword input
Mandatory keyword – set the keyword mandatory
Enable keyword suggestion – enables suggestions (categories or offer names) while searching on keyword
Show categories – show categories dropdown
Mandatory categories – set categories mandatory
Available categories – the admin can decide which categories to display in the search module
Show subcategories – show subcategories dropdown
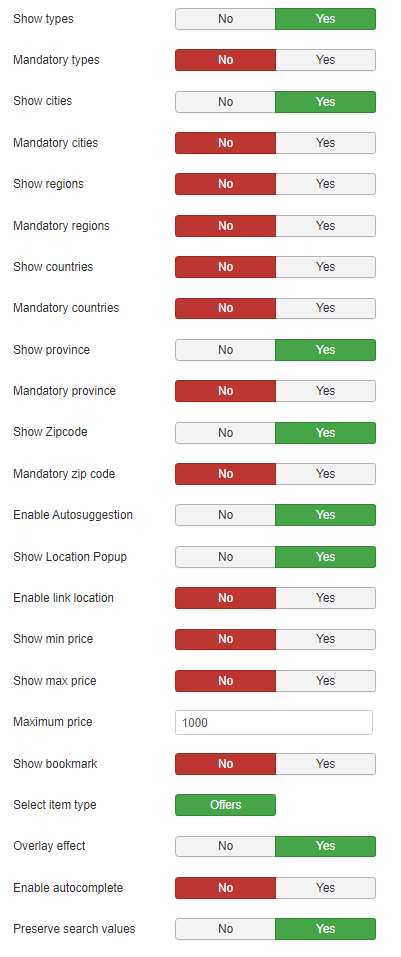
Show types – show offer type
Mandatory types – set the offer types to mandatory
Show cities – show cities
Mandatory cities – set cities mandatory
Show regions – show regions
Mandatory regions – set regions mandatory
Show countries – show countries
Mandatory countries – set countries mandatory
Show province – show province
Mandatory province – set province mandatory
Show Zipcode – show zip code
Mandatory zipcode – set the zipcode field to mandatory
Enable Autosuggestion – enables the location autosuggestion
Show location popup – show/hide the location popup that is shown when clicking on the zip code field
Enable link location – enable link location functionality between countries, regions and cities.
Show min price – show the min price field
Show max price – show the max price field
Maximum price – max number of map markers, when there are no search results.
Show bookmark - show bookmarks
Select item type – filter the offers based on type selected
Overlay effect - add an overlay offect when the search input field receives the focus
Enable autocomplete – enable autocomplete functionality on select boxes
Preserve search values – enable/disable preserving values between searches
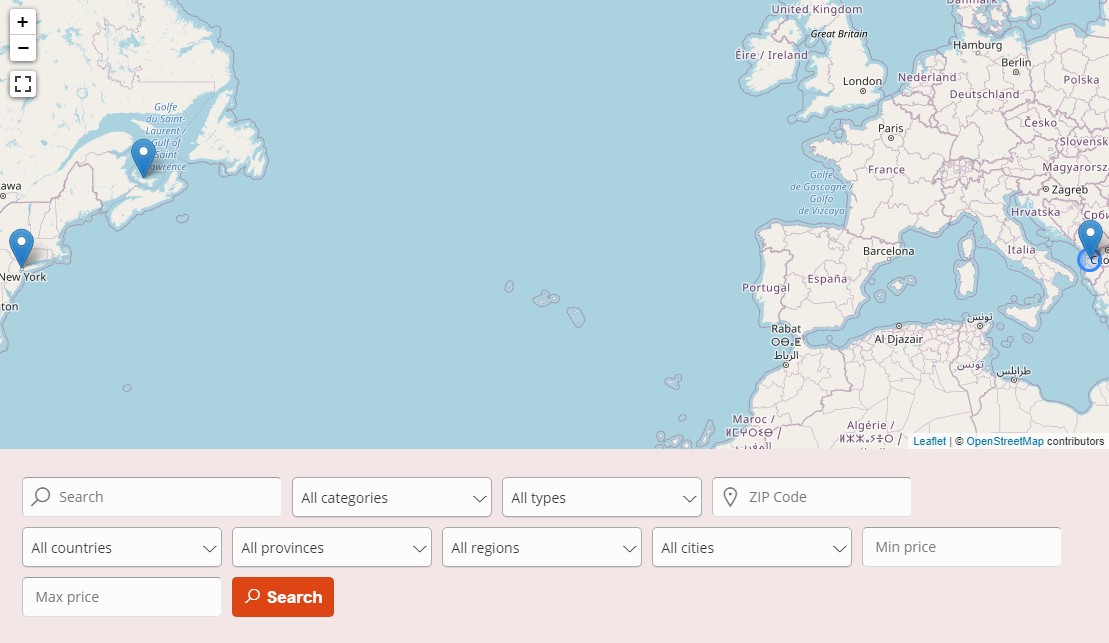
If the search module is set in the new position dir–search-offers-top, it will display on the left side of the site, on top of the search filter.
J-BusinessOffer module
The JBusinessOffer module displays the offers of the day in a cyclic manner. Offers of the day can be set via the backend in the Manage Offers section. A click on the offer will redirect visitor to the offer description.
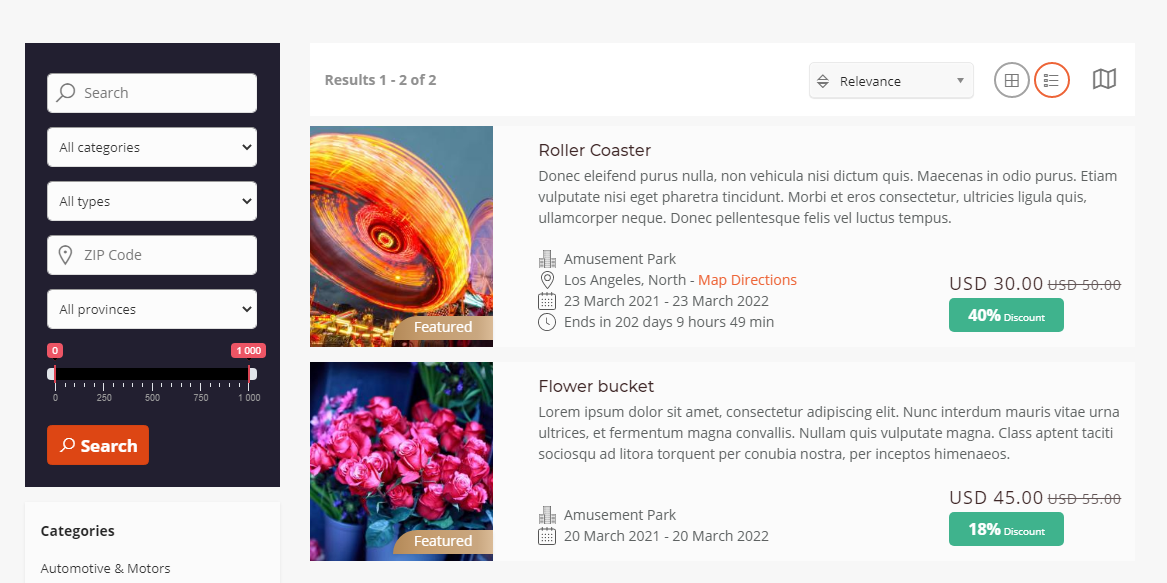
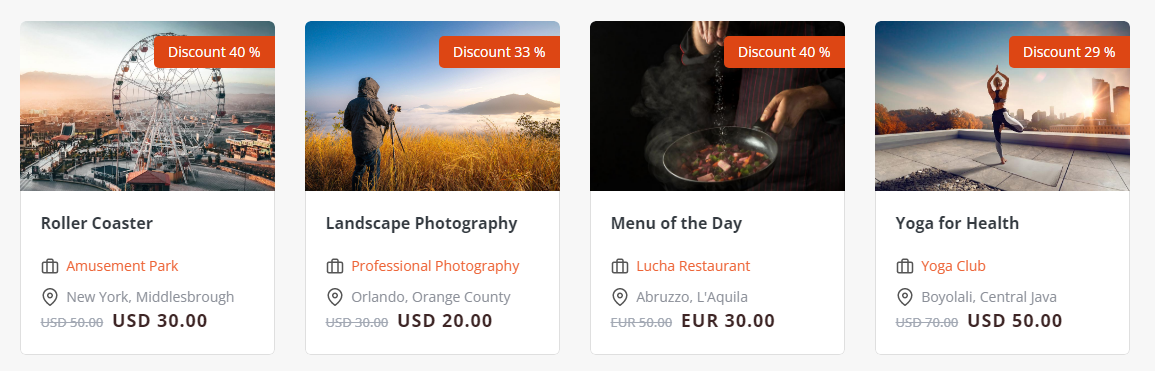
J-BusinessDirectory – Offers
The module displays the latest offers published.
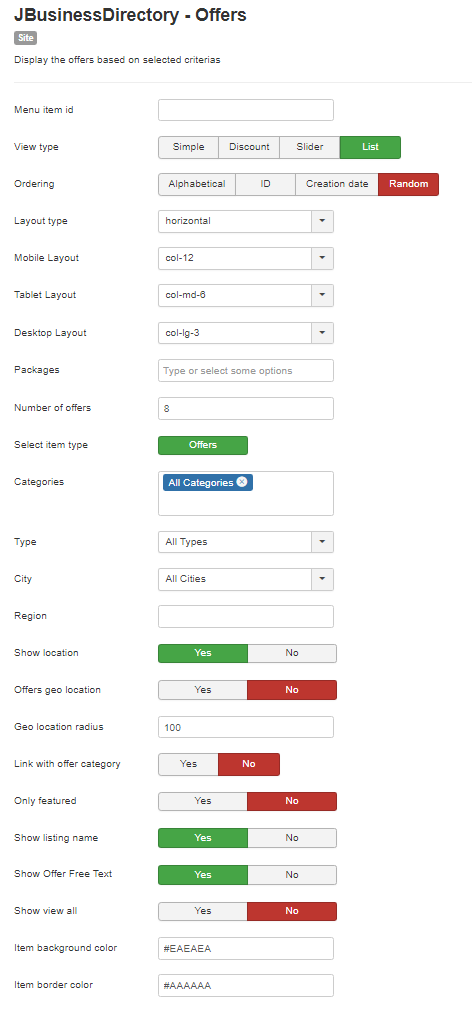
Menu item id – the menu item that will be associated with the view all link
View type – the view on which the offers will be displayed
Ordering – set the default ordering for the offers
Layout type – set the layout type. For list view type the layout will be always vertical.
Mobile Layout – layout for the mobile devices
Tablet Layout – layout for the tablet devices
Desktop Layout – layout for the desktops
Packages - you can choose to display only the offers that belong to the set packages
Number of offers – set the max number of offers to display on the module
Select item type –filter the offers based on the type selected
Categories – you can choose to display only the offers that belong to the set categories
Type – filter the offers based on type
City – you can choose to display only the offers that belong to the set city
Region - you can choose to display only the offers that belong to the set region
Show location – show offer location
Offers geo location – display offers based on the offer location – this will do a refresh of the page and the coordinates will be added on the current URL
Geo location radius – show offers based on the radius set
Link with offer category – show related offers , display the offers that are relevant to the current offer category
Only featured – choose the possibility to whether display or not only the featured offers
Show listing name – show the name of the listing associated with the offer
Show offer free text – show/hide the free offer text
Show view all – set whether to display or not the “View all” button, which will redirect the user to set categories above
Item background color – set the background color of the latest offer
Item border color - set the border color of the latest offer
J-BusinessDirectory Offer Search plugin
After installation you can access the plugins section of Joomla administration and filter by search plugins. You should be able to see the J-BusinessDirectory Offer Search plugin and you can click on it to access the settings.
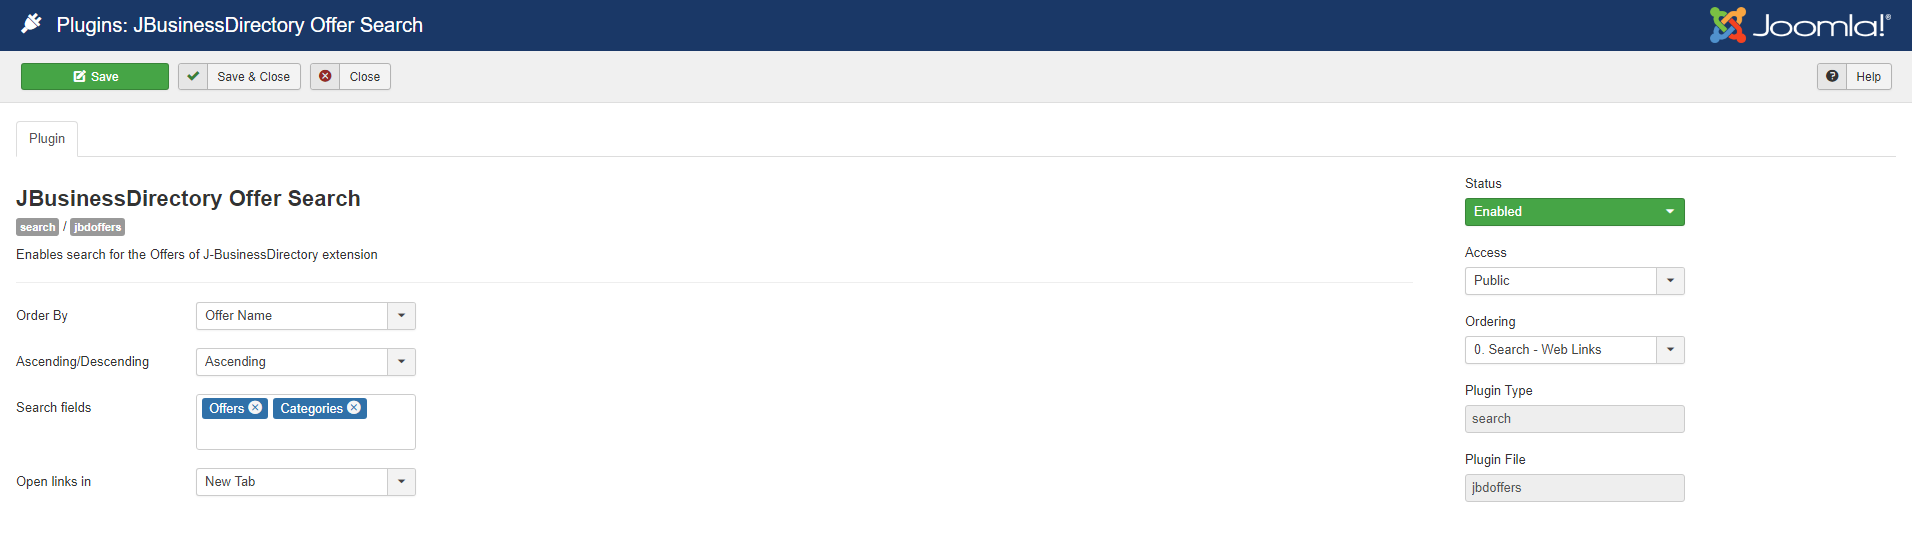
On the settings page you can choose to enable the plugin.
Order by – the offers are ordered by the offers’ name, offers’ start date and offers’ end date
Ascending/Descending – the offers can be ordered in an ascending or descending order
Search fields – the user can set where s/he wants to search the submitted data (offers or category)
Open links in – the links can be open in the same tab or in a new one
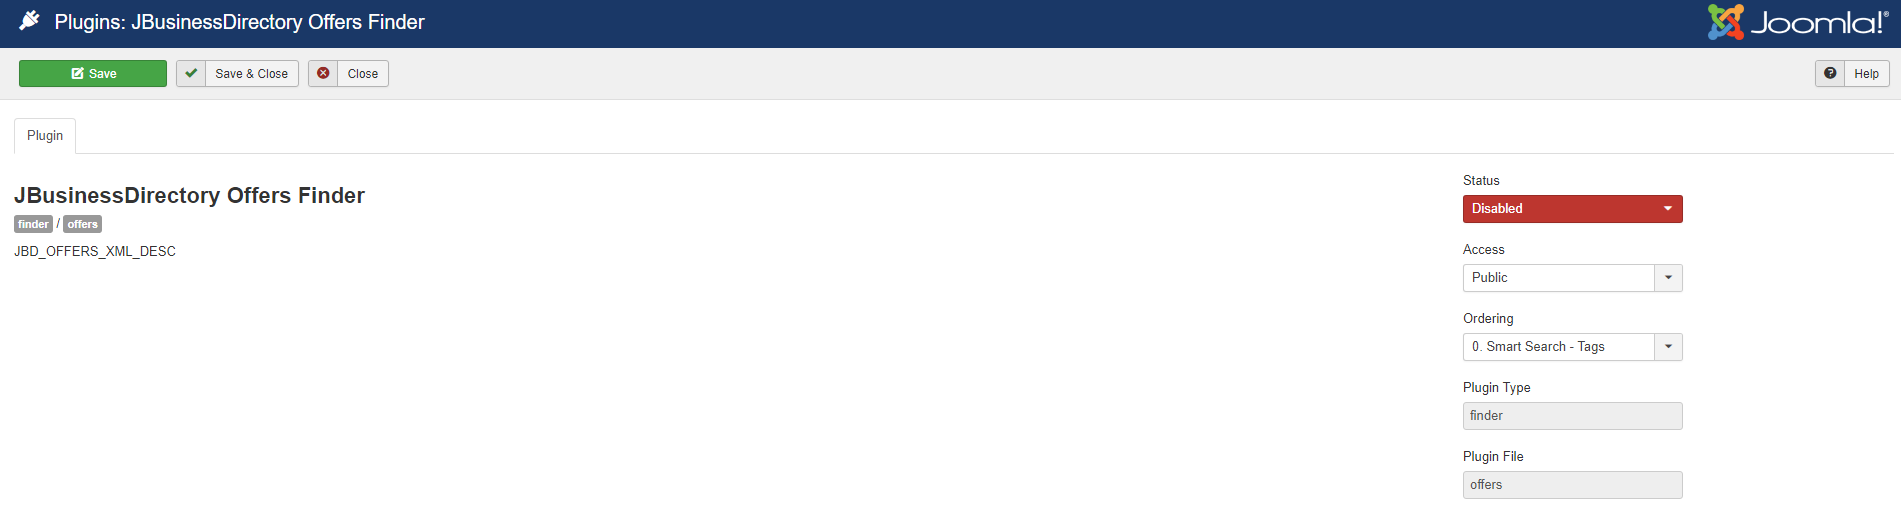
J-BusinessDirectory Offer Finder plugin
After installation you can access the plugins section of Joomla administration and filter by content plugins. You should be able to see the J-BusinessDirectory Offer Finder plugin and you can click on it to access the settings.
On the settings page you can choose to enable the plugin.
Functionality
Joomla Smart Search Extension
After installing and enabling the plugin, you will have to access the Smart Search extension and press the index button, in order for the directory listings to be indexed.
When the indexing of the offers is finished, a new option will be shown on the search tools type of content, the offer type. So, after selecting the offer type from the search filter, all the existing directory offers will be shown.

Only in this way, the offers can be accessed by the smart search.
The site administrator can create a new menu item available for the smart search and assign it to his/her own convenience and search the offers.
J-BusinessDirectory Event Search module

Title – the title of module that will be displayed in front-end
Description – text that will be displayed on front-end
Menu item id – set the menu item id that is associated with the search. The menu item id will be shown when the search is done.
Layout type – the orientation of search fields. It can be horizontal or vertical.
Background color - define the background color of the event search module
Max events – determine the max number of map markers, when there are no search results
Min number of letters – minimum number of letters required for the search
Custom Attributes - dropdown of custom attributes that will be shown on front-end
Search filter distance – set the default distance in case of a zip code search
Maximum radius - the maximum radius that will appear on slider
Show map – show a map with result business listing above the search fields
Show only map – show only map on search module
Map height – set the height of the map
Map width – set the width of the map
Show keyword - show the keyword input
Mandatory keyword – set the keyword mandatory
Enable keyword suggestion – enables suggestions (categories or event names) while searching on keyword
Show categories – show categories dropdown
Mandatory categories – set categories mandatory
Available categories – the admin can decide which categories to display in the search module
Show subcategories – show subcategories dropdown
Show types – show the events’ type
Mandatory types - set the events type mandatory
Show date range – show the events date range
Mandatory date range – set events date range mandatory
Show age – show the events age limit
Mandatory age – set events age limit mandatory
Show time – show the events time
Mandatory time – set events time mandatory
Show cities – show cities
Mandatory cities – set cities mandatory
Show regions – show regions
Mandatory regions – set regions mandatory
Show countries – show countries
Mandatory countries – set countries mandatory
Show province – show province
Mandatory province – set province mandatory
Show Zipcode – show zip code
Mandatory zipcode – set the zipcode field to mandatory
Enable Autosuggestion – enables the location autosuggestion
Show location popup - show/hide the location popup that is shown when clicking on the zip code field
Enable link location – enable link location functionality between countries, regions and cities.
Overlay effect - add an overlay offect when the search input field receives the focus
Enable autocomplete – enable autocomplete functionality on select boxes
Preserve search values – enable/disable preserving values between searches
If the search module is set in the new position dir–search-events-top, it will display on the left side of the site, on top of the search filter.
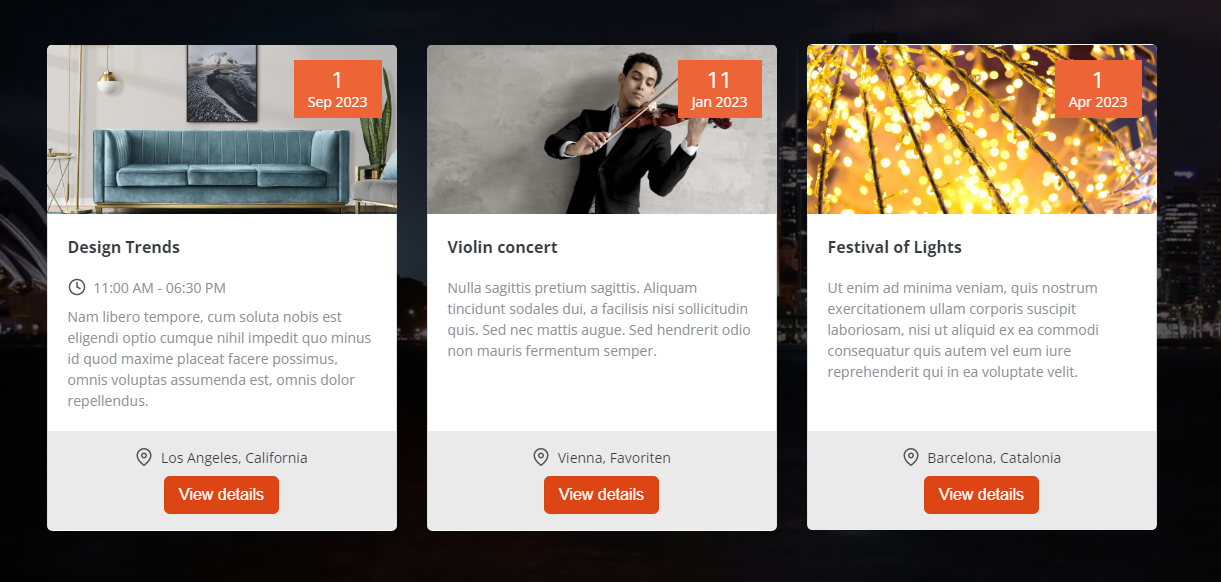
J-BusinessDirectory – Events
The module displays the latest events published.

Menu item id – the menu item that will be associated with the view all link
View type – the view on which the events will be displayed
Ordering – set the default ordering for the events
Layout type – set the layout type. For list view type the layout will be always vertical.
Mobile Layout – layout for the mobile devices
Tablet Layout – layout for the tablet devices
Desktop Layout – layout for the desktops
Packages - you can choose to display only the events that belong to the set packages
Number of events – set the max number of events to display on the module
Categories – you can choose to display only the events that belong to the set categories
Type – filter the events based on type
City – you can choose to display only the events that belong to the set city
Region - you can choose to display only the events that belong to the set region
Show location – show event location
Events geo location – display events based on events location – this will do a refresh of the page and the coordinates will be added on the current URL
Geo location radius – show events based on the radius set
Link with event view - Link with event category. Display related events that have the same category. Used to display related items.
Only featured – choose the possibility to whether display or not only the featured events
Show listing name – show the name of the listing associated with the event
Show view all – set whether to display or not the “View all” button, which will redirect the user to set categories above
Item background color – set the background color of the latest event
Item border color - set the border color of the latest event
J-BusinessDirectory Event Search plugin
After installation you can access the plugins section of Joomla administration and filter by search plugins. You should be able to see the J-BusinessDirectory Event Search plugin and you can click on it to access the settings.
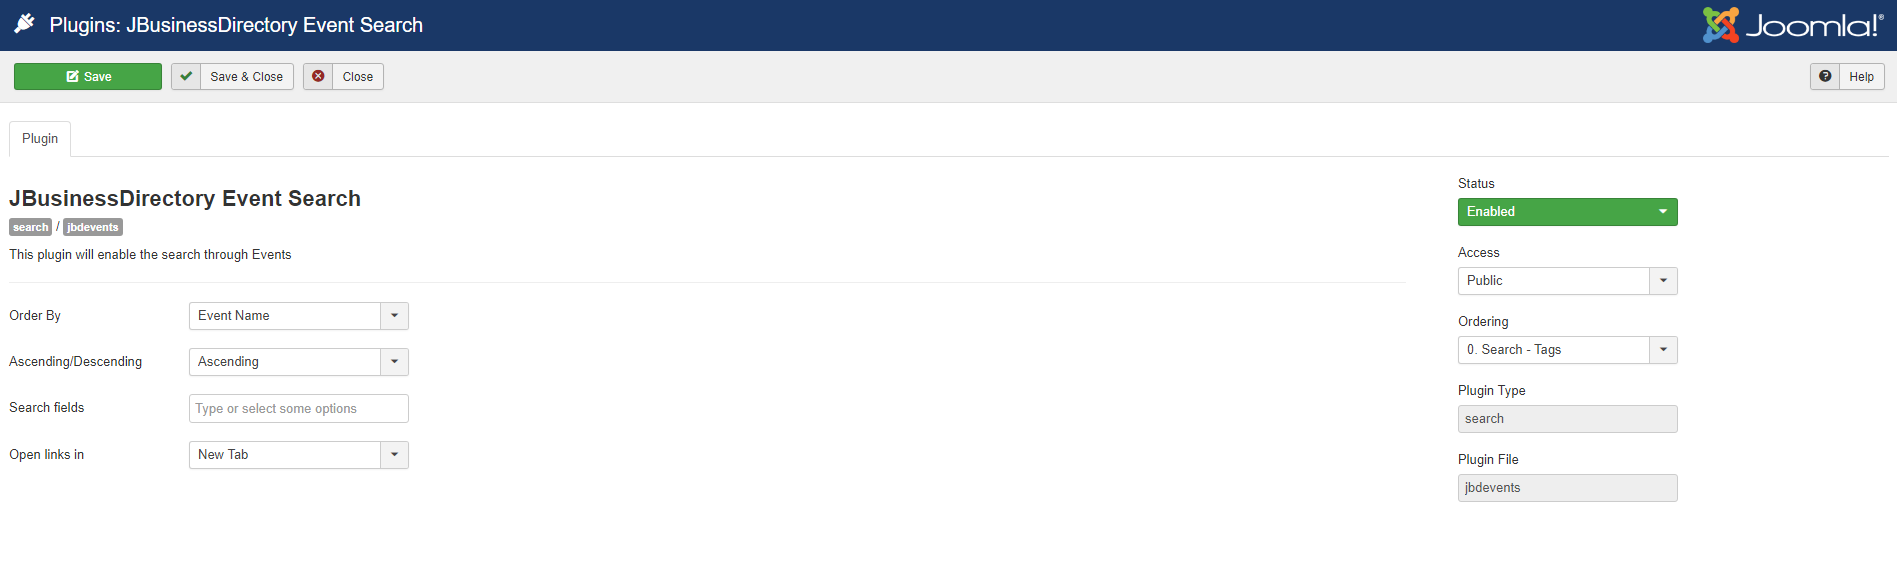
On the settings page you can choose to enable the plugin.
Order by – the events are ordered by the events’ name, events’ start date and the events’ end date
Ascending/Descending – the events can be ordered in an ascending or descending order
Search fields – the user can set where s/he wants to search the submitted data (events or category)
Open links in – the links can be open in the same tab or in a new one
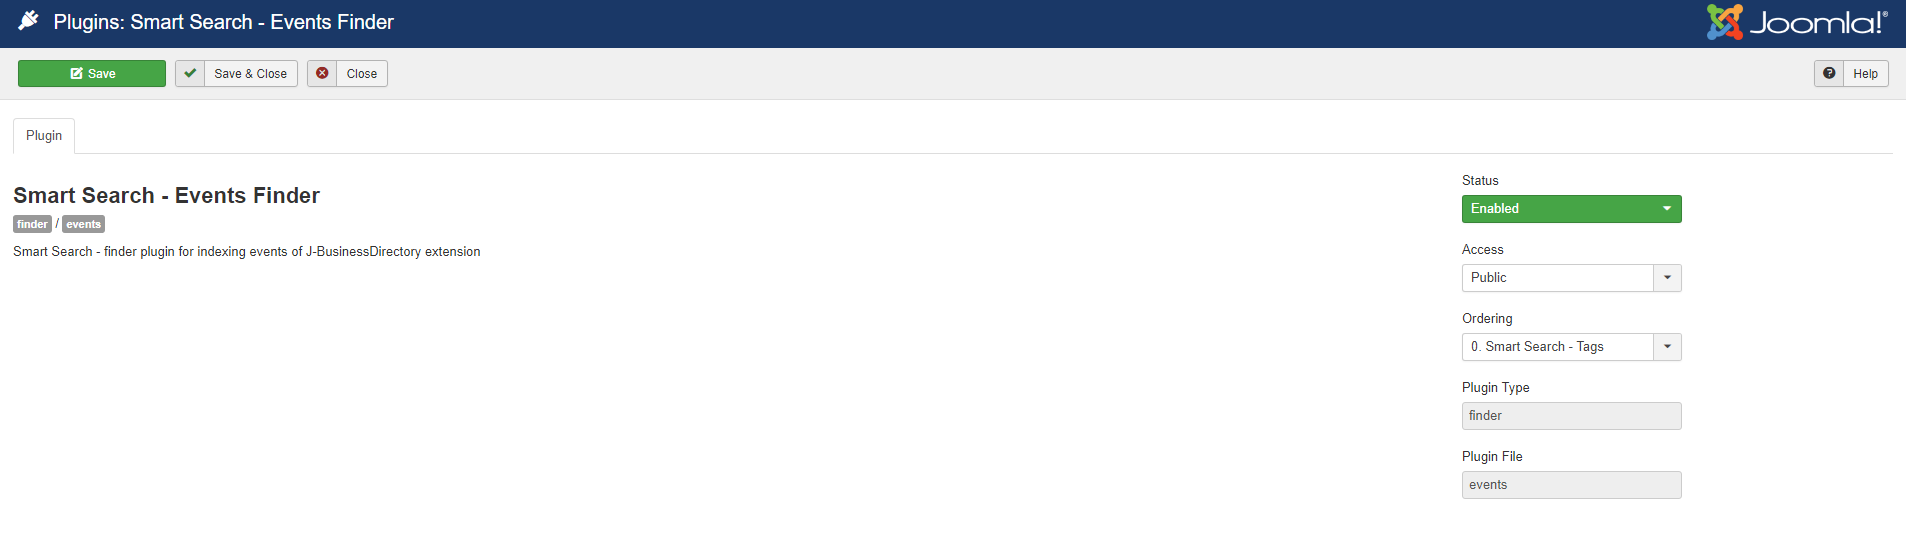
J-BusinessDirectory Event Finder plugin
After installation you can access the plugins section of Joomla administration and filter by content plugins. You should be able to see the J-BusinessDirectory Event Finder plugin and you can click on it to access the settings.
On the settings page you can choose to enable the plugin.
Functionality
Joomla Smart Search Extension
After installing and enabling the plugin, you will have to access the Smart Search extension and press the index button, in order for the directory listings to be indexed.
When the indexing of the events is finished, a new option will be shown on the search tools type of content, the events type. So, after selecting the events type from the search filter, all the existing directory events will be shown.
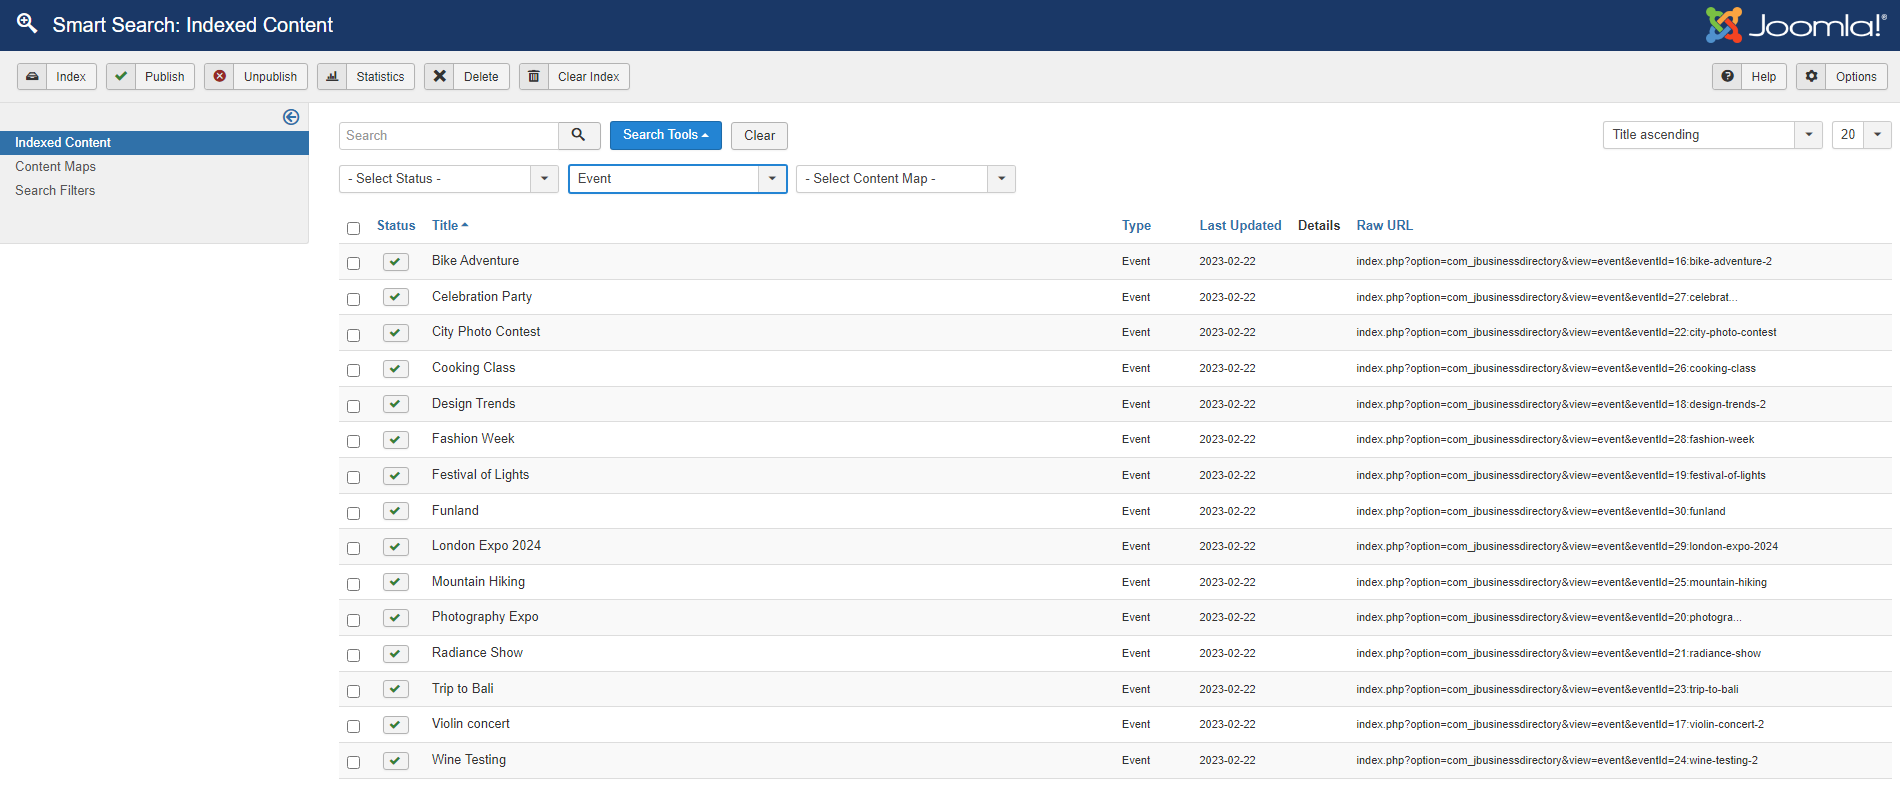
Only in this way, the events can be accessed by the smart search.
The site administrator can create a new menu item available for the smart search and assign it to his/her own convenience and search the listings.
J-BusinessDirectory Categories Module
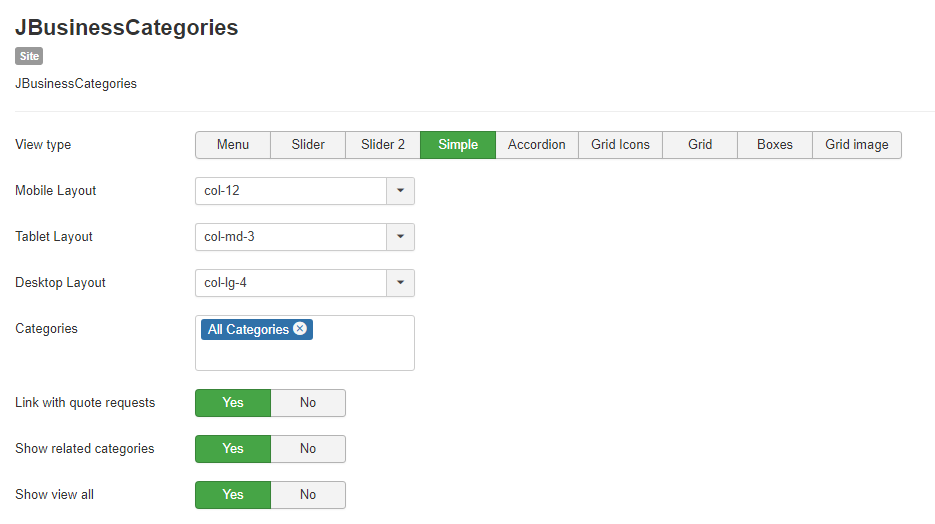
The JBusinessCategory displays a list with all the available categories and subcategories. Currently only two levels are displayed, the main categories and their subcategories. Subcategories are displayed on mouse over the main category. Clicking on a category will display all the businesses available for that specific category.
View type - the view on which the categories will be displayed. If the slider type is selected, also on slider view options, there is the possibility to choose the visible items, number of items to scroll, enable or disable autoplay and the speed of autoplay. (It is the same also for JBusinessCategoriesOffersModule and JBusinessCategoriesEventsModule).
Mobile Layout - layout for the mobile devices
Table Layout - layout for the tablet devices
Desktop Layout - layout for the desktops
Categories - you can set whether to display all the categories or only some of them
Link with quote requests - display the quote request dialog instead of the search results (will work only with JBD Quote Request app)
Show related categories - display the related categories to the searched category, it will be shown when performing a category search on the results page
Show view all - you can set whether you want the “View all” button to show or not in the end of the module

J-BusinessCategoriesOffers module
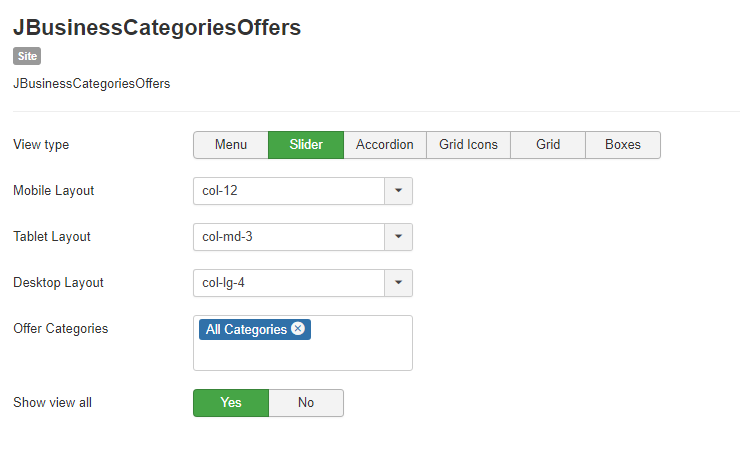
The module displays a list with all the available categories and subcategories. Currently only two levels are displayed, the main categories and their subcategories. Subcategories are displayed on mouse over the main category. Clicking on a category will displayed all the offers available for that specific category. It has the same edit view and functionalities as the JBusinessCategories module.
J-BusinessCategoriesEvents module
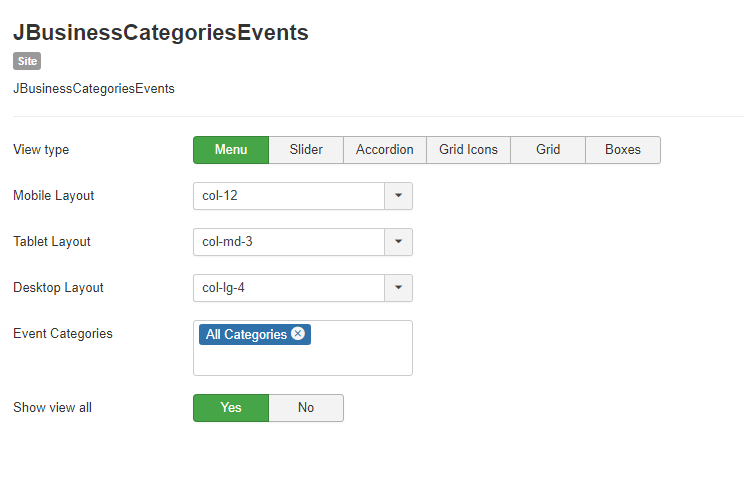
The module displays a list with all the available categories and subcategories. Currently only two levels are displayed, the main categories and their subcategories. Subcategories are displayed on mouse over the main category. Clicking on a category will displayed all the events available for that specific category. It has the same edit view and functionalities as the JBusinessCategories module.
J-CategoryBanners
The module that is designed to provide a link between Joomla Banners extension and J-BusinessDirectory extension. When a user is doing a search, the module will provide the possibility to show related banners based on search category. The module retrieves the search category from directory extension and based on that it retrieves all banners from a banner category that has the exact name with the directory category.
In order to setup the module, you will have to go to the admin area in Extensions/Modules section.
The J-CategoryBanners module has the following parameters that will be explained in the section below.
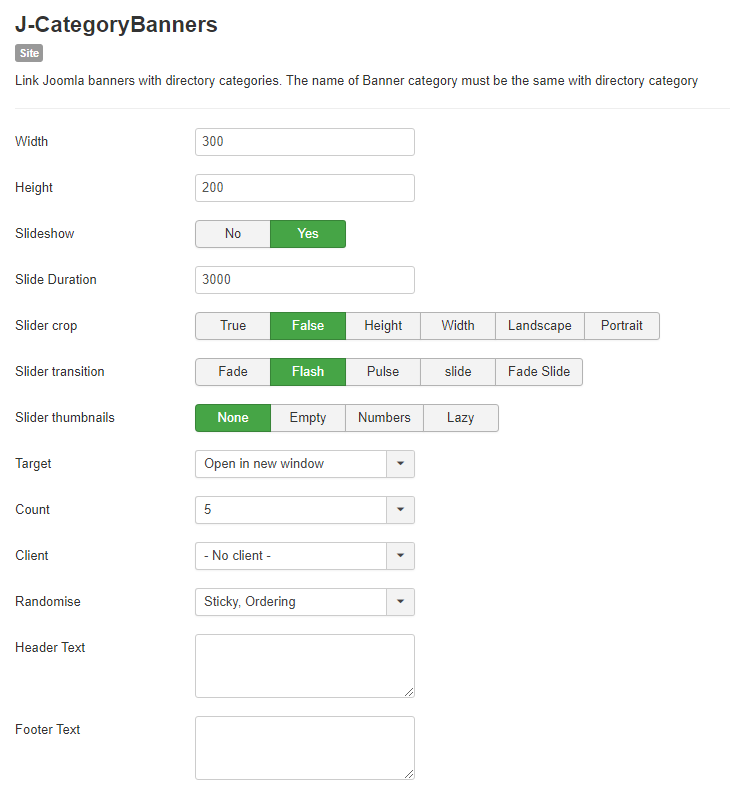
Width – set the width of banners or slideshow. If the slideshow is set to yes and width to 0 the slideshow will expand to the container limit (width will become 100%).
Height – set the height of banners or slideshow
Slideshow – set the possibility of showing the banners in a slideshow mode.
Slide duration – set the duration for each slide
Slider crop - defines how the image will be cropped inside its container:
True - means that all images will be scaled to fill the stage, centered and cropped.
False - will scale down so the entire image fits.
Height - will scale the image to fill the height of the stage.
Width - will scale the image to fill the width of the stage.
Landscape - will fill up images that have landscape proportions, but scale portrait images, to fit inside the container.
Portrait – it is like ‘landscape’ but the other way around.
Slider transition – define what transition to use
Fade - crossfade between images
Flash - fades into background color between images
Pulse - quickly removes the image into background color, then fades the next image
Slide - slides the images depending on image position
Fadeslide - fade between images and slide, slightly at the same time
Slider thumbnails - sets how and if thumbnails should be created
Empty - Galleria will create empty spans with the classNameimg instead of thumbnails.
Numbers - Galleria will create empty spans with numbers instead of thumbnails.
Lazy - Galleria will create empty images with the class ‘lazy’.
Target – defines the target of the link, it the link will be open on same tab or on a separate tab
Count – number of banners that will be loaded.
Client – set the client of banners that will be loaded
Randomise – set the order of banners
Header Text – text that will appear above the banners
Footer Text – text that will appear below the banners
Other than setting up the features, the admin of the site needs to create also banner categories that will have the exact same name as the directory category, so that they can be linked together. And so, when a user is doing a search, the module will provide the possibility to show related banners based on the searched category.
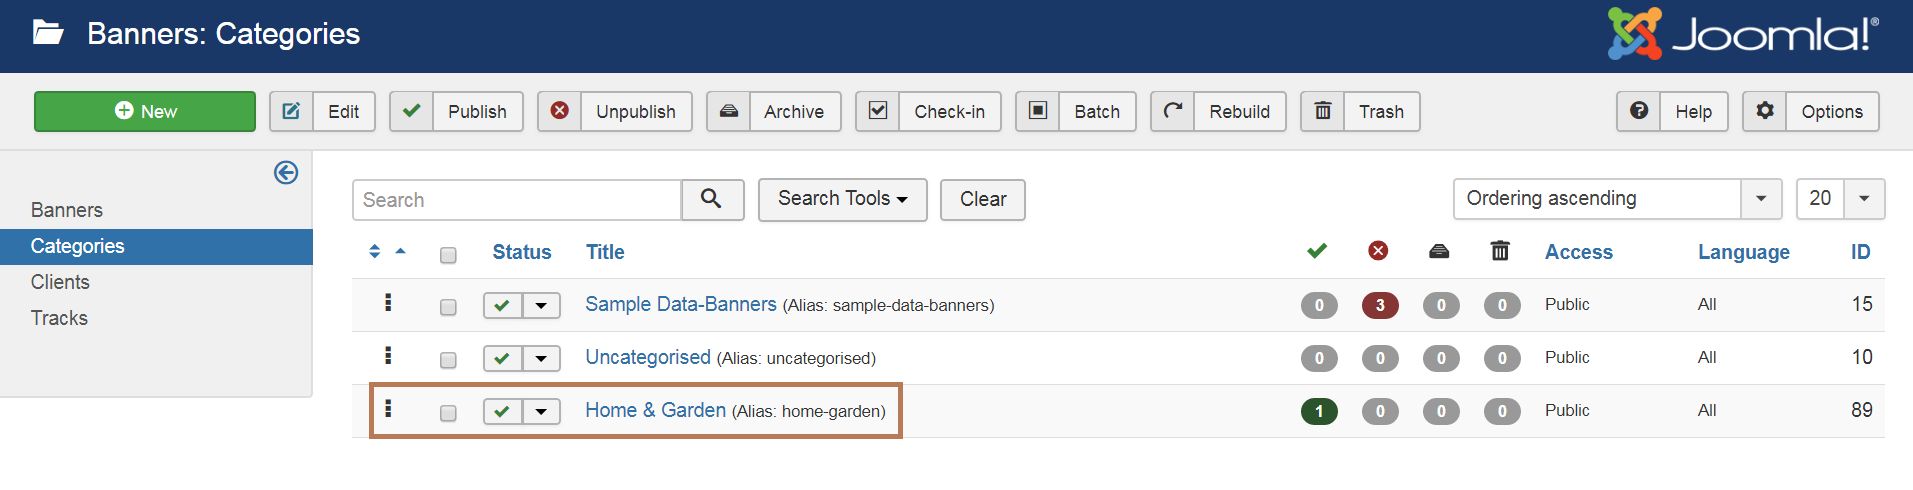
The category banners can be created in the admin area in Components/Banners/Categories.
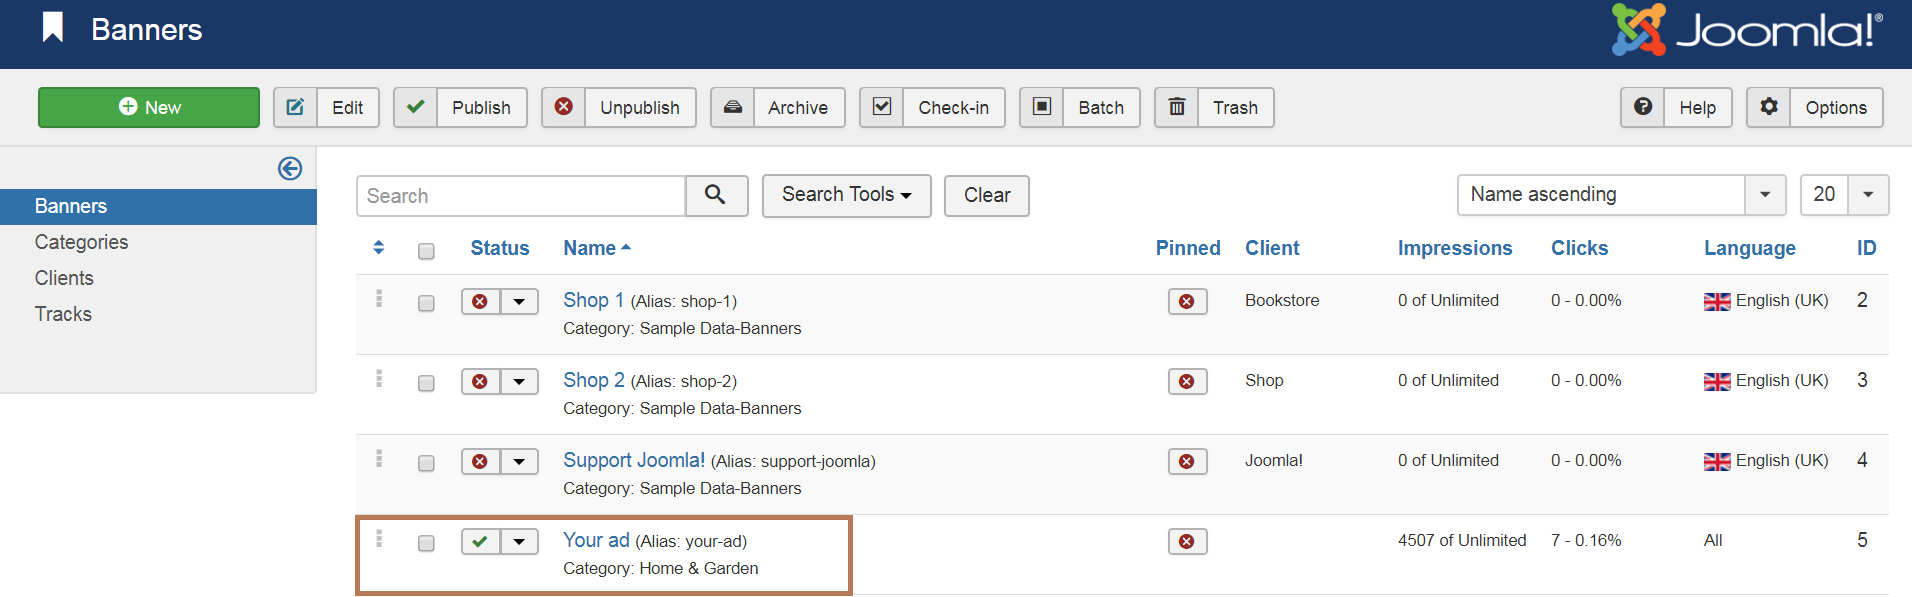
The new category banner can be created by selecting the “New” button in the left upper corner, and the category banner has to have the exact same name as the directory category. For the category banner to display, it is needed to add also a banner that will be related to the created category. Banners can be added in the admin area Components/Banners/Banners.
The new banner can be created by selecting the “New” button in the left upper corner. As it is also displayed in the above picture, the new banner is related to the category banner.
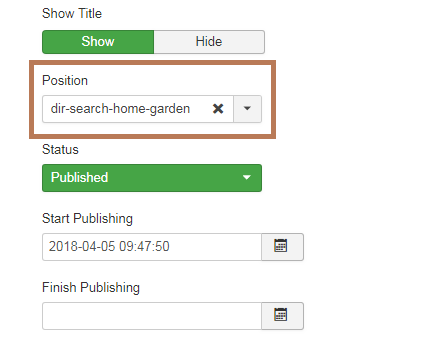
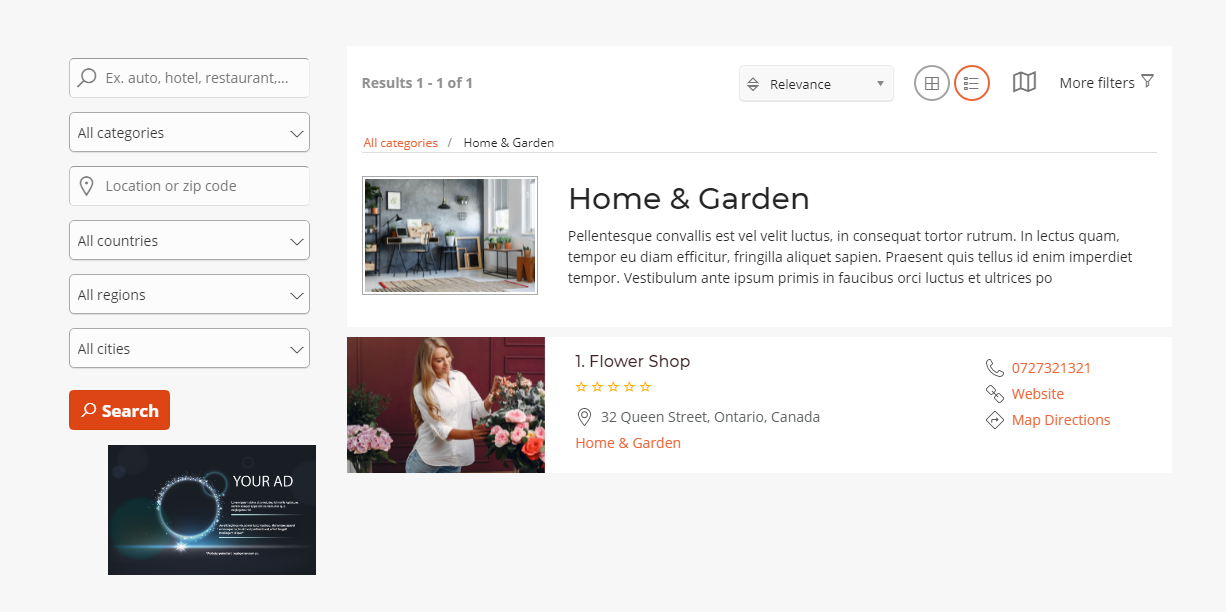
In the j-CategoryBanner module itself, the admin has to set the module position as: dir-search-category_alias, so that when the user will search for that category in front-end, the banner will display.
As displayed in the picture, the position set is dir-search-home-garden, with “home-garden” being the alias of the category banner, which is auto – generated from the title, if not set manually by the admin.
If the user will search for the category that has the same name as the category banner, the banner will display at the bottom of the search filter, like displayed in the below picture.
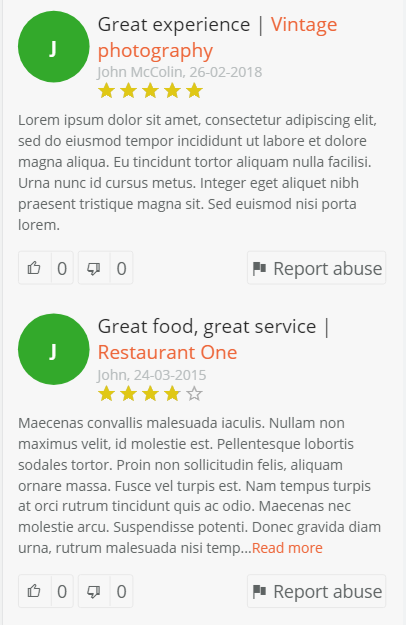
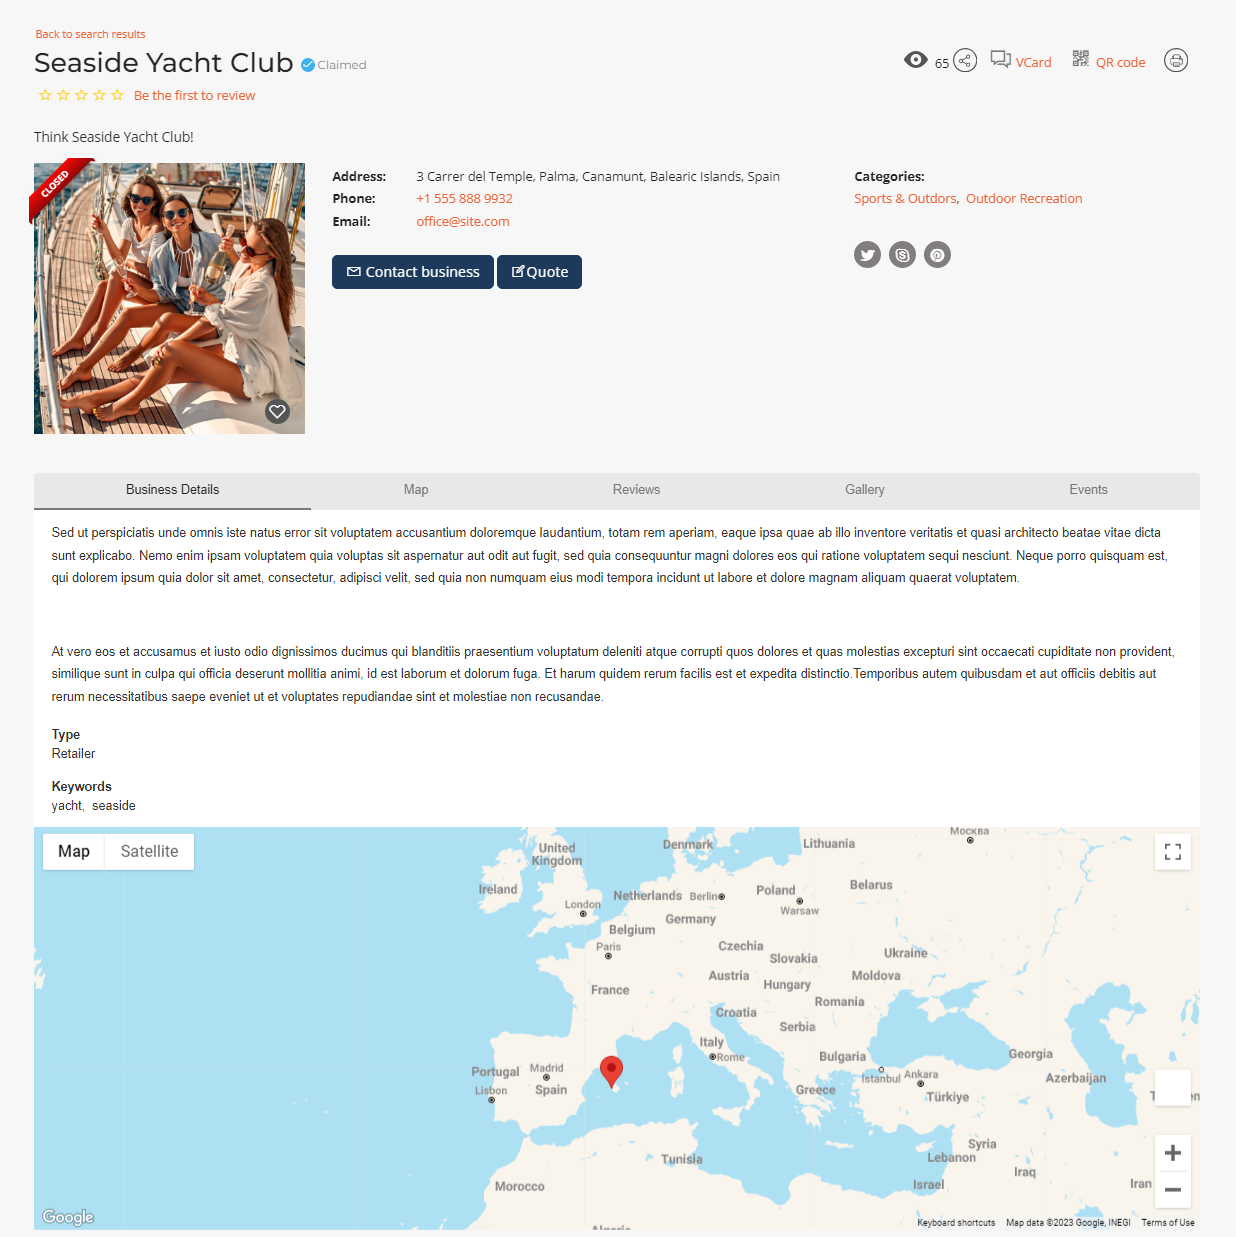
J-BusinessDirectory – Reviews
This module displays all the saved reviews for business listings.
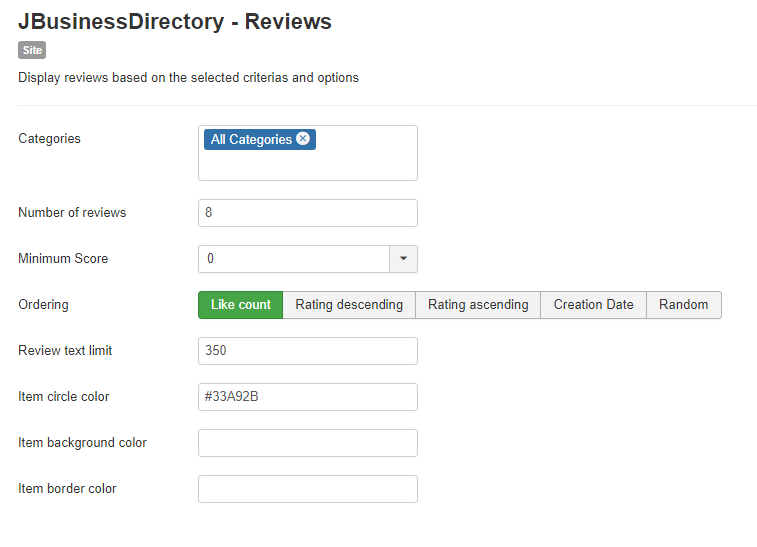
Categories – display only the reviews for those listings that belong to the categories set
Number of reviews – the number of reviews to be displayed on the module
Minimum score – the minimum score of the reviews to be displayed
Ordering – set the ordering on which the reviews will be displayed
Review text limit – set the max number of characters the review description can gave
Item circle color – the color of the review user circle
Item background color – the background color of the reviews module
Item border color - the border color of the reviews module
J-Query login module
This module creates a login as a popup. This was created for a better user experience.
J-BusinessDirectory - Progress
Track the progress of a user to add his own business listing.
J-BusinessDirectory - Icons
Shows a section with some quick links in Joomla’s Control Panel.
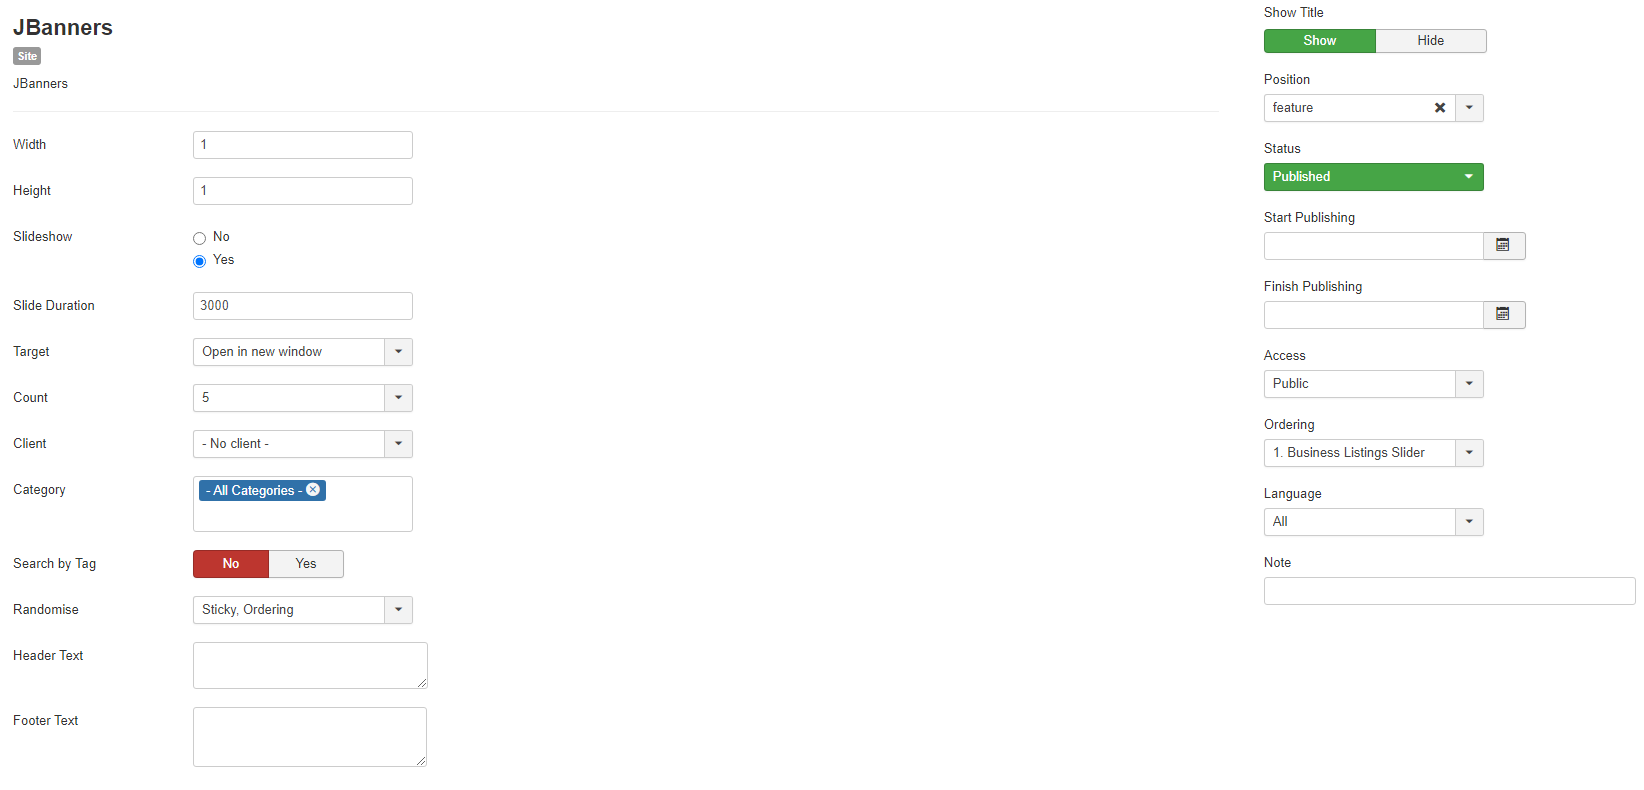
J-Banners
The module can be used in 2 ways.
as a slideshow (by setting slideshow to yes)
as a banner
J-BusinessDirectory URL Translator plugin
This plugin is used to enable the business listing name to be part of the URL Link. This was created for SEO purposes. For the directory to work you need to enable this plugin. Instructions on how to do this are available in the installation section.
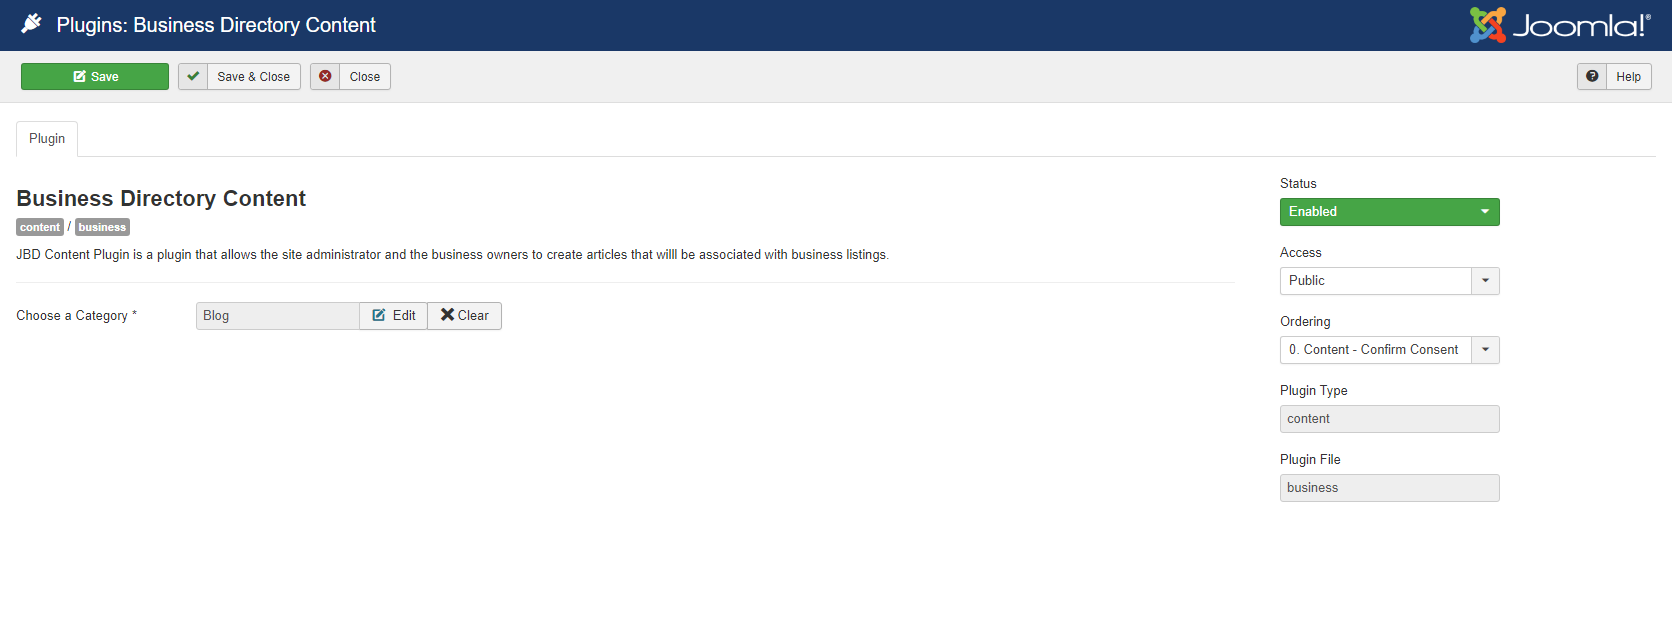
J-BusinessDirectory Content Plugin
J-BusinessDirectory Content Plugin is a plugin that allows the site administrator and the business owners to create articles that will be associated with business listings.
After the installation, you access the plugins section of Joomla administration and filter by content plugins. You should be able to see the J-BusinessDirectory Content plugin and you can click on it to access the settings.
On the settings page you can choose the Category that will be used for the article category. On the front-end the category field for the Joomla articles will be hidden and populated with the category that is selected on the plugin.
J-BusinessDirectory User Module
Enable J-BusinessDirectory User Module
After installing the module from the Directory Extensions section in the dashboard, you can access the modules section of Joomla administration and filter by user module. You should be able to see the J-BusinessDirectory User module and you can click on it to access the settings.
The site administrator can assign the module anywhere on the website.
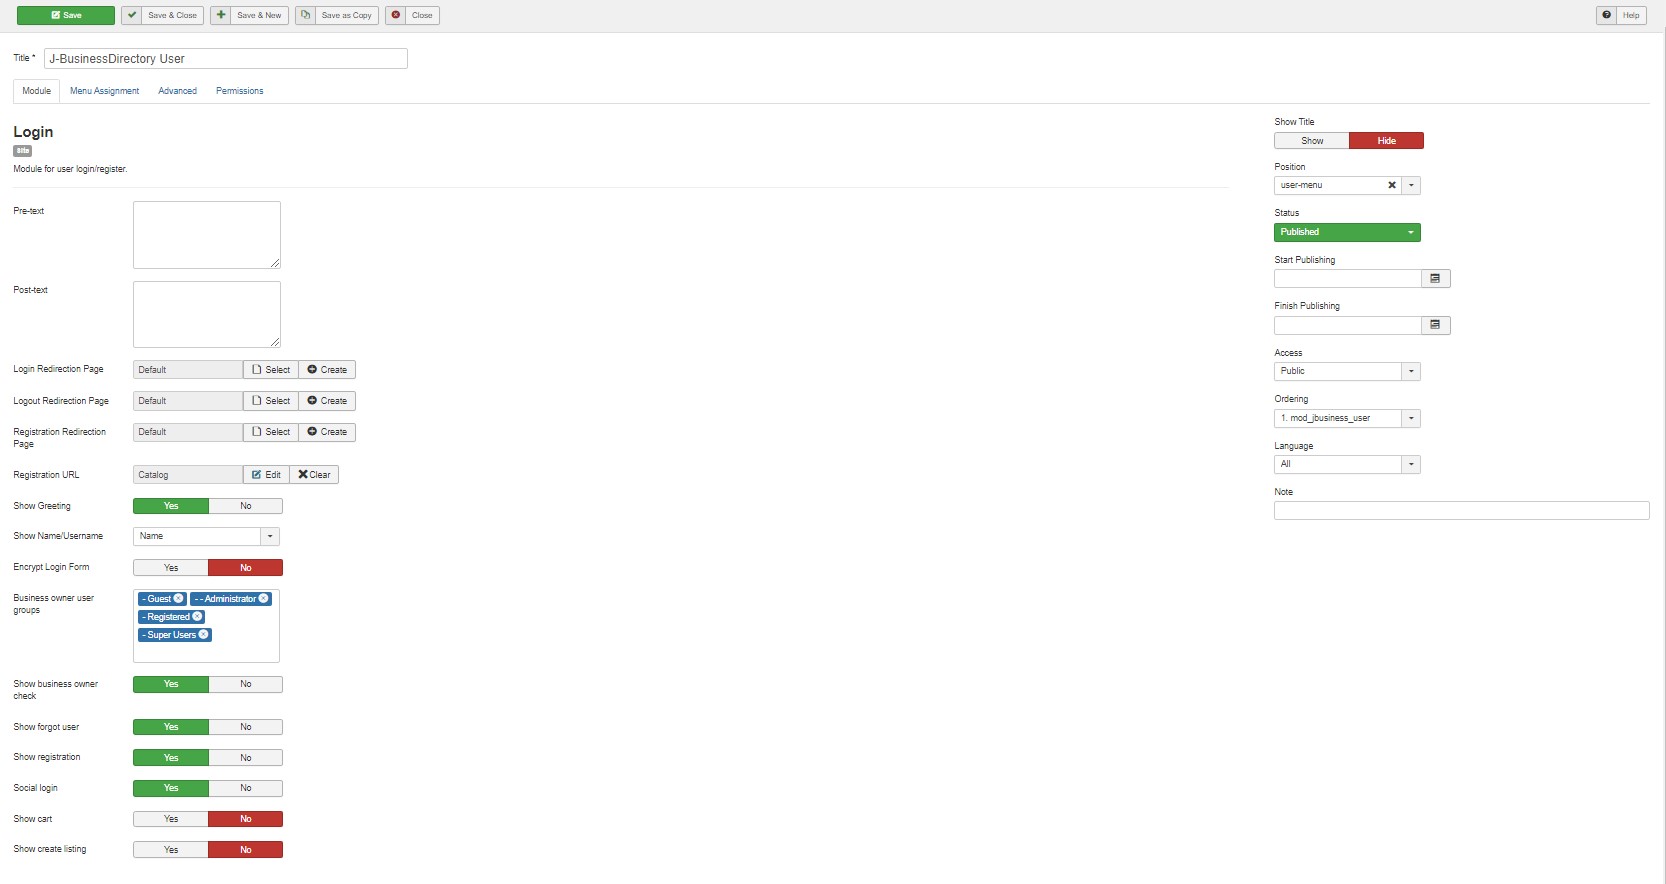
The settings of the module include:
Pre-text – the text or HTML that is displayed above the login form
Post-text – the text or HTML that is displayed below the login form
Login Redirection Page – set the redirection page after logging in, whether an existing menu item or you can create a new one
Logout Redirection Page – set the redirection page after logging out, whether an existing menu item or you can create a new one
Show greeting – set whether you want to show/hide the greeting
Encrypt login form – HTTPS must be enabled to use this option
Social login – set whether to show/hide the Facebook and Google login buttons
Show cart – set whether to show/hide the shopping cart button
Show create listing – set whether to show/hide the “Create listing” button
After all the settings of the module are set, it will be shown anywhere on the website depending on menu assignment and the position.
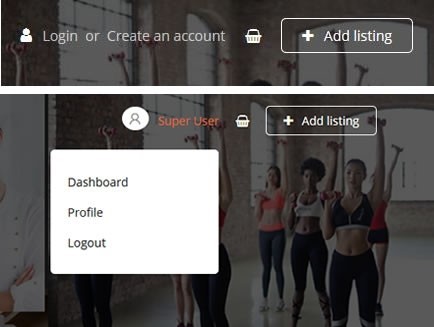
The user can either login or register also by using the social networks like Facebook and Google.
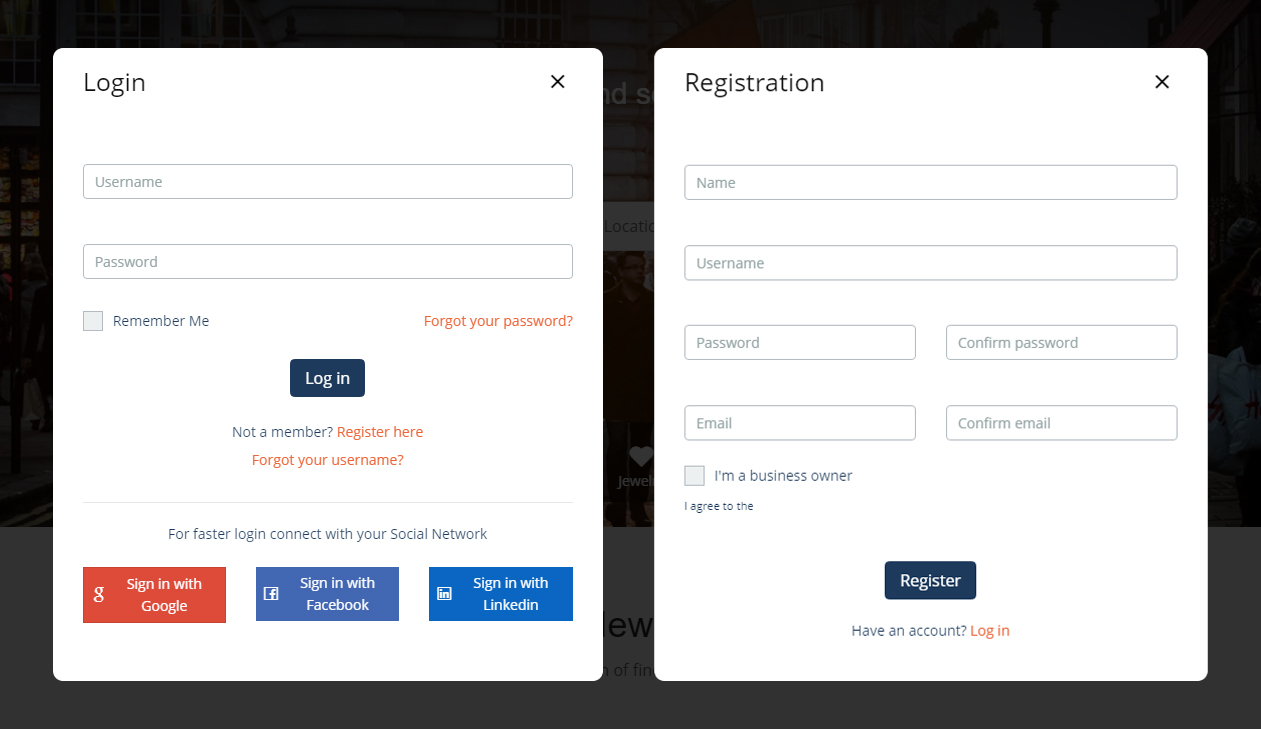
To make use of the social networks, the site admin needs to setup the project for both platforms on these sites:
After everything will be ready, the site admin will have to enter the authentication keys on the directory’s general settings, for the social networks login to work.
When the user will be logged in, s/he can access directly one of the sections (dashboard, profile), or logout, as shown in the below picture.
J-BusinessDirectory Locations Module
After installing the module from the Directory Extensions section in the dashboard, you can access the modules section of Joomla administration and filter by location module. You should be able to see the J-BusinessDirectory Location module and you can click on it to access the settings.
The site administrator can assign the module anywhere on the website.
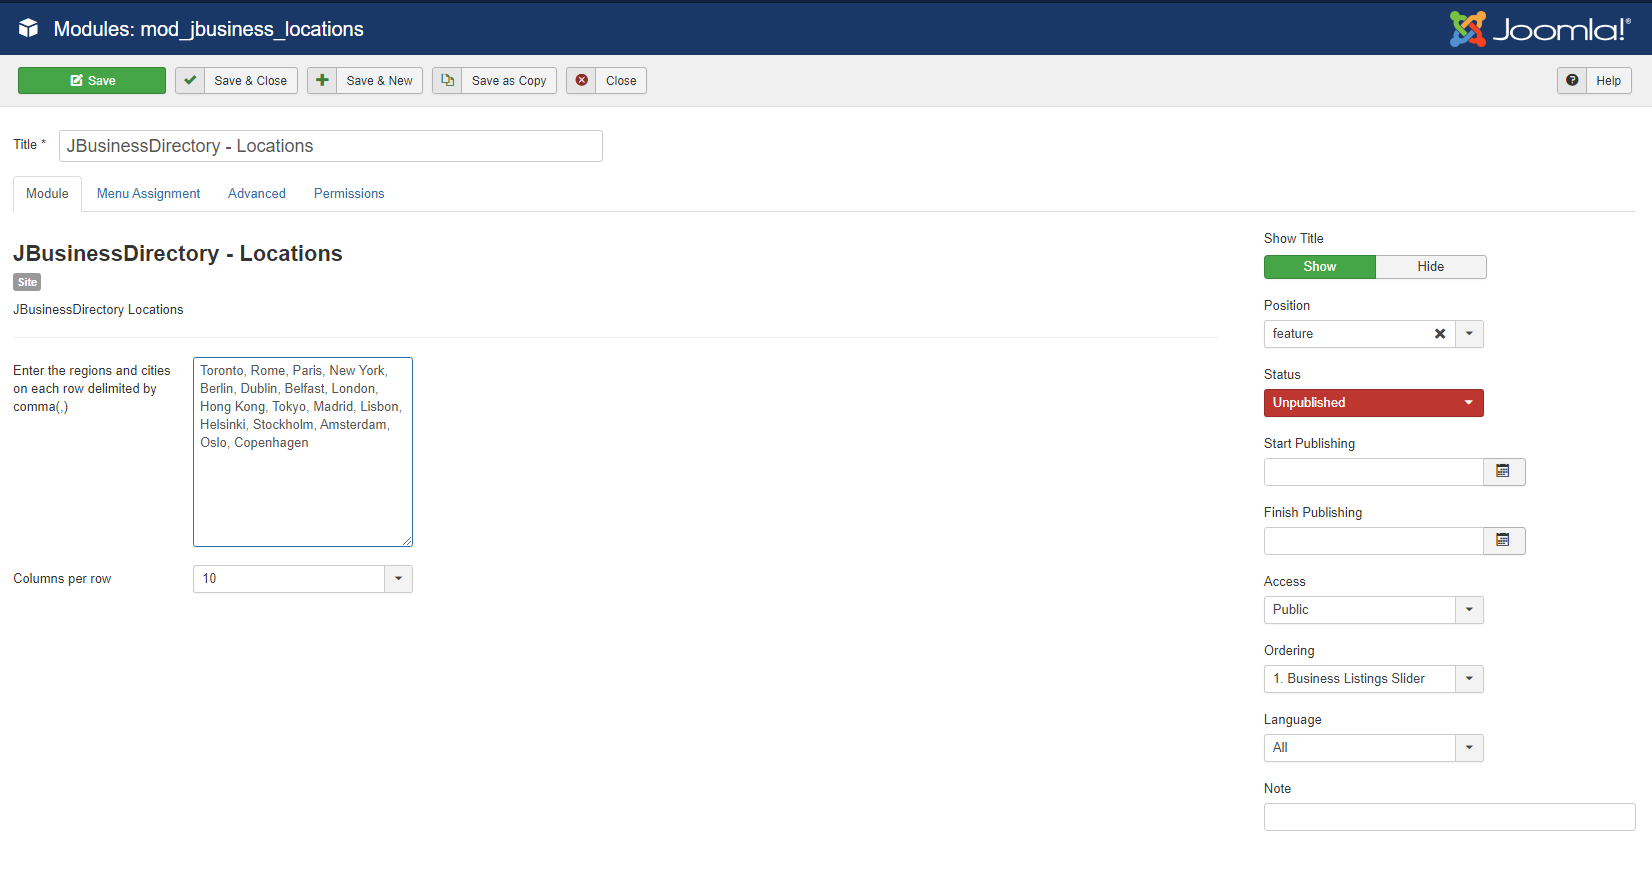
The settings of the module include:
The regions and cities that will be shown; they should be separated by a comma
Columns per row – set the number of columns per row
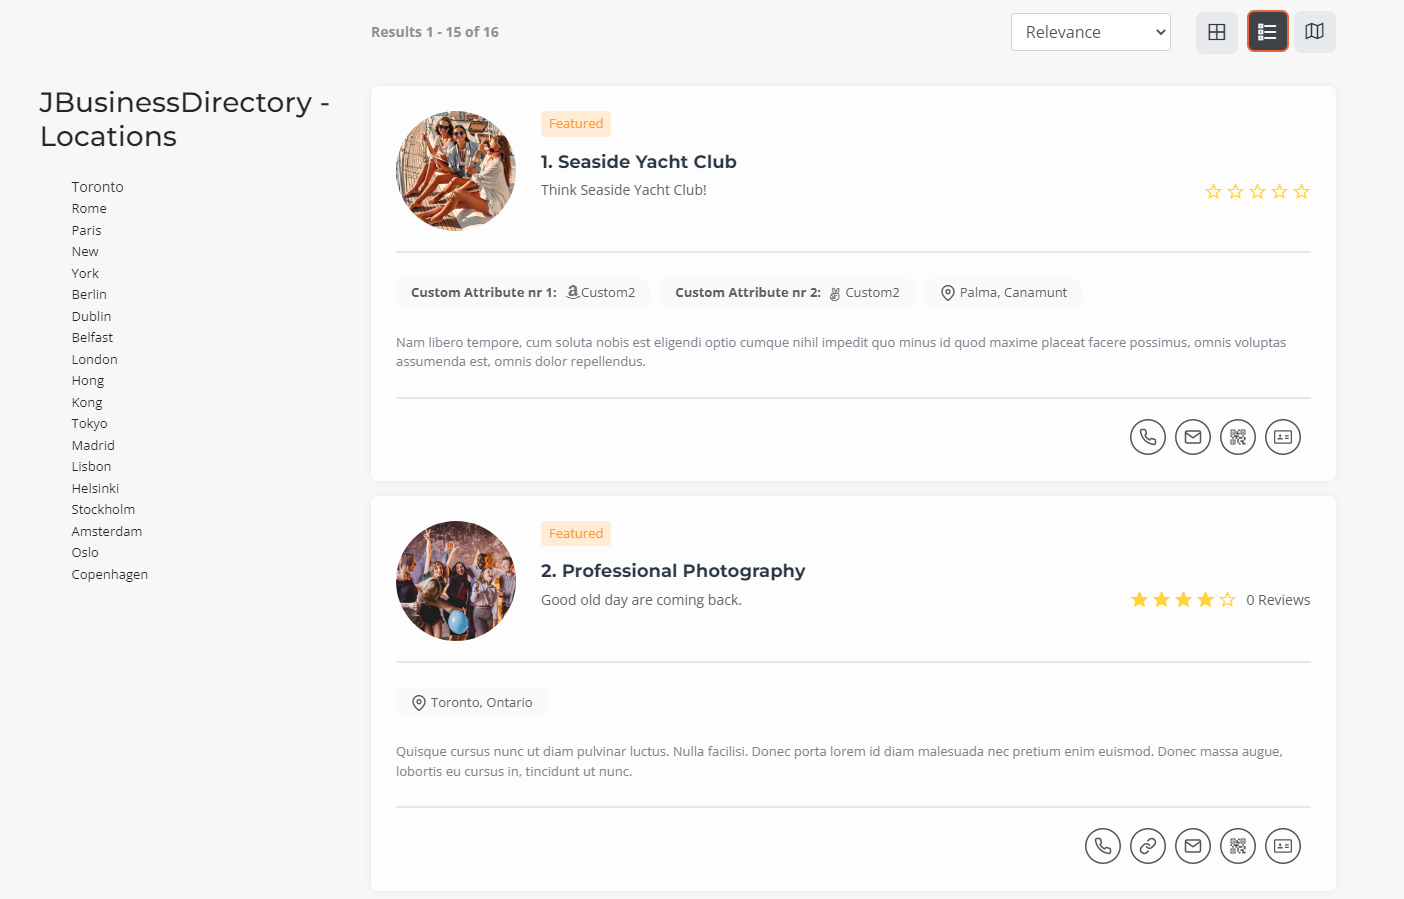
After all the settings of the module are set, it will be shown anywhere on the website depending on menu assignment and the position.
A search can be performed for each of the regions and cities added on the module.
J-BusinessDirectory Map Module
After installation you access the modules section of Joomla administration and filter by map module. You should be able to see the J-BusinessDirectory Map module and you can click on it to access the settings.
The site administrator can assign the module anywhere on the website.
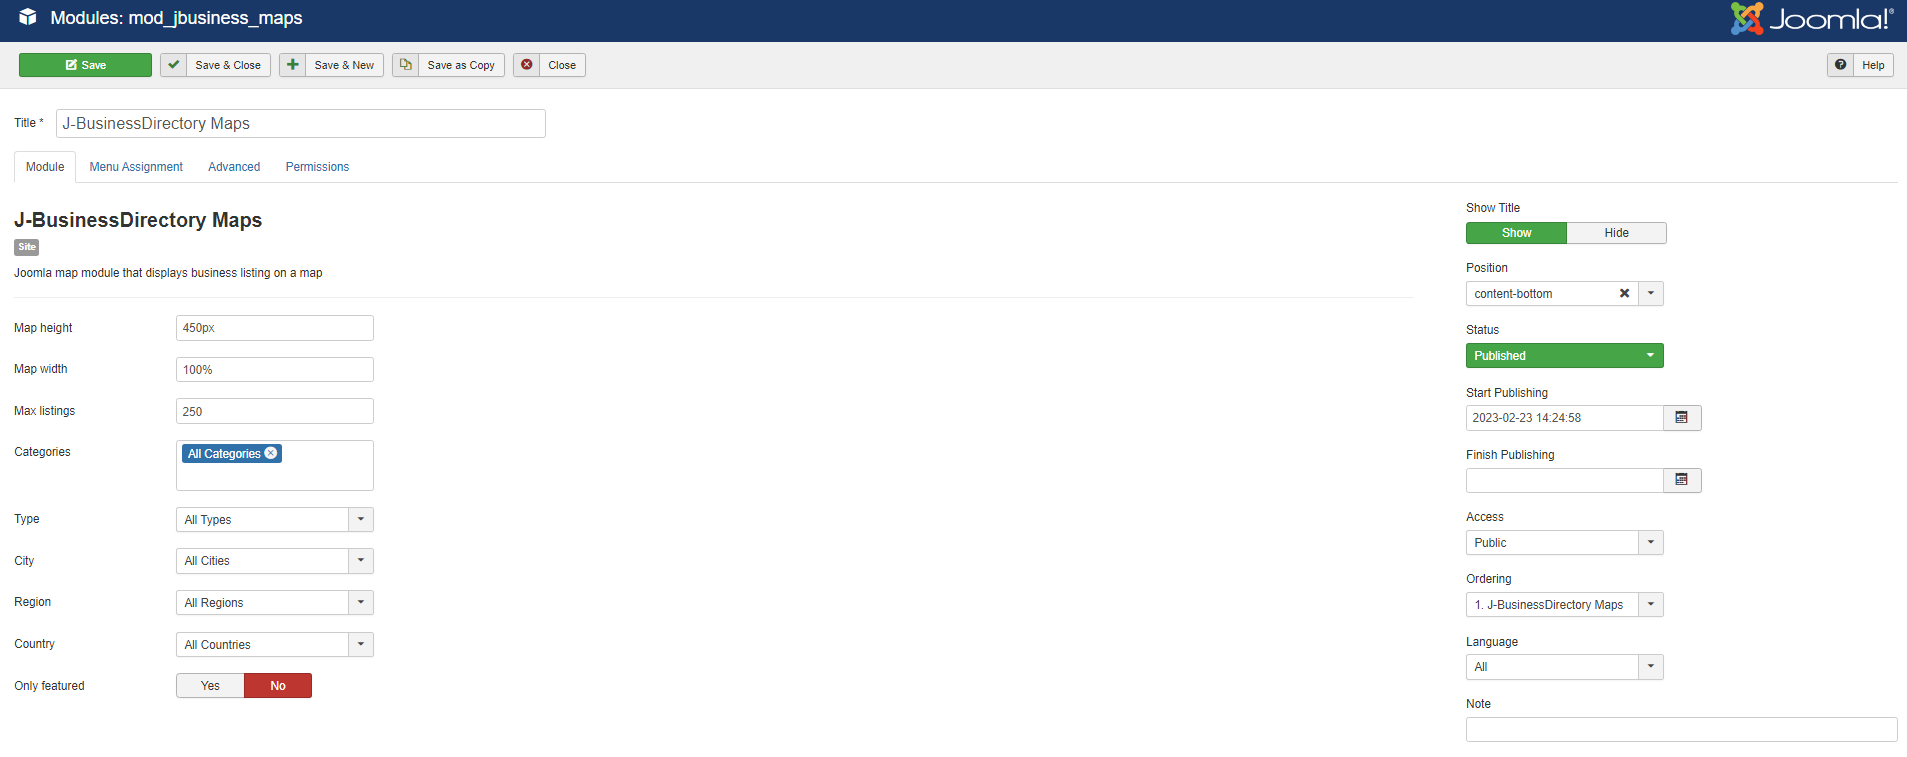
The settings of the module include:
Map height – set the map height
Map width – set the map width
Max listings – set the maximum number of listings to be shown on the map
Categories – filter the shown listings by the categories set on the module
Type – filter the shown listings by the type set on the module
City – filter the shown listings by the city set on the module
Region – filter the shown listings by the region set on the module
Country – filter the shown listings by the country set on the module
Only featured – if set to yes, only featured listings are shown
After all the settings of the module are set, it will be shown anywhere on the website depending on menu assignment and the position.
J-BusinessDirectory Listing Videos Module
After installation you access the modules section of Joomla administration and filter by listing videos module. You should be able to see the J-BusinessDirectory Listing Videos module and you can click on it to access the settings.
The site administrator can assign the module anywhere on the website.
The module displays the latest listing videos published.
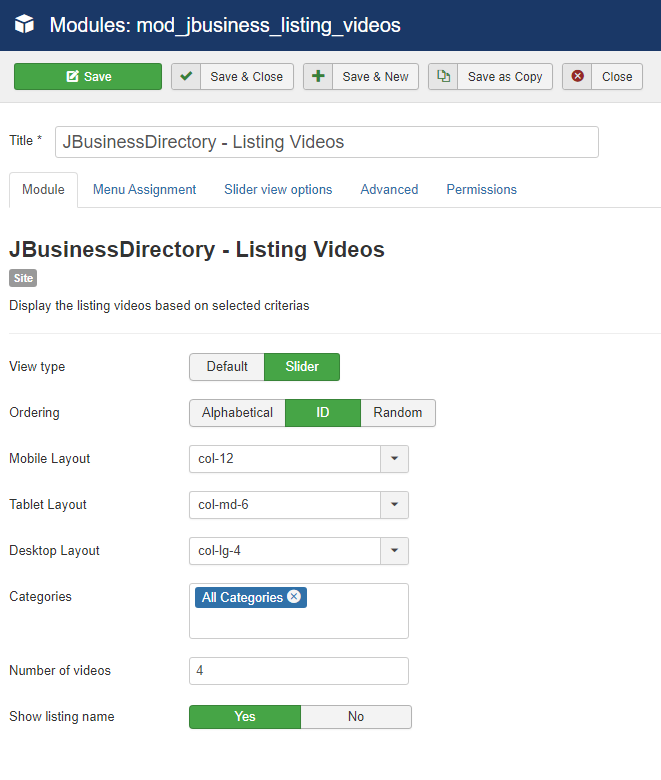
View type – the layout in which the listings videos will be displayed
Ordering – set the default ordering for the videos
Mobile Layout – layout for the mobile devices
Tablet Layout – layout for the tablet devices
Desktop Layout – layout for the desktops
Categories – you can choose to display only the videos that belong to the set categories
Number of videos – set the max number of videos to display on the widget
Show listing name - choose rather to show or not the listing name on the video widget
After installation you access the modules section of Joomla administration and filter by listing videos module. You should be able to see the Joomla-BusinessDirectory Listing Videos module and you can click on it to access the settings.The site administrator can assign the module anywhere on the website.

J-BusinessDirectory Announcements Module
After installation you access the modules section of Joomla administration and filter by announcements module. You should be able to see the J-BusinessDirectory Announcements module and you can click on it to access the settings.
The site administrator can assign the module anywhere on the website.
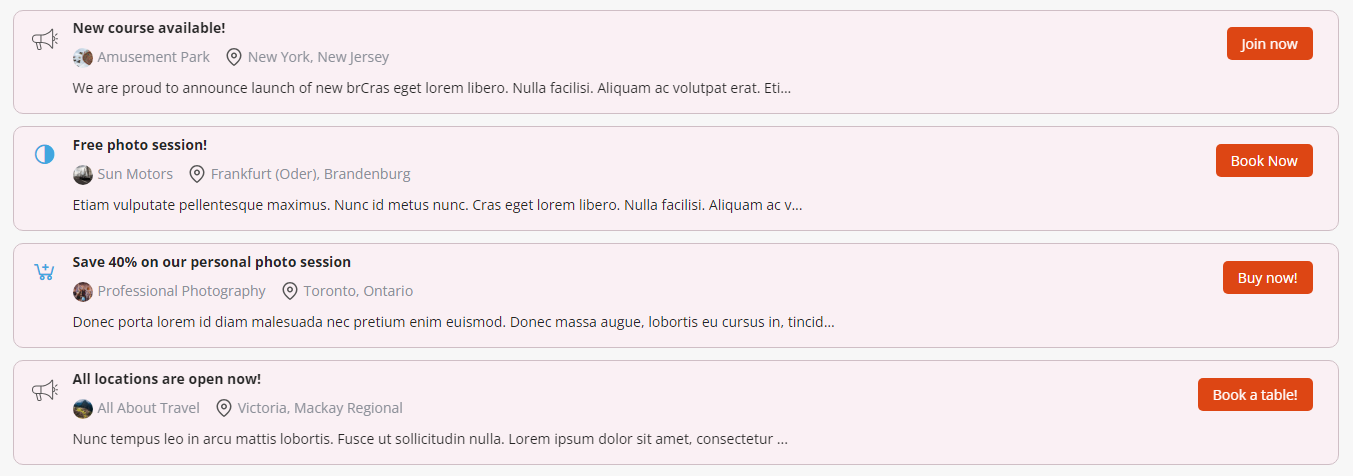
The module displays the latest announcements published.
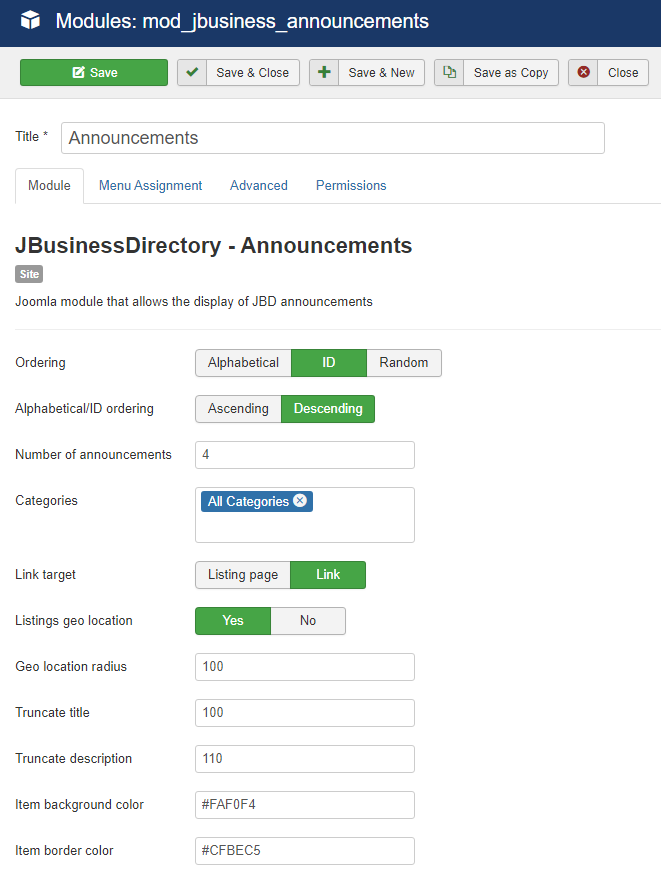
Ordering – set the default ordering for the announcements
Alphabetical/ID ordering - set the ordering type
Number of announcements – set the max number of announcements to display on the widget
Categories – you can choose to display only the announcements that belong to the set categories
Link target - set item link target
Listings geo location – display announcements based on announcements location – this will do a refresh of the page and the coordinates will be added on the current URL
Geo location radius – show announcements based on the radius set
Title characters - set the number of characters to show as announcement title, the rest of the characters with be truncated
Description characters - set the number of characters to show as announcement description, the rest of the characters with be truncated
Item background color – set the background color of the latest announcements
Item border color - set the border color of the latest announcements
After installation you access the module section of Joomla administration and filter by announcements module. You should be able to see the J-BusinessDirectory Announcements module and you can click on it to access the settings.The site administrator can assign the module anywhere on the website.
J-BusinessDirectory Packages Module
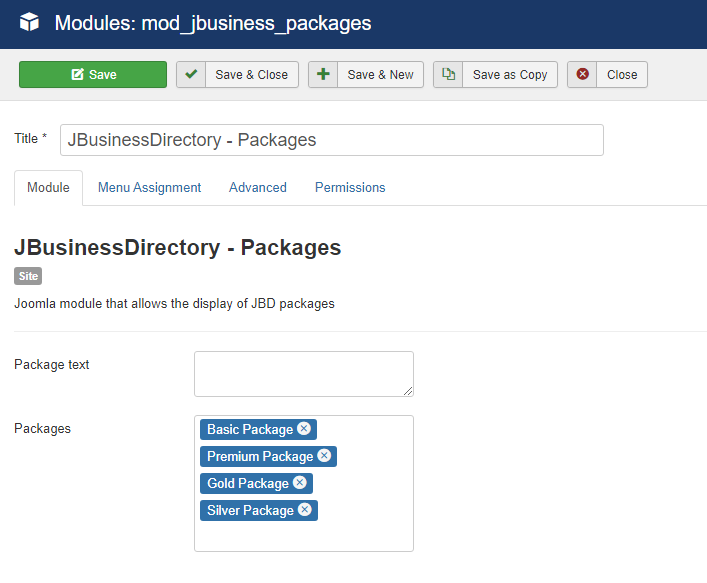
After installation you access the modules section of Joomla administration and filter by packages module. You should be able to see the J-BusinessDirectory Pacakges module and you can click on it to access the settings.
The site administrator can assign the module anywhere on the website.
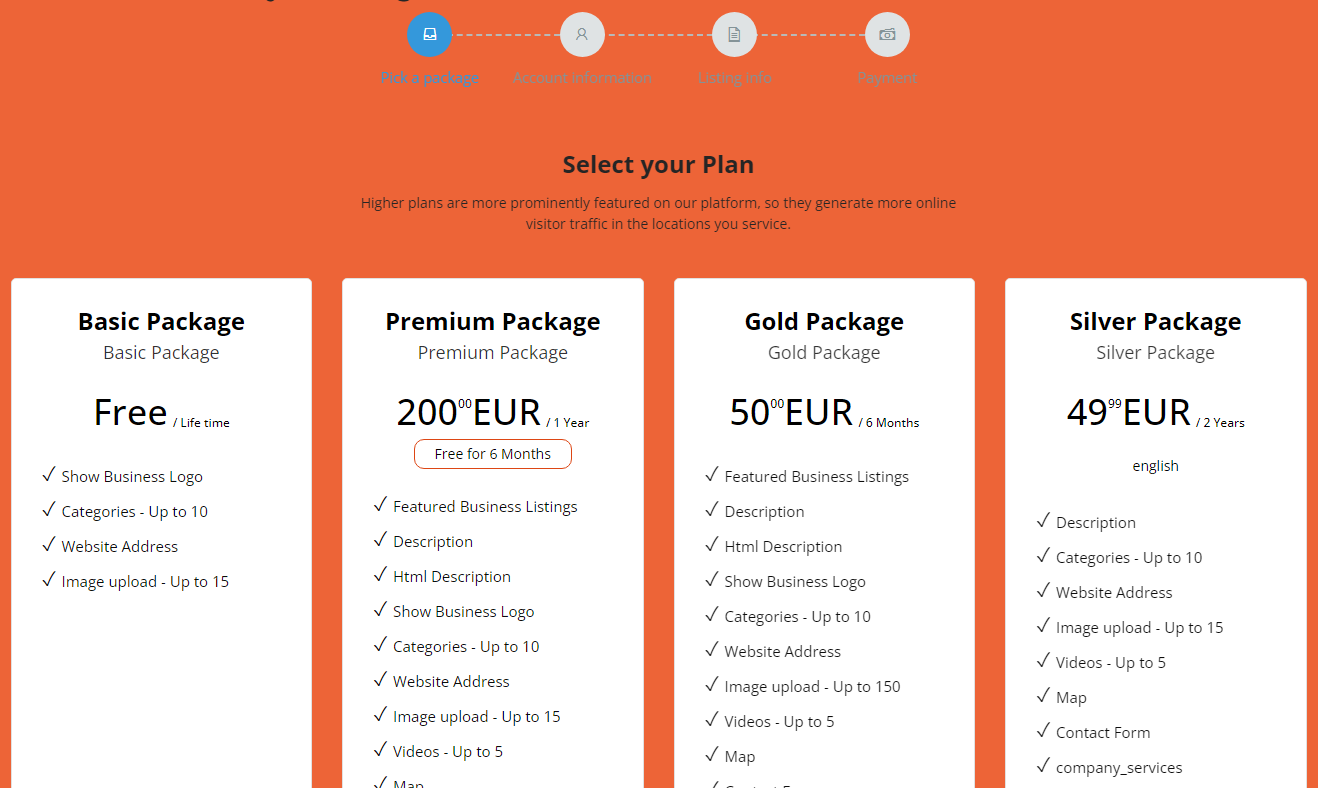
On this module you will have to select the packages that will show on the front-end area and also the text next to it.
Note:If packages are disabled the module will just a preview of the functionality. In order to enable packages please set Enable Packages to yes on J-BusinessDirectory General Settings | Business Listings tab
J-BusinessDirectory Keyword Feed Module
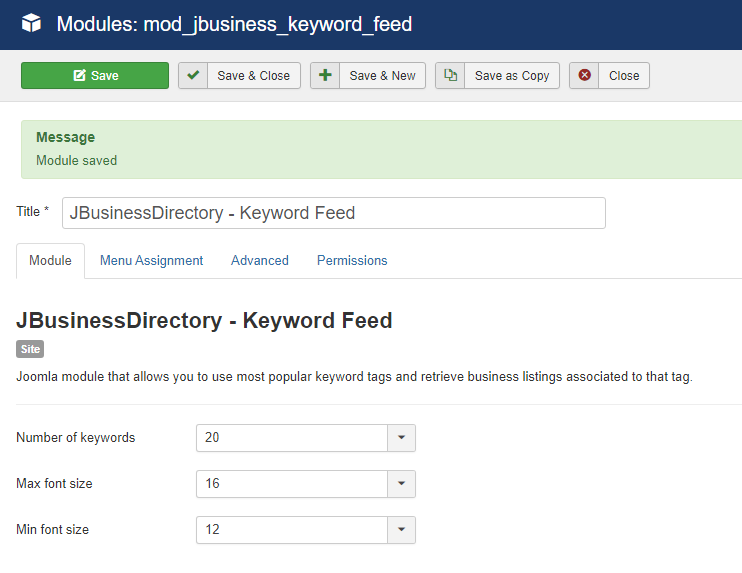
After installation you access the modules section of Joomla administration and filter by keyword feed module. You should be able to see the J-BusinessDirectory Keyword Feed module and you can click on it to access the settings.
The site administrator can assign the module anywhere on the website.
The module gets a list of keywords, the ones which have been used the most and displays them in a section. Upon clicking on each keyword it performs a keyword search.

Social Network Login
Facebook
Setup the Facebook oAuth Login by going to the Facebook Developer platform: https://developers.facebook.com/docs/facebook-login/
Select the Websites or mobile websites option
If you don’t have a Facebook developer account, you need to create one first before continuing to the next step.
Once you have logged in with your developer account, go to the My Apps section:
In order to set up the login by Facebook you need to create an App first that will be linked with your webpage. Click on the Create App, and select the last option on the modal window:
Enter the details for your application and then click Next. Once the app is created, you need to select the Facebook Login and set it up.
Once on your App Page, select the settings on the left sidebar menu and click Basic.
Enter your website domain on the App Domains field and your site URL on the Website section at the end.
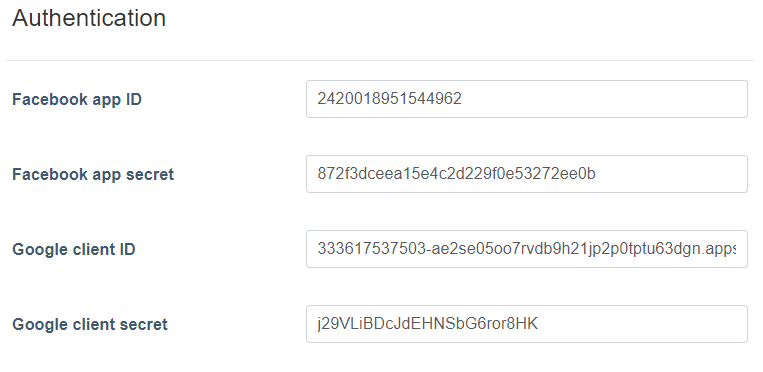
Copy the App ID and the App Secret and paste them on the User authentication section under General Settings on the J-BusinessDirectory admin panel.
Now you need to access the Settings for the Facebook Login:
Enable the Client OAuth Login and Web OAuth Login. On the Valid OAuth Redirect URIs, you need to enter the following redirect URL:
https://yoursite.com/index.php?option=com_jbusinessdirectory&task=userprofile.oauthCallback&type=facebook
Replace yoursite.com with the domain of your website. Also note that the URL must be HTTPS. Please make sure your website has an SSL certificate active, otherwise it will not work with http websites
Save all the changes, and lastly, make sure you set the app mode to Live:
Google
Before continuing the setup for the Google OAuth, make sure you have created a Project on the google developers console.
First you need to create the credentials for Google OAuth:
https://console.developers.google.com/apis/credentials
Click on Create Credentials and select OAuth Client ID. If needed, setup the consent screen configurations by following all the necessary steps provided by google. After setting up the configuration for the consent screen, click on Create Credentials again, and on the Application Type, select Web Application.
Add a name of your choosing and save. Once saved, you will be redirected back to the Credentials screen and now you can select the credentials you just created inside the OAuth 2.0 Client IDs section.
Under Authorized Redirect URI-s, click the Add URI button twice
https://yoursite.com/index.php?option=com_jbusinessdirectory&task=userprofile.oauthCallback&type=google
http://yoursite.com/index.php?option=com_jbusinessdirectory&task=userprofile.oauthCallback&type=google
Replace yoursite.com with the domain of your website. Please note that we are adding the same URI twice, once with http:// and once with https://
Now copy the Client ID and Client Secret and paste them on the User authentication section under General Settings on the J-BusinessDirectory admin panel.
LinkedIn
Before setting up the Linkedin OAuth, make sure you first create an app by following the instructions on the page below:
https://www.linkedin.com/developers/apps/
Once you have created the app, go the app details screen and click on the Auth tab:
Copy the Client Secret and Client ID and paste them on the User authentication section under General Settings on the J-BusinessDirectory admin panel.
Under the OAuth 2.0 Settings section, enter the following redirect URLs:
Replace yoursite.com with the domain of your website. Please note that we are adding the same URI twice, once with http:// and once with https:// Now go to the Product Tabs, and select the Sign in with Linkedin product:
Once the product has been reviewed and approved, under the Auth tab, the OAuth 2.0 Scopes should have been updated and should look like this: