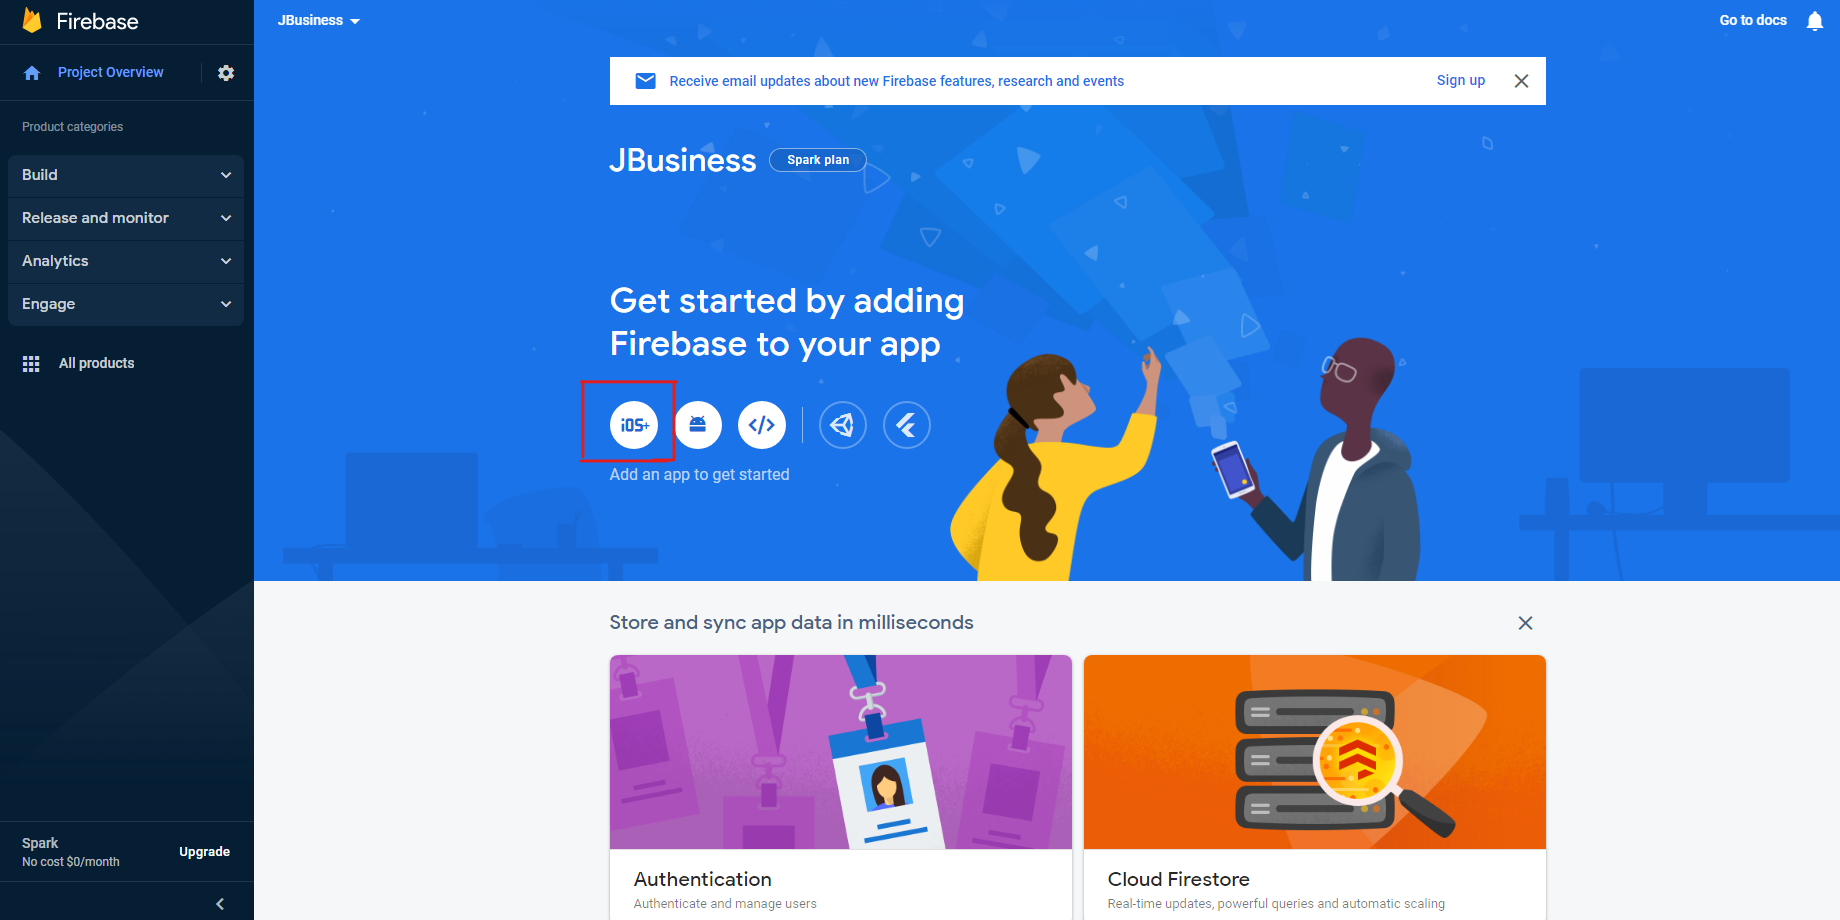
Mobile Apps
iOS Mobile App
The iOS App shows data in real time from the business directory website. The Business Owner will have the possibility to manage his/her own listings, offers, events, as well as private messages from the other business owners / users.
A section dedicated to The Business Owner’s profile will be present. From the profile menu, The Business Owner can manage its own bookmarks and reviews (for both, Listings and Offers). This section offers also the possibility to edit the current profile, to change the settings and to access the Front–End Control Panel.
Building the app - Prerequisites
After purchasing the application, you can access our online form for the application building process. A couple of configuration data and images are needed for the customization process.
You would have to provide the website address of the business directory extension, the images, the desired colors and the language.
Images
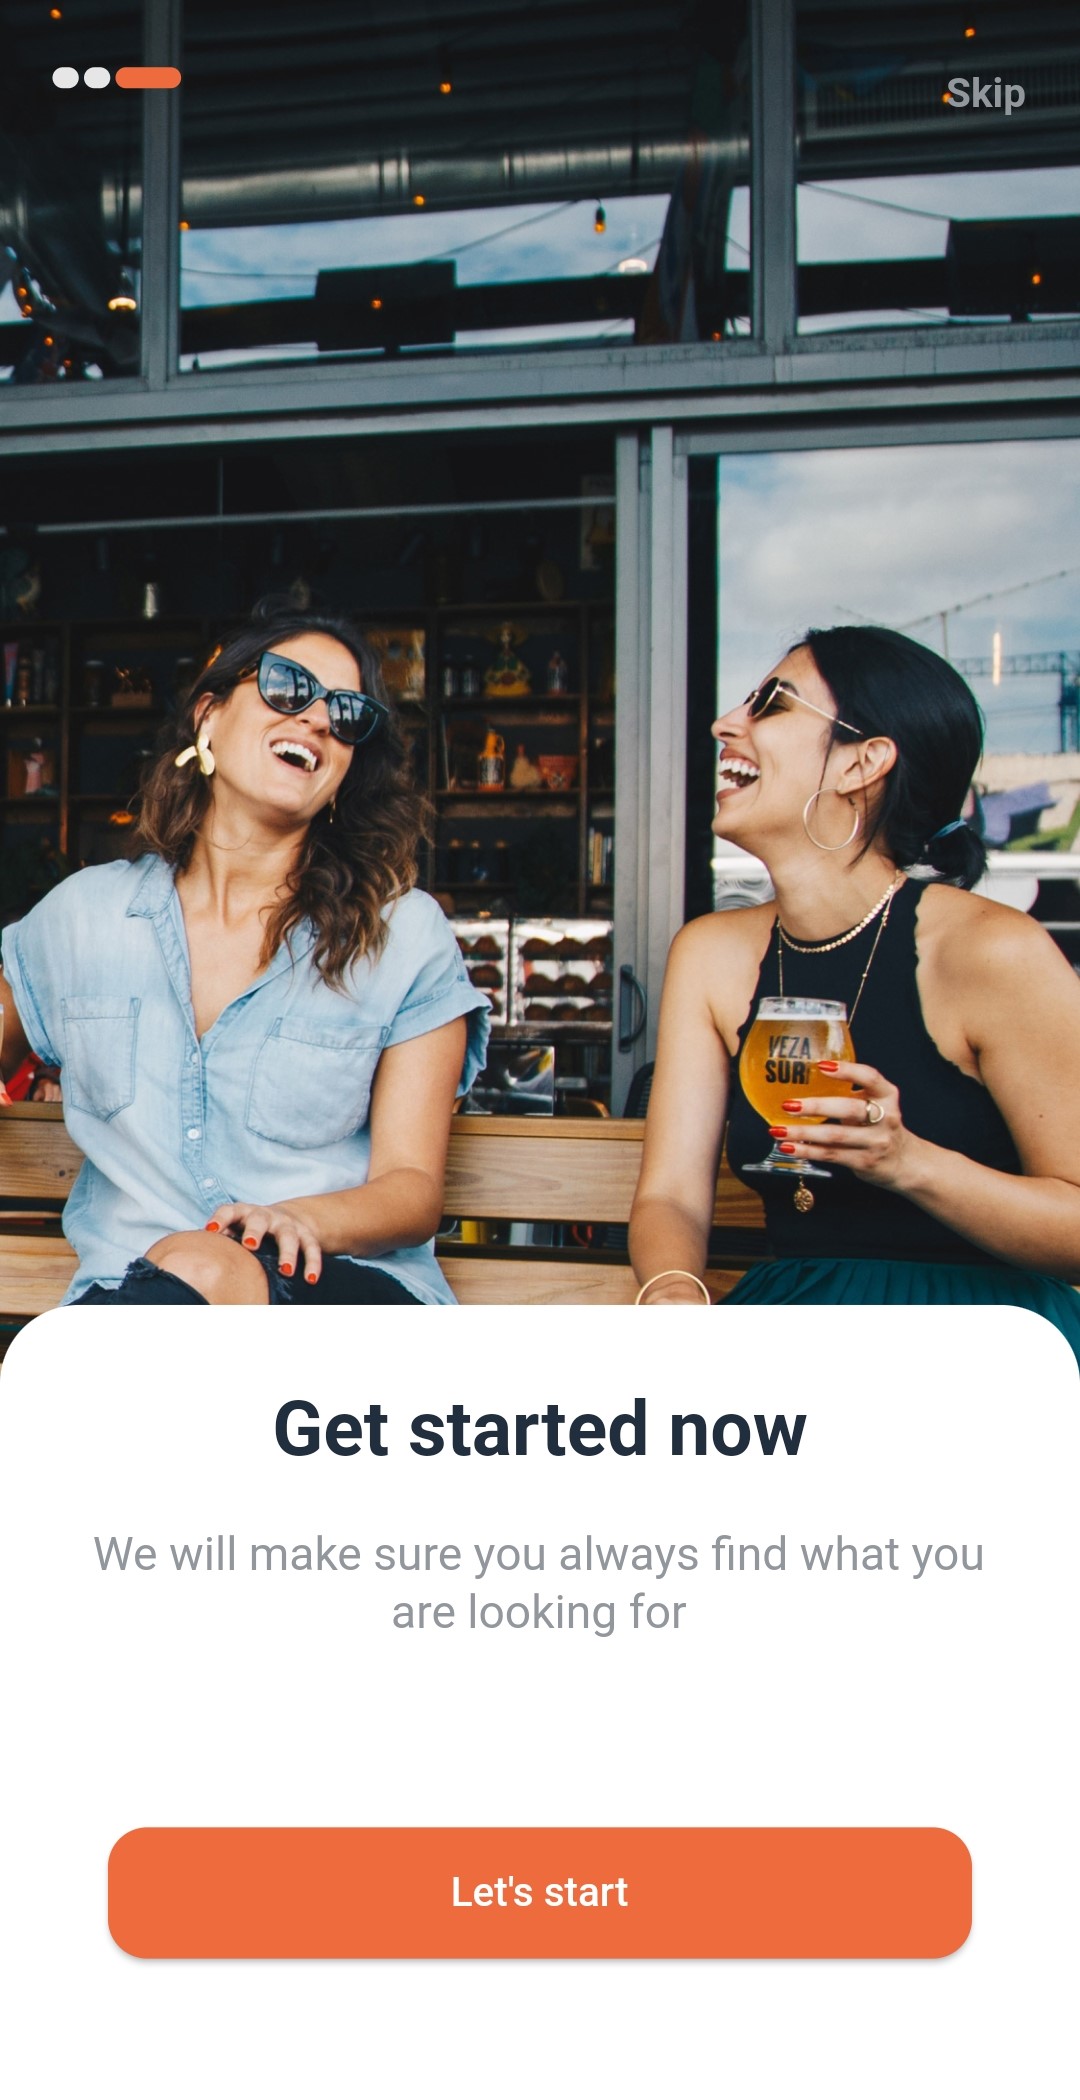
Landing Screen Images
These are the images that will appear when first opening the app.
slider_image_1.jpg
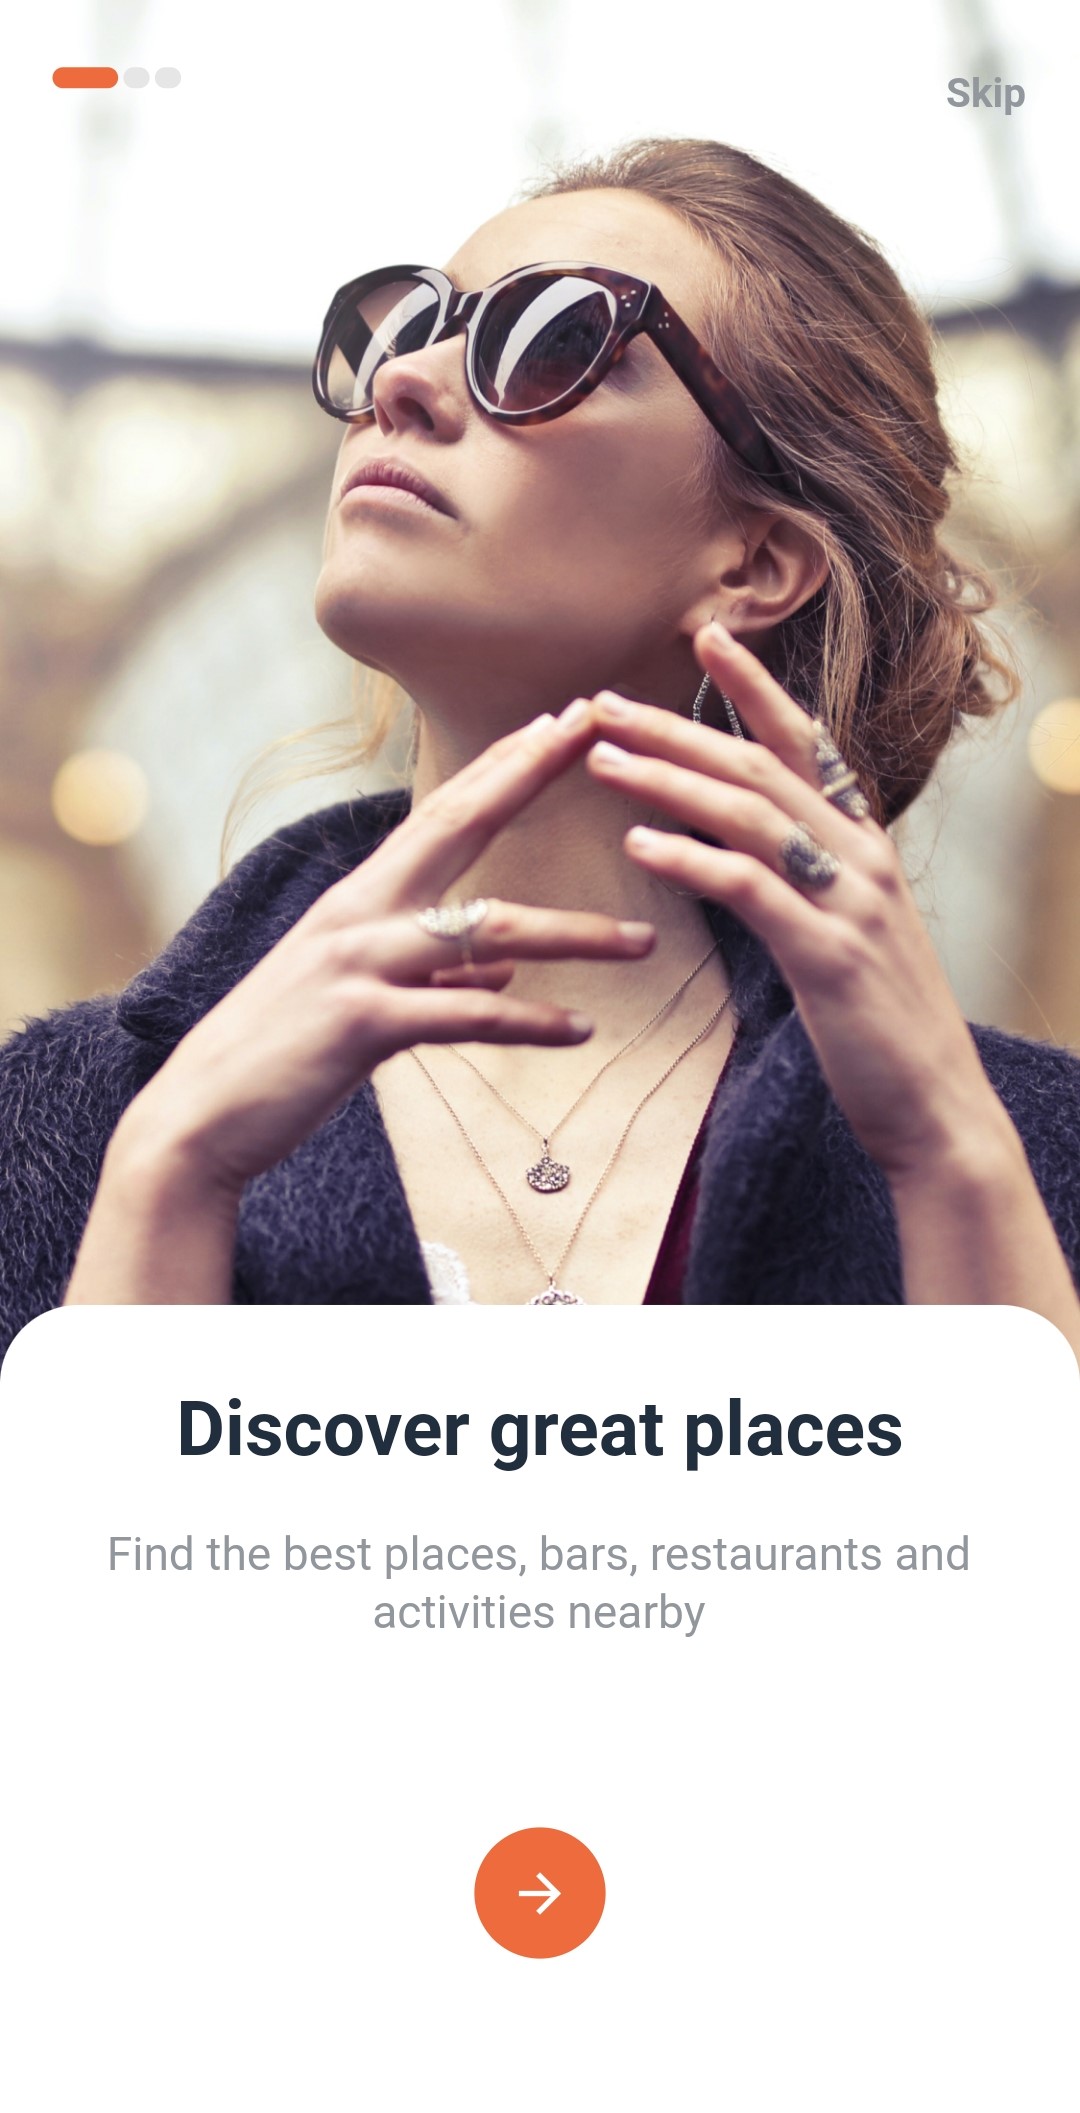
slider_image_2.jpg
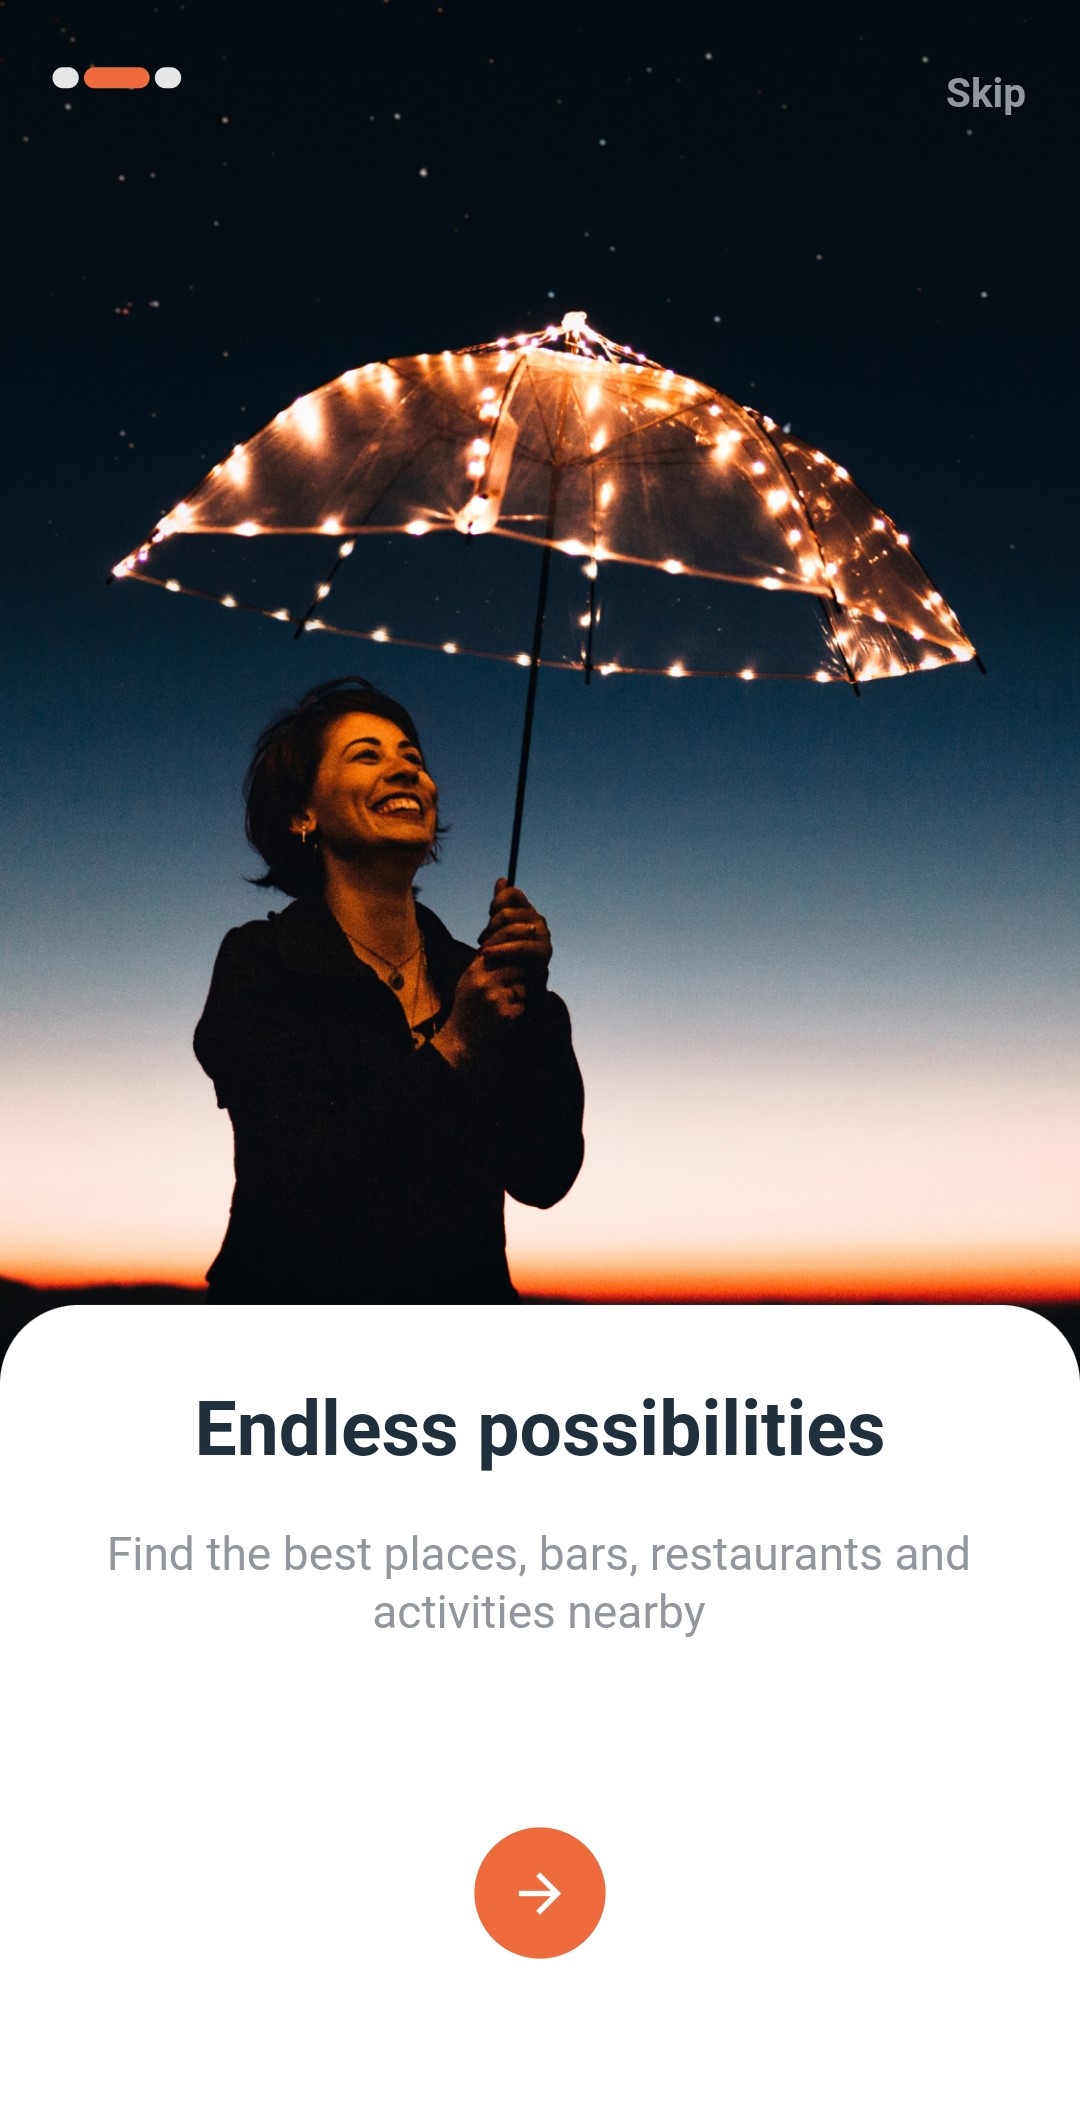
slider_image_3.jpg
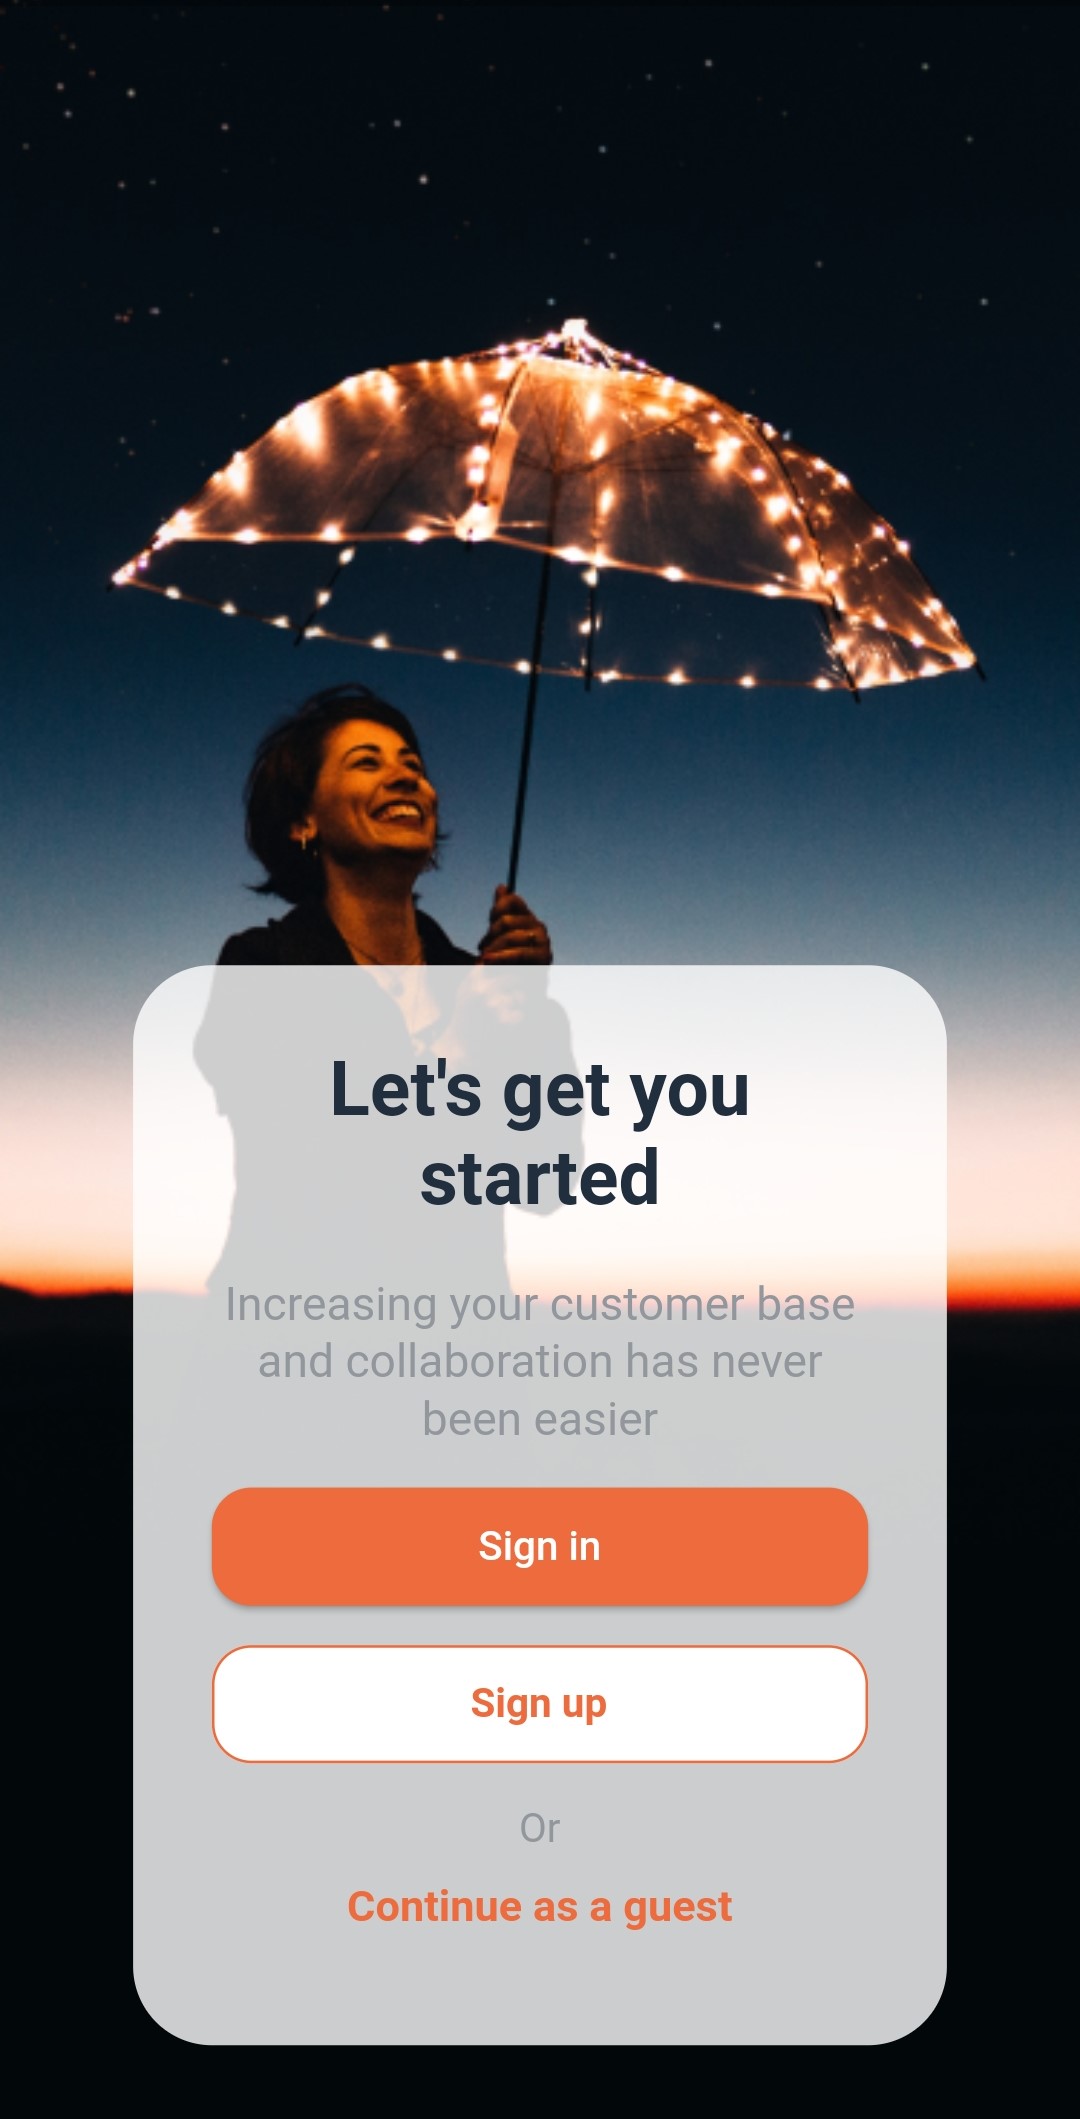
After the landing screens it will appear the sign in/up screen with the option to continue as a guest aswell.
Home Screen Header
This is the header image on top of the main screen of the application.
home_header_image.jpeg

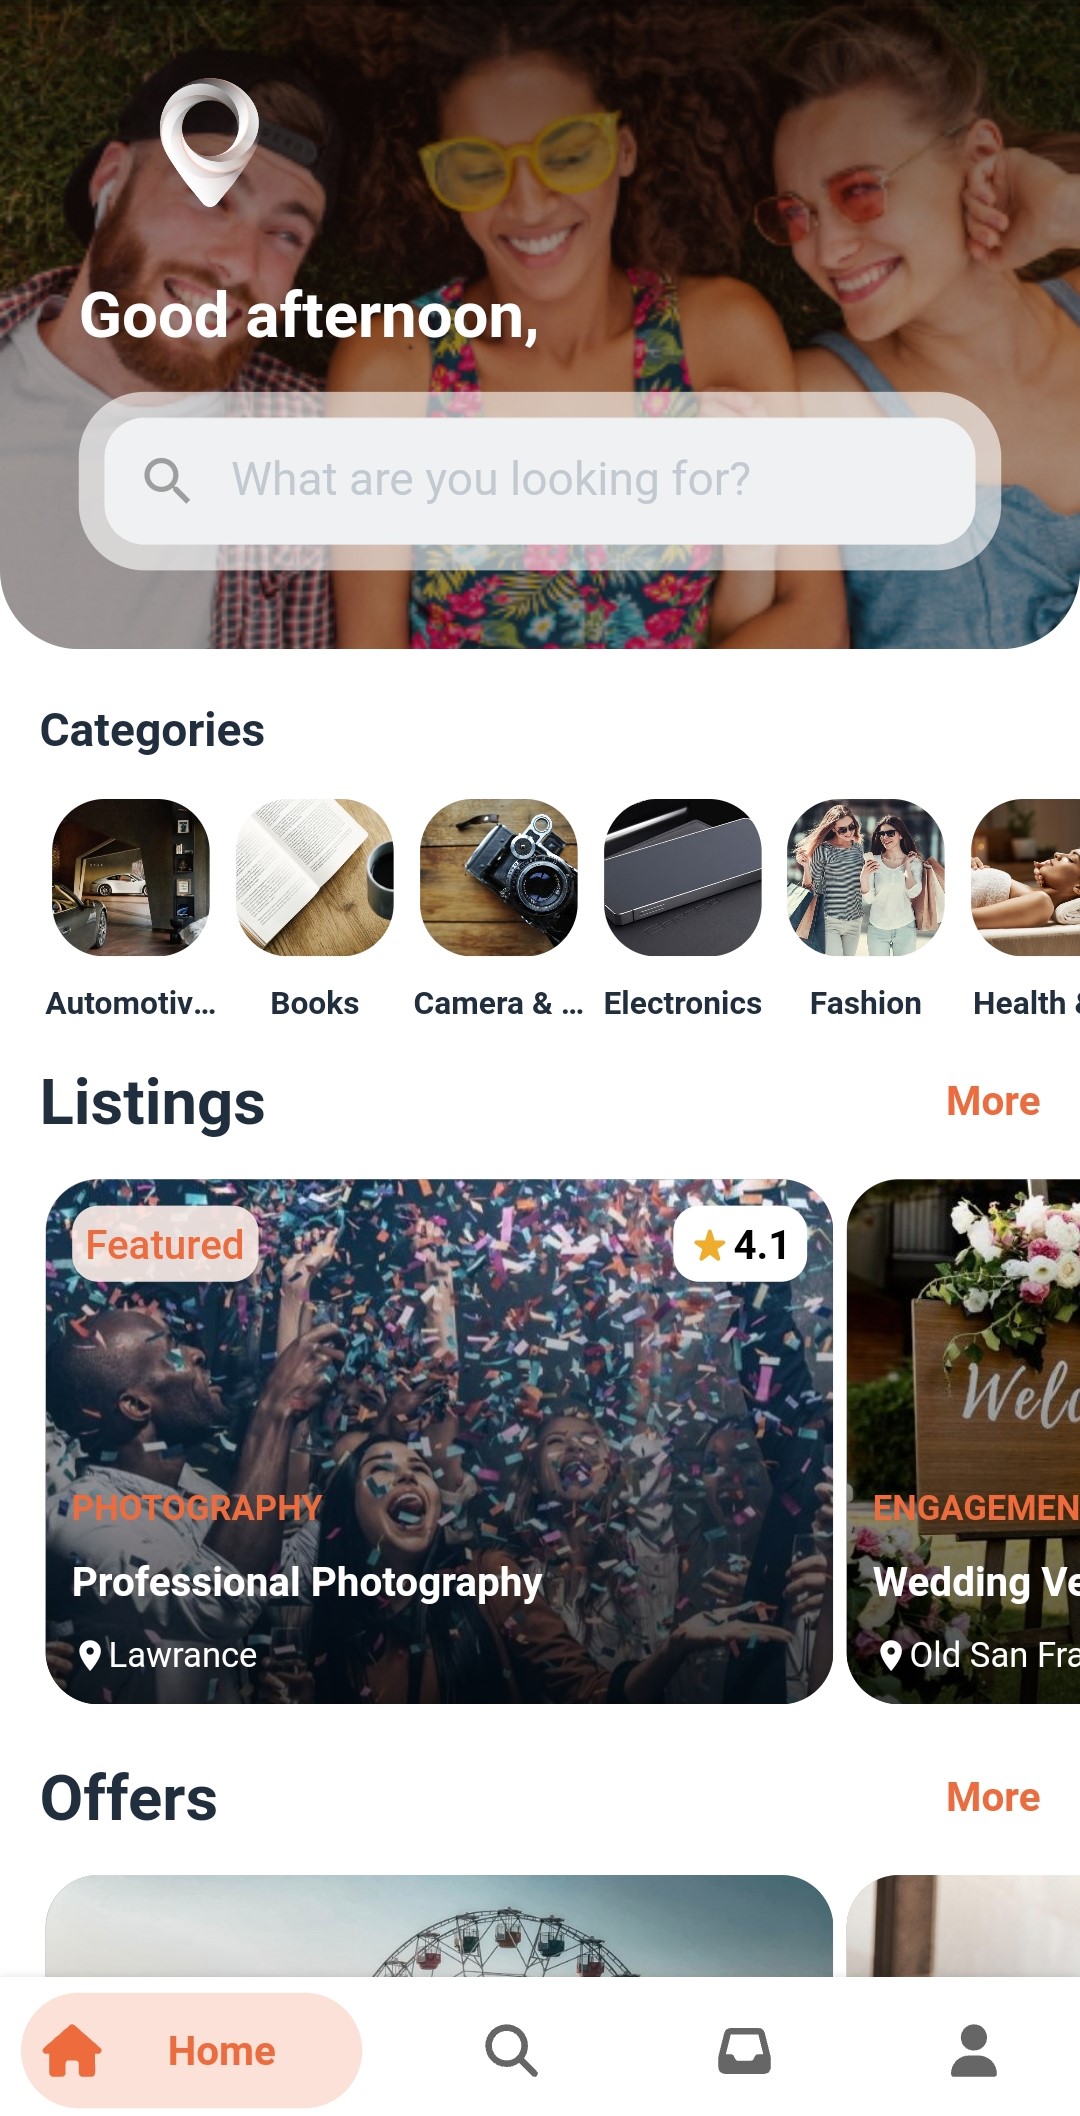
Listing No Image
featured_listing_placeholder.jpg - when the listing won’t have a logo image added, this image will be displayed instead in the list view.
Logo
ic_jbd_logo_24dp.xml (SVG) – this is the logo image that contains the black background as shown in the home screen header. Logo should always be in a SVG format.
ic_jbd_logo_nobg_24dp.xml (SVG) – this is the logo image, that doesn’t contain the black background, as shown in the above three landing screen images. Logo should always be in a SVG format.
Note: These two logos can actually be the same image, but it is recommended, for design purposes, to have two different versions of the logo as described above.
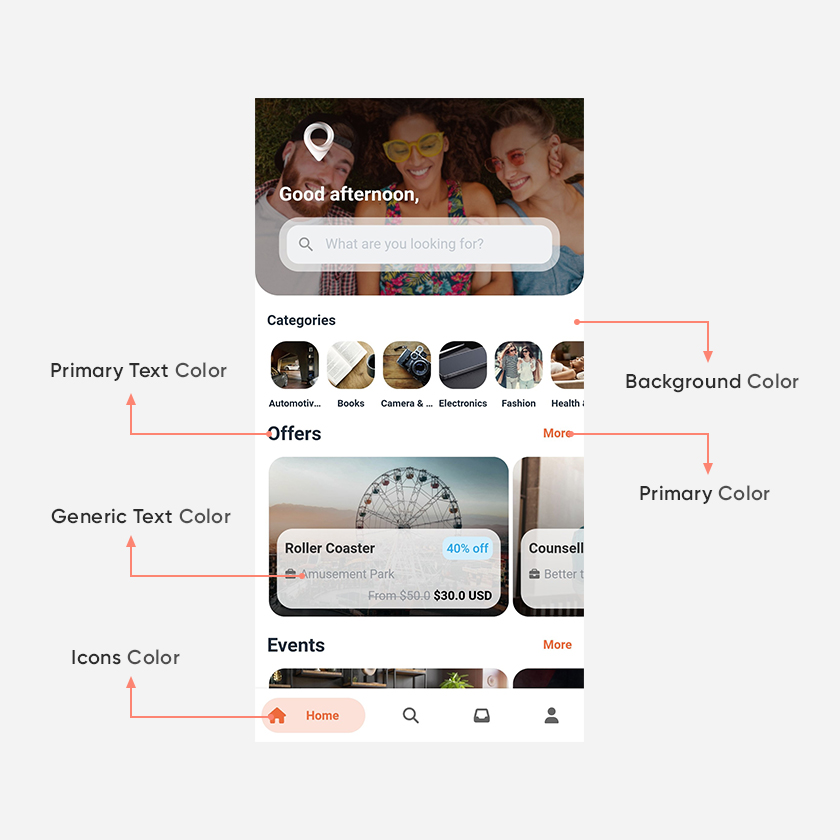
Colors
The main color values used are: colorPrimary, colorPrimaryText, colorIcons, colorBackground, colorGenericText
Firebase Set up
Firebase is used to push notifications to you audience as well as storing app data. Please do the set up below.
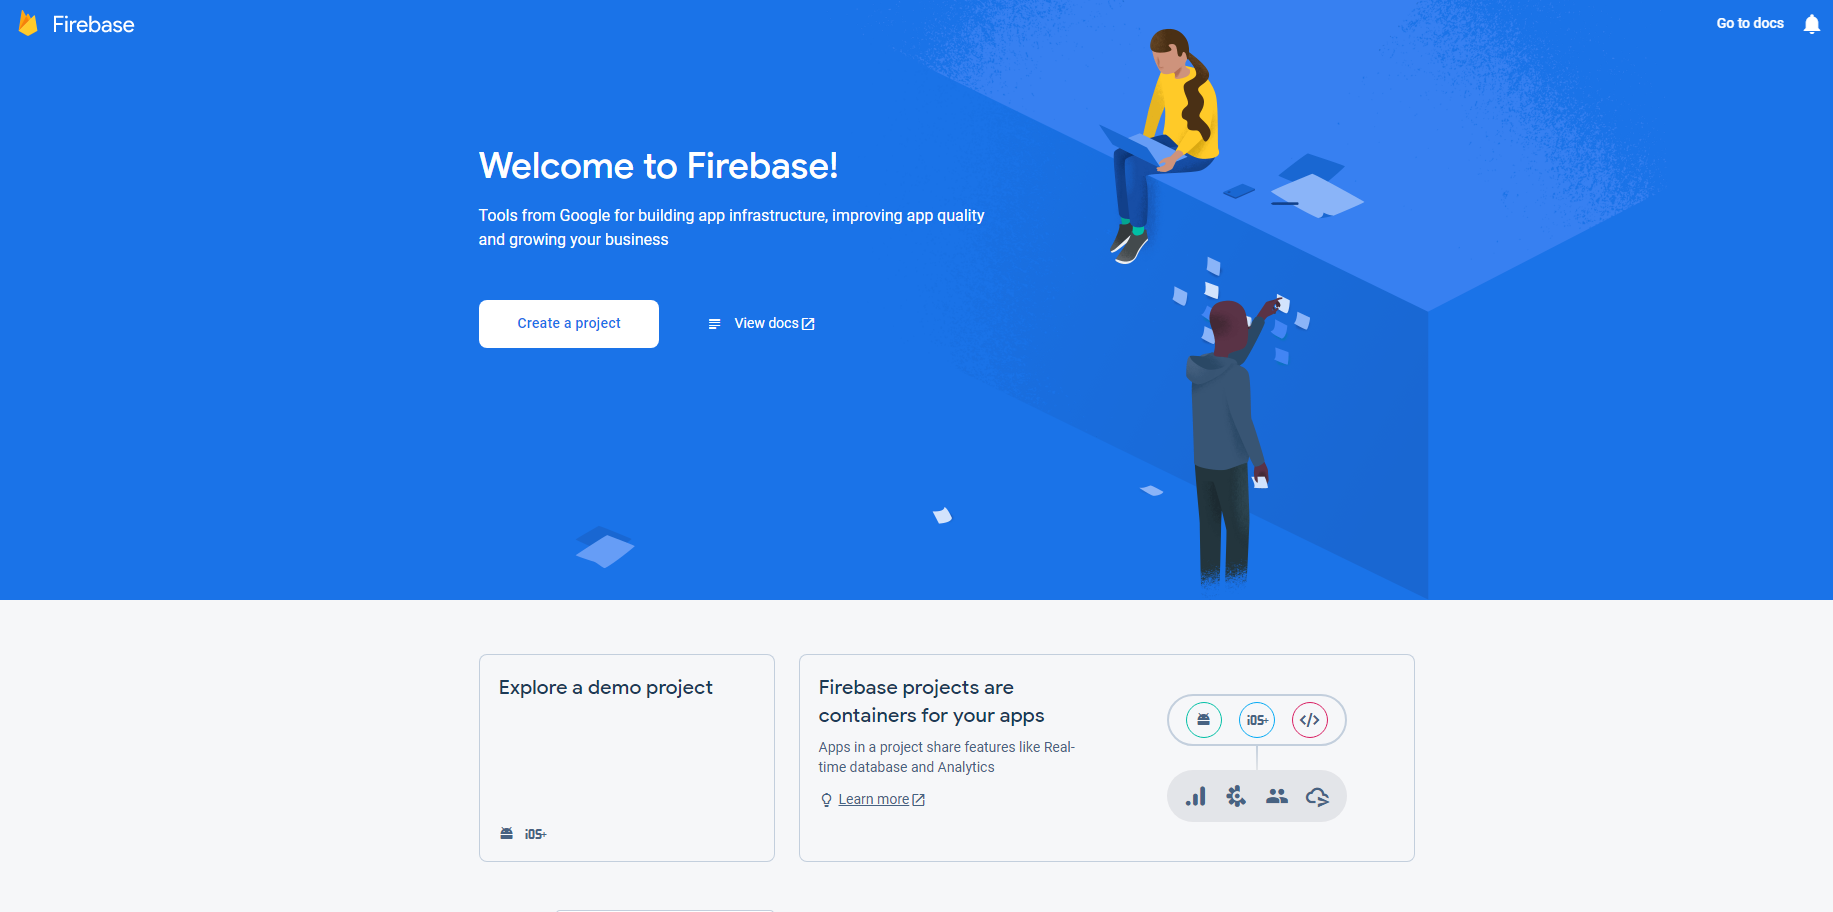
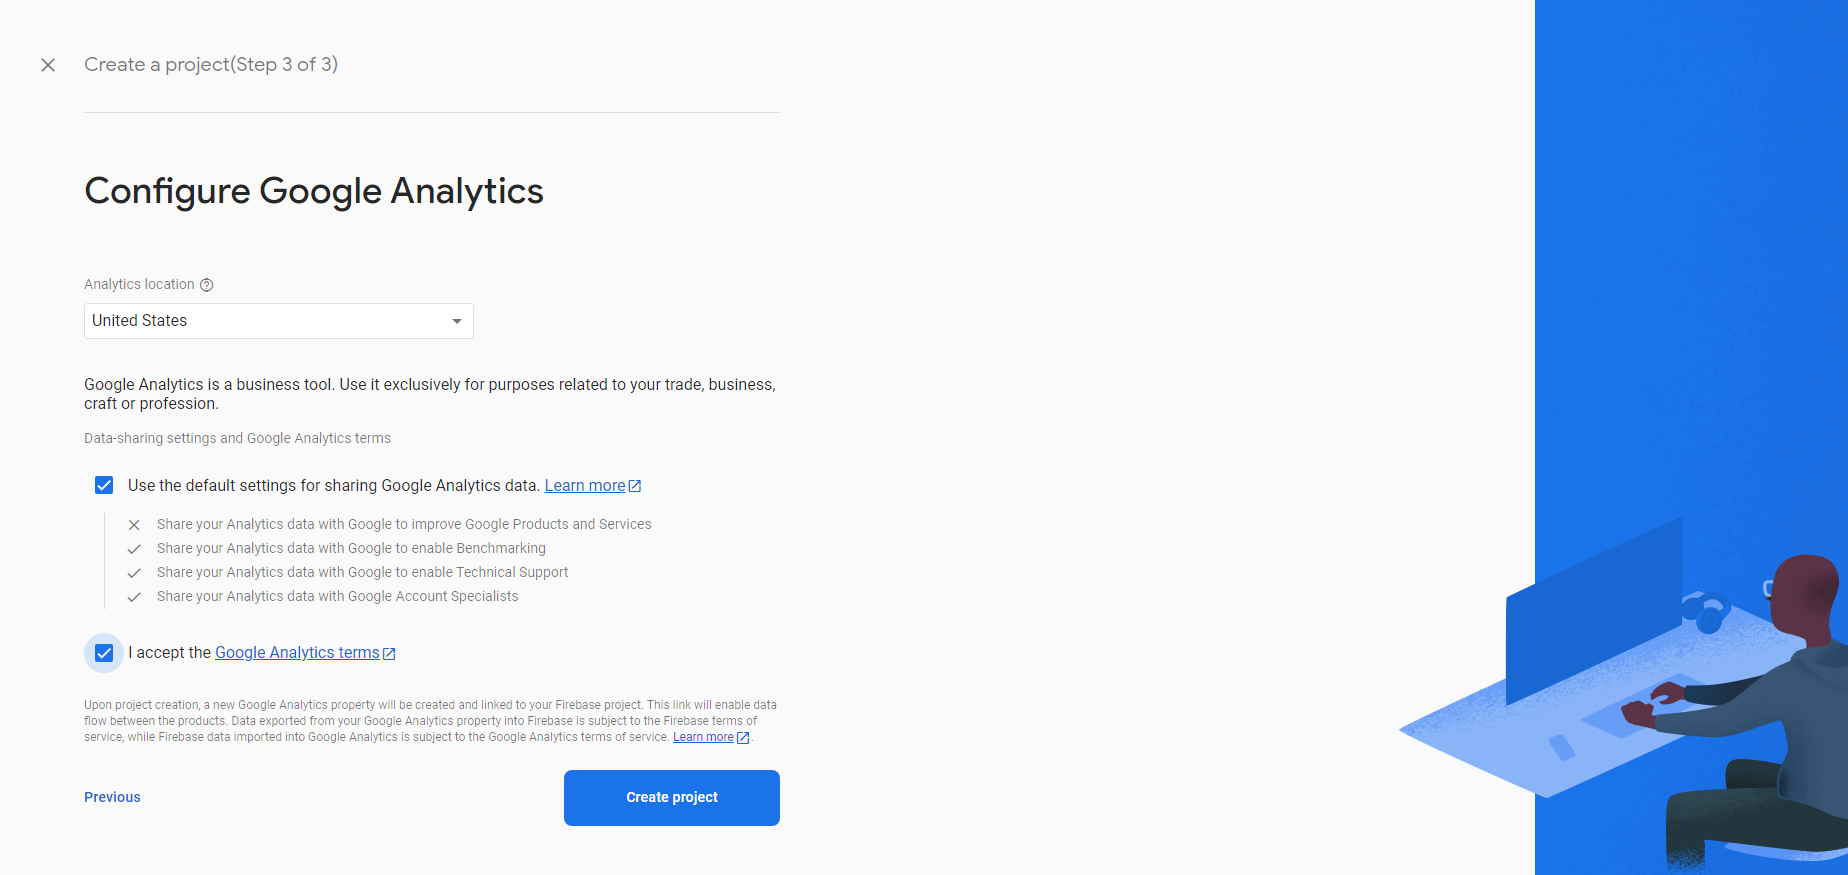
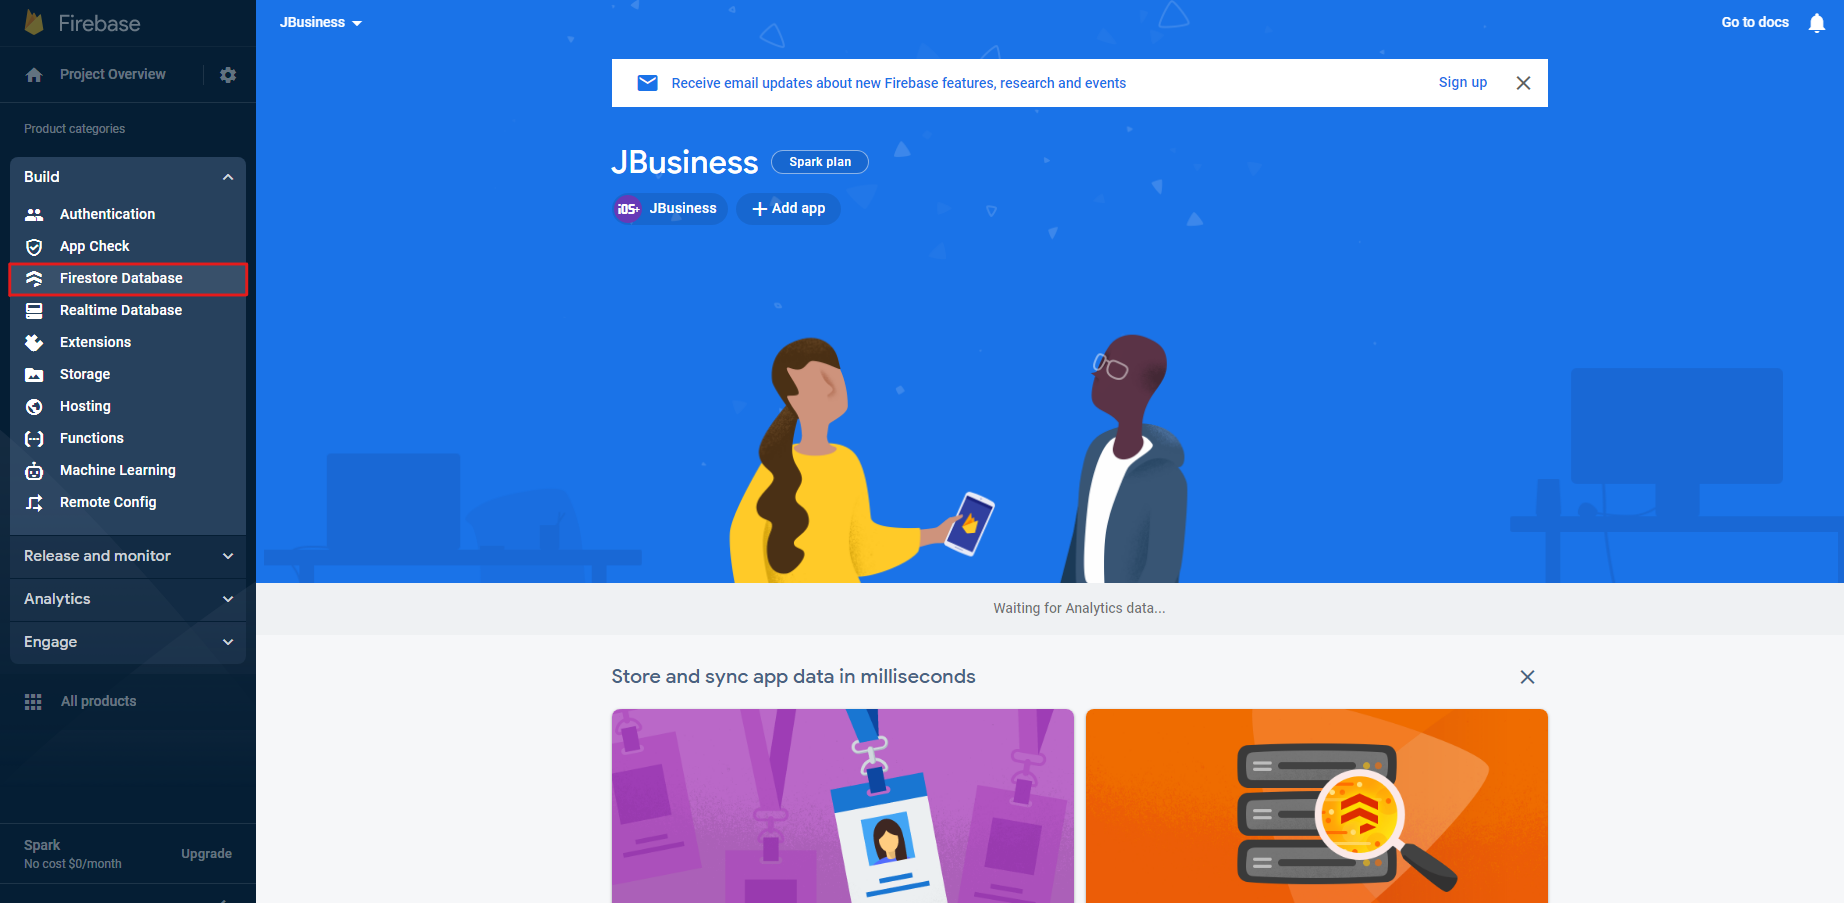
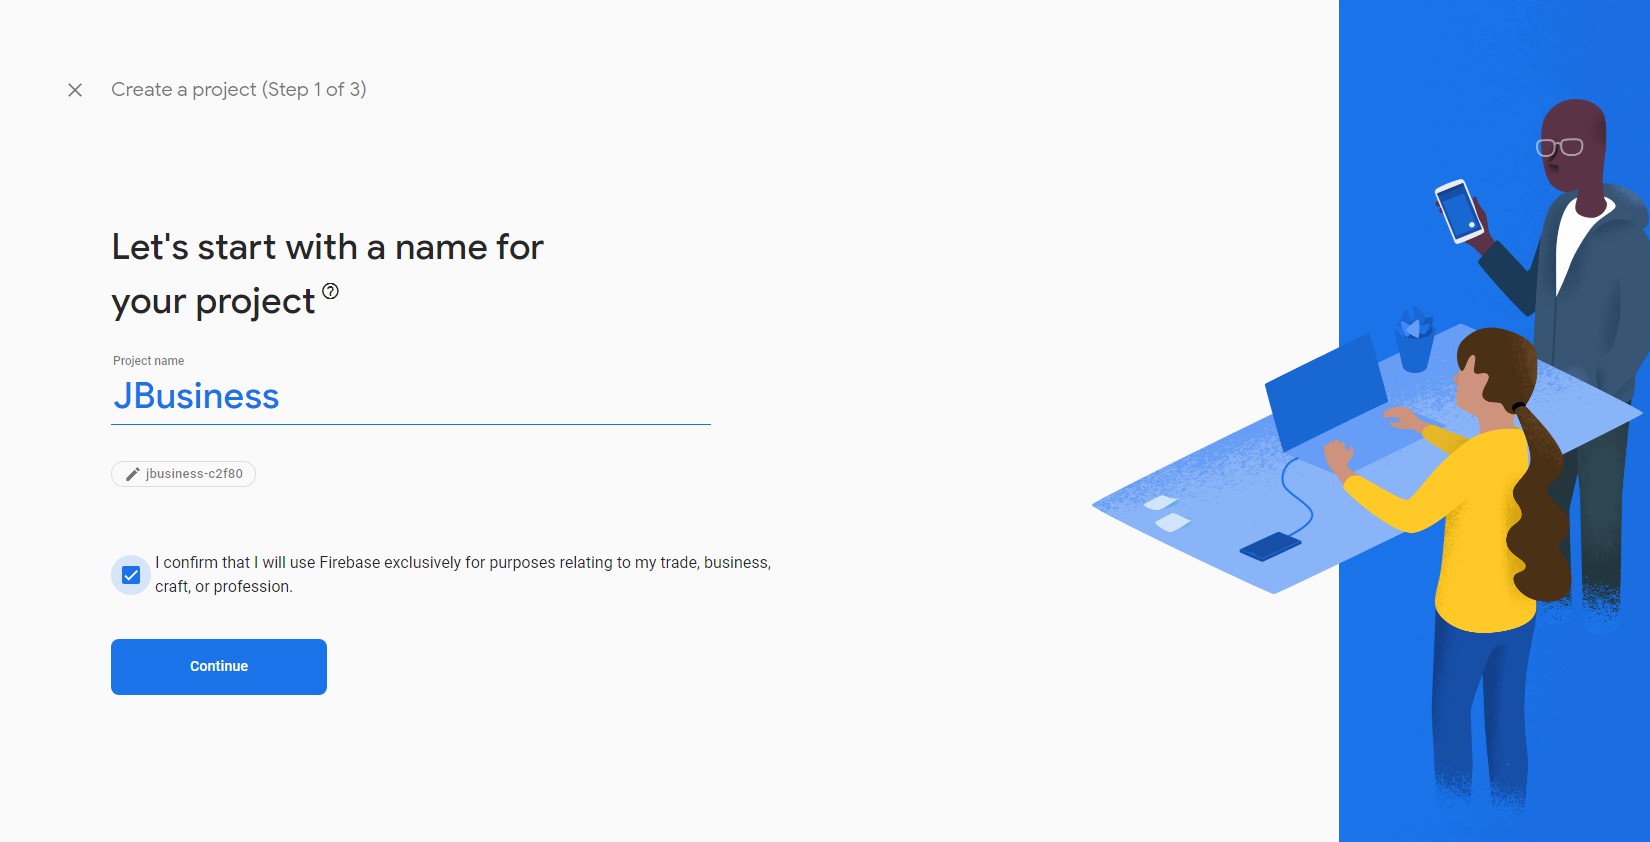
Create project in firebase
Firebase Landing Page
Firebase Add a New Project Dialog
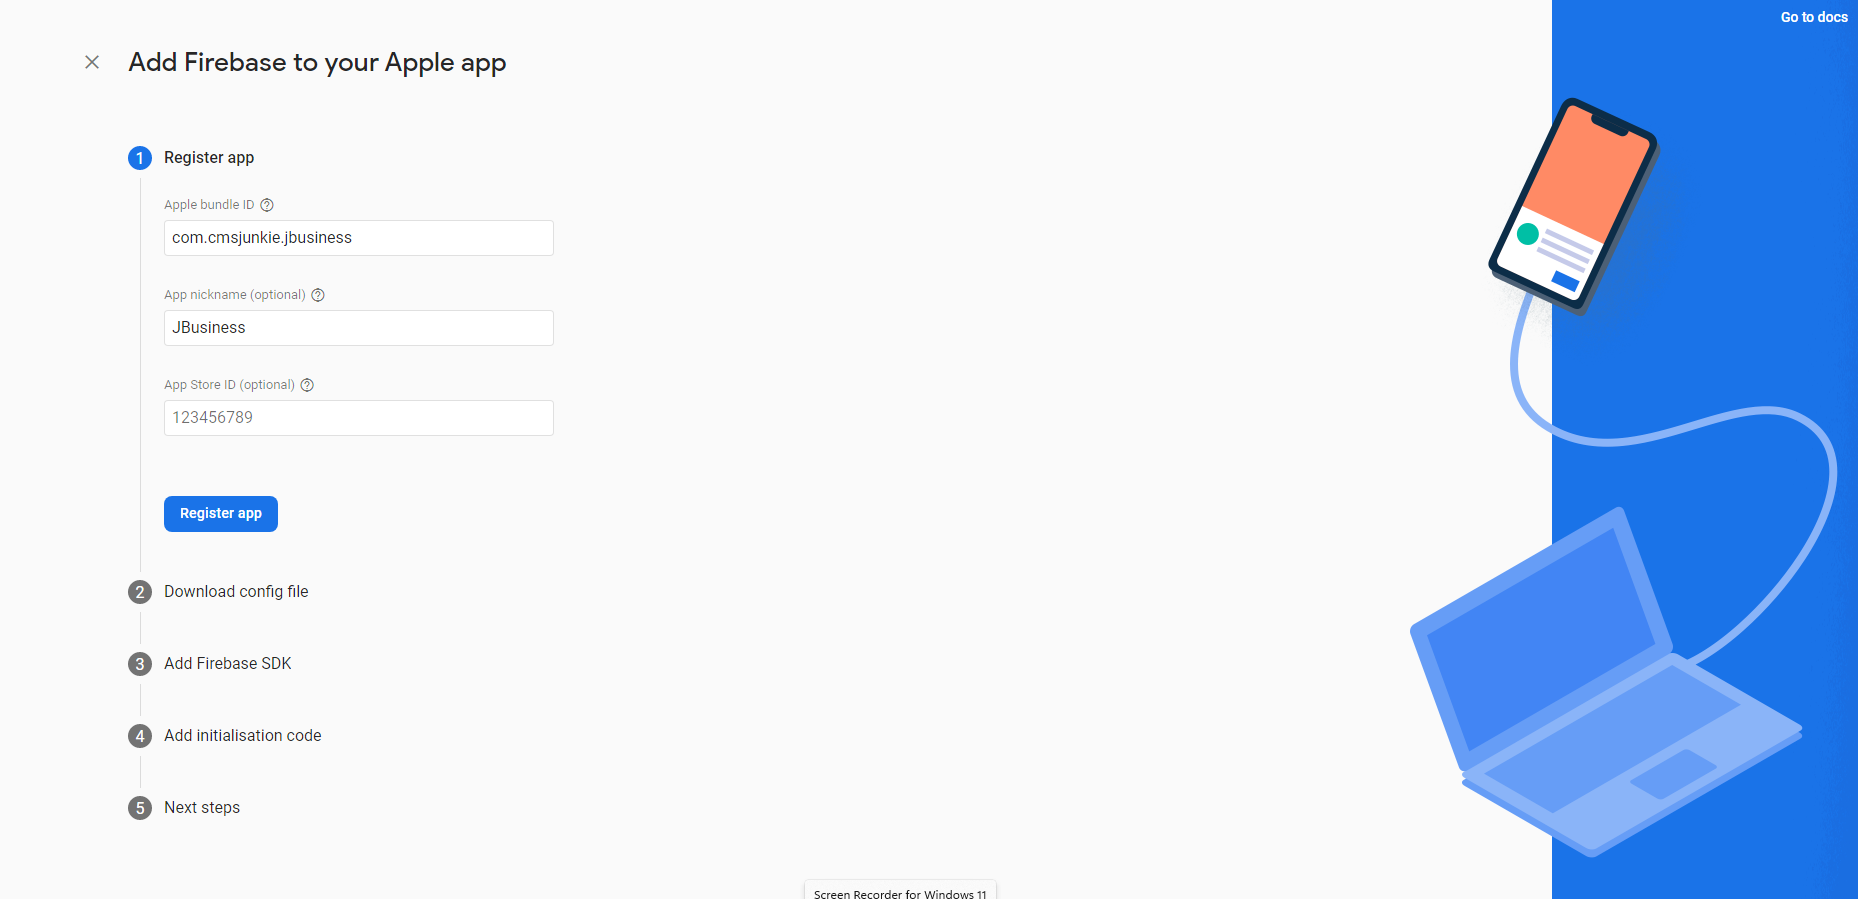
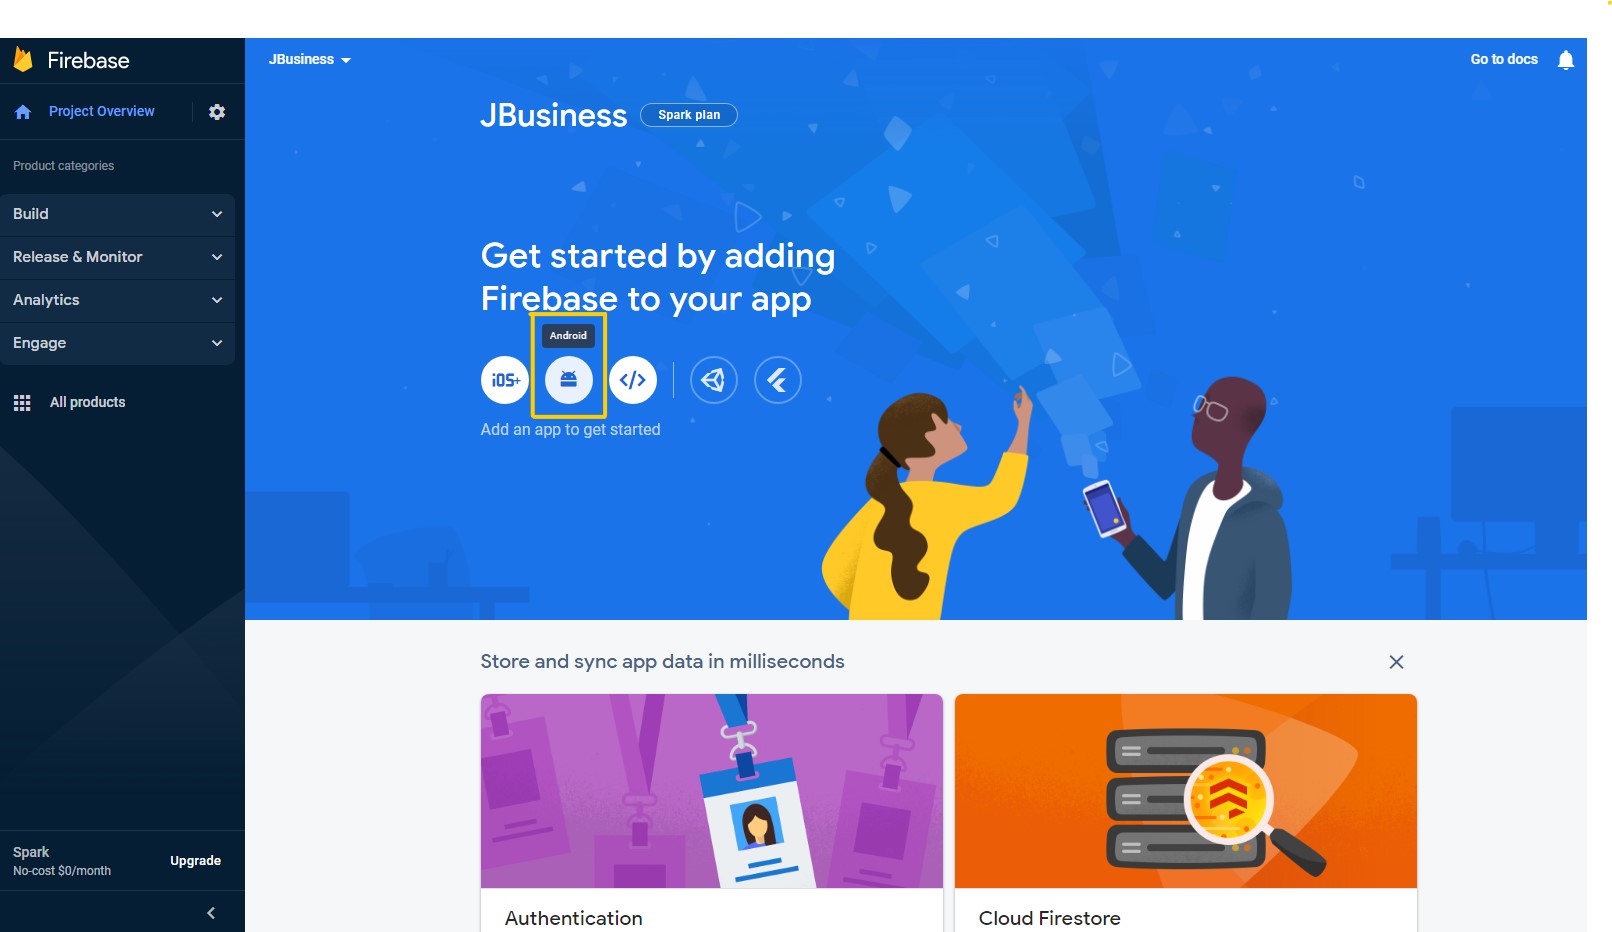
Add iOS app to project
Firebase Console Dashboard
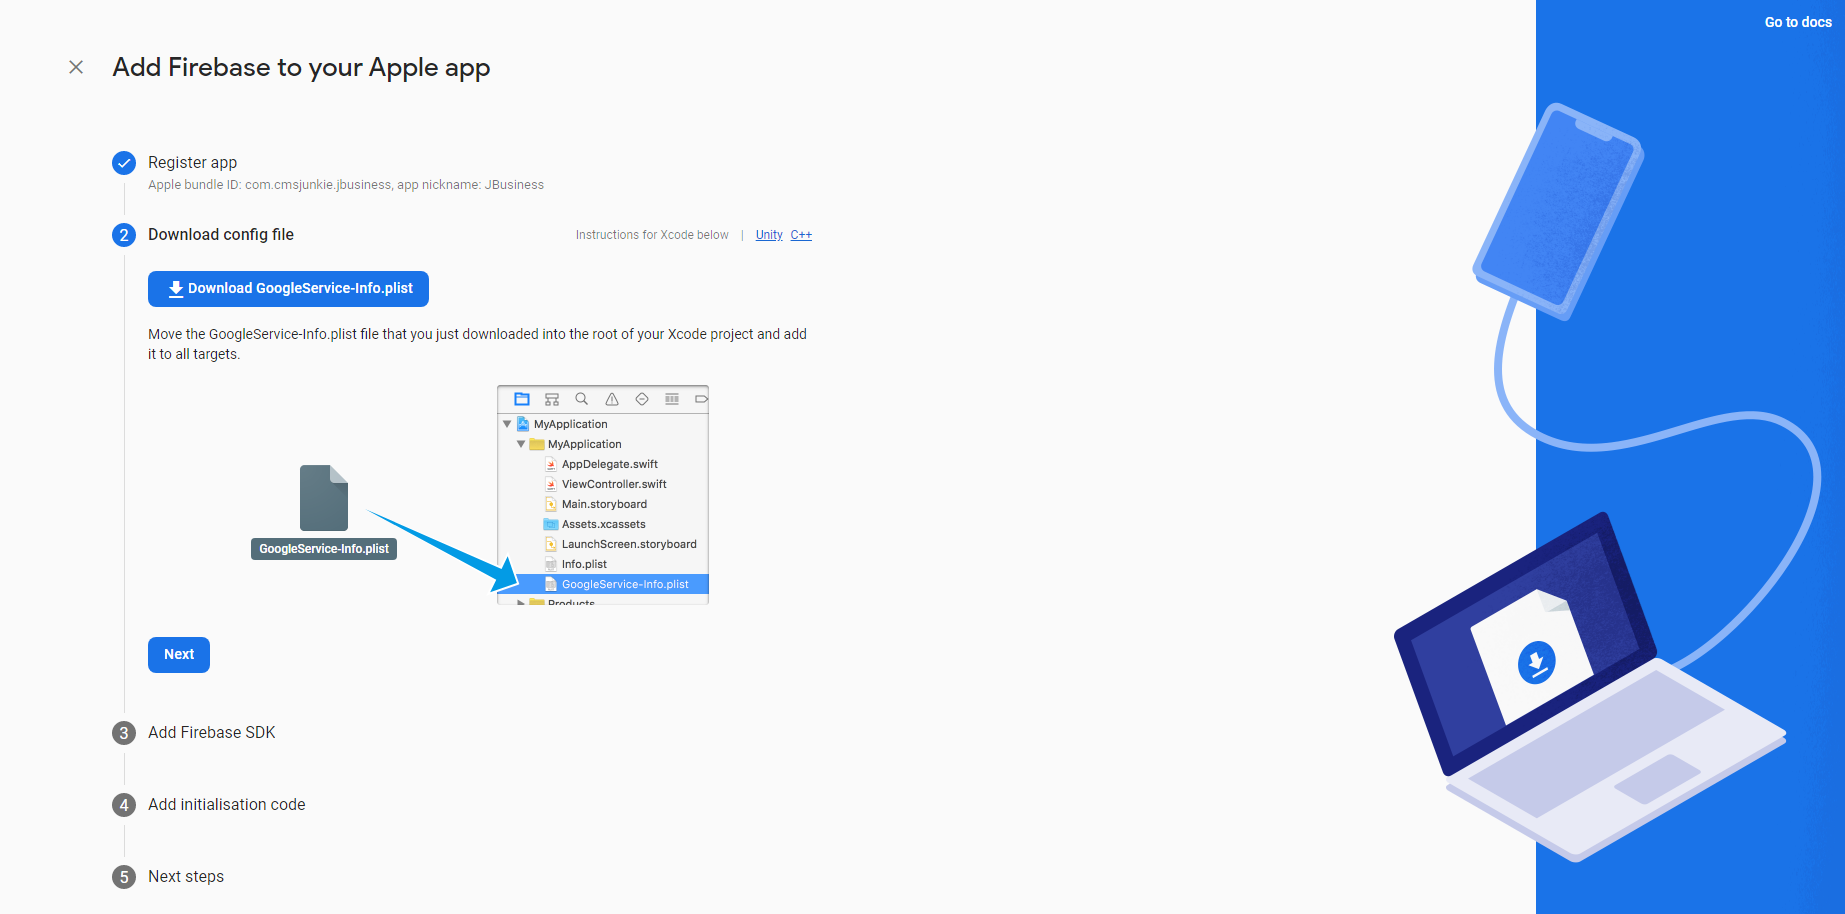
Download GoogleServices-info.plist
Firebase Project Register
Firebase Download GooglServices-info.plist
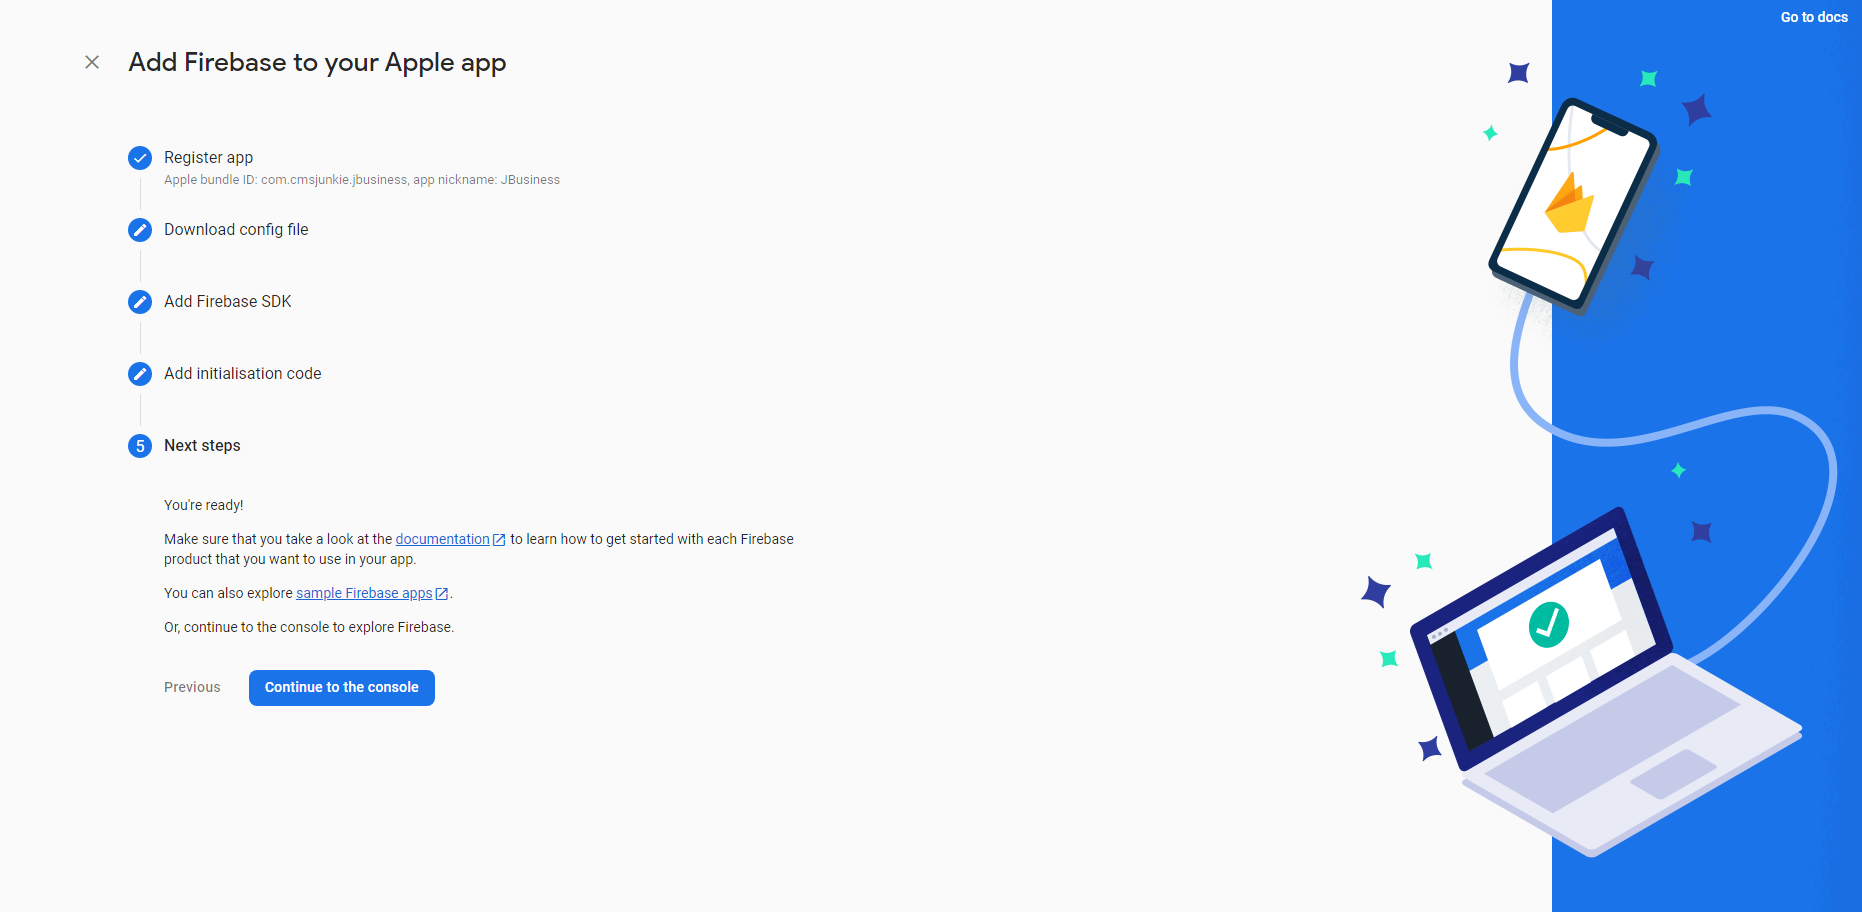
Firebase Verify Your Installation
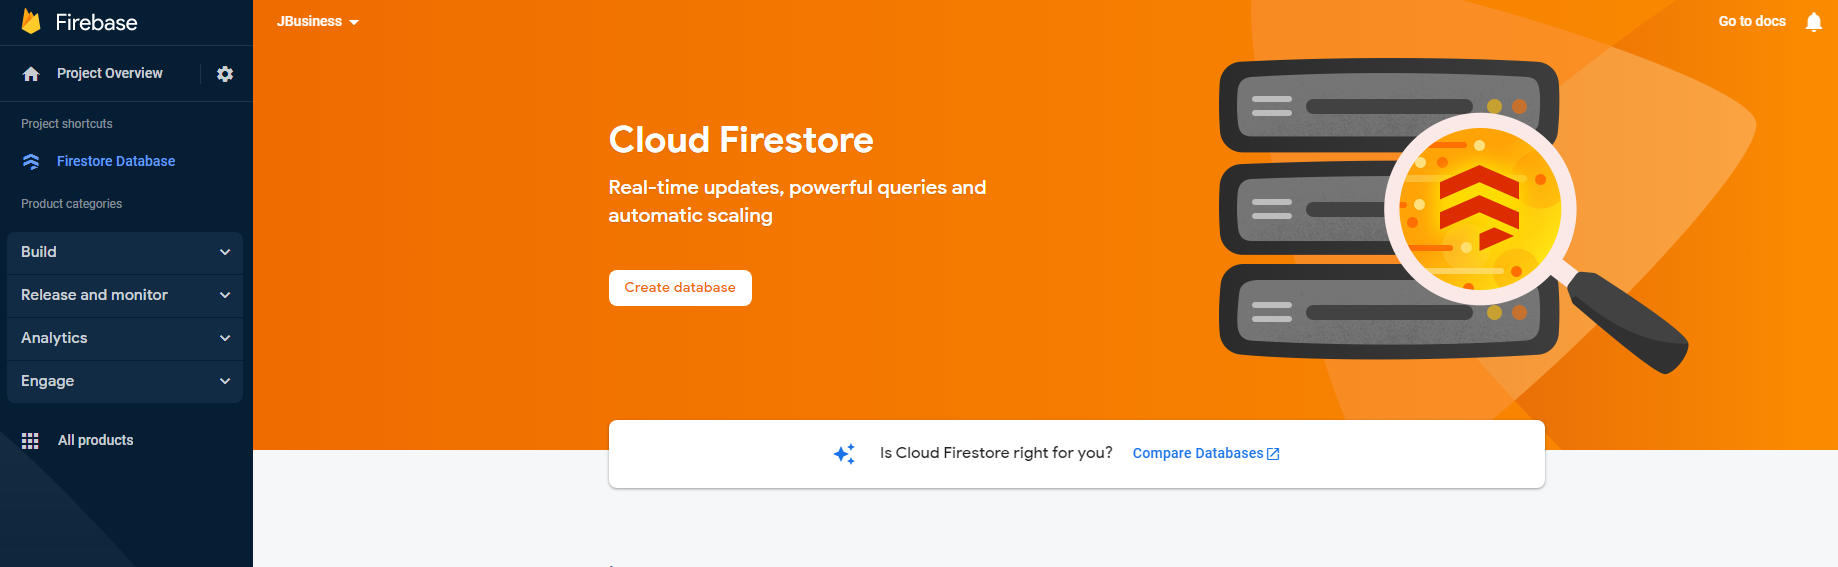
Setup Database
Go to database section
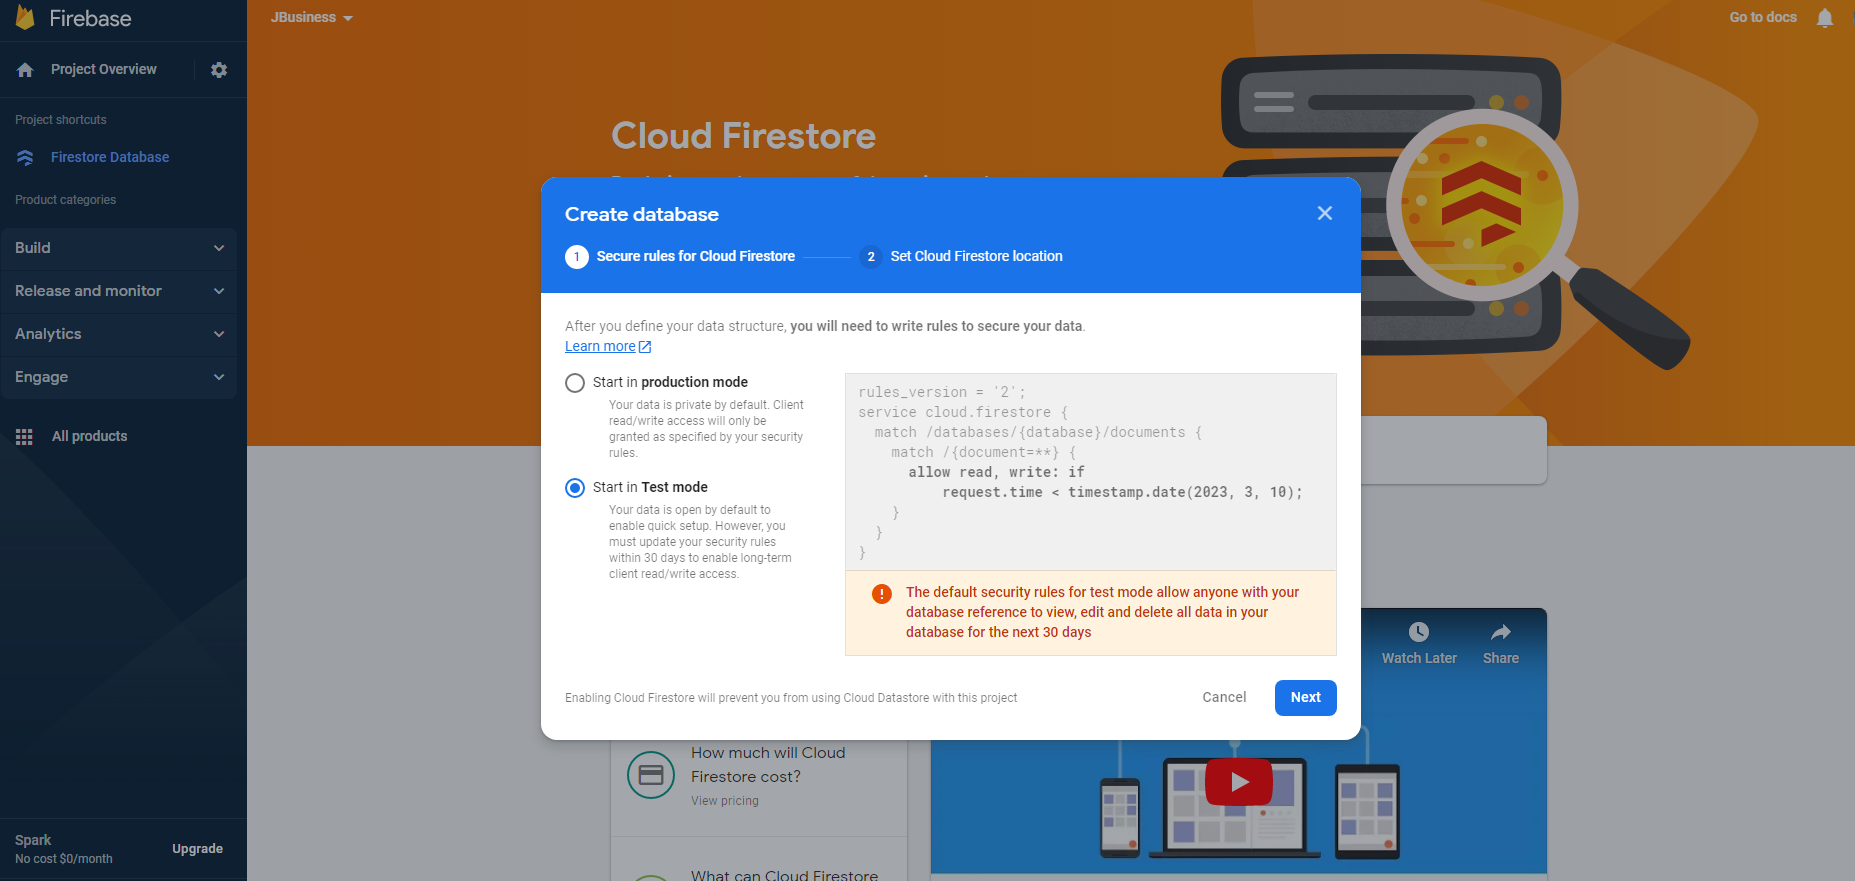
Create database
Start in test mode -> Enable
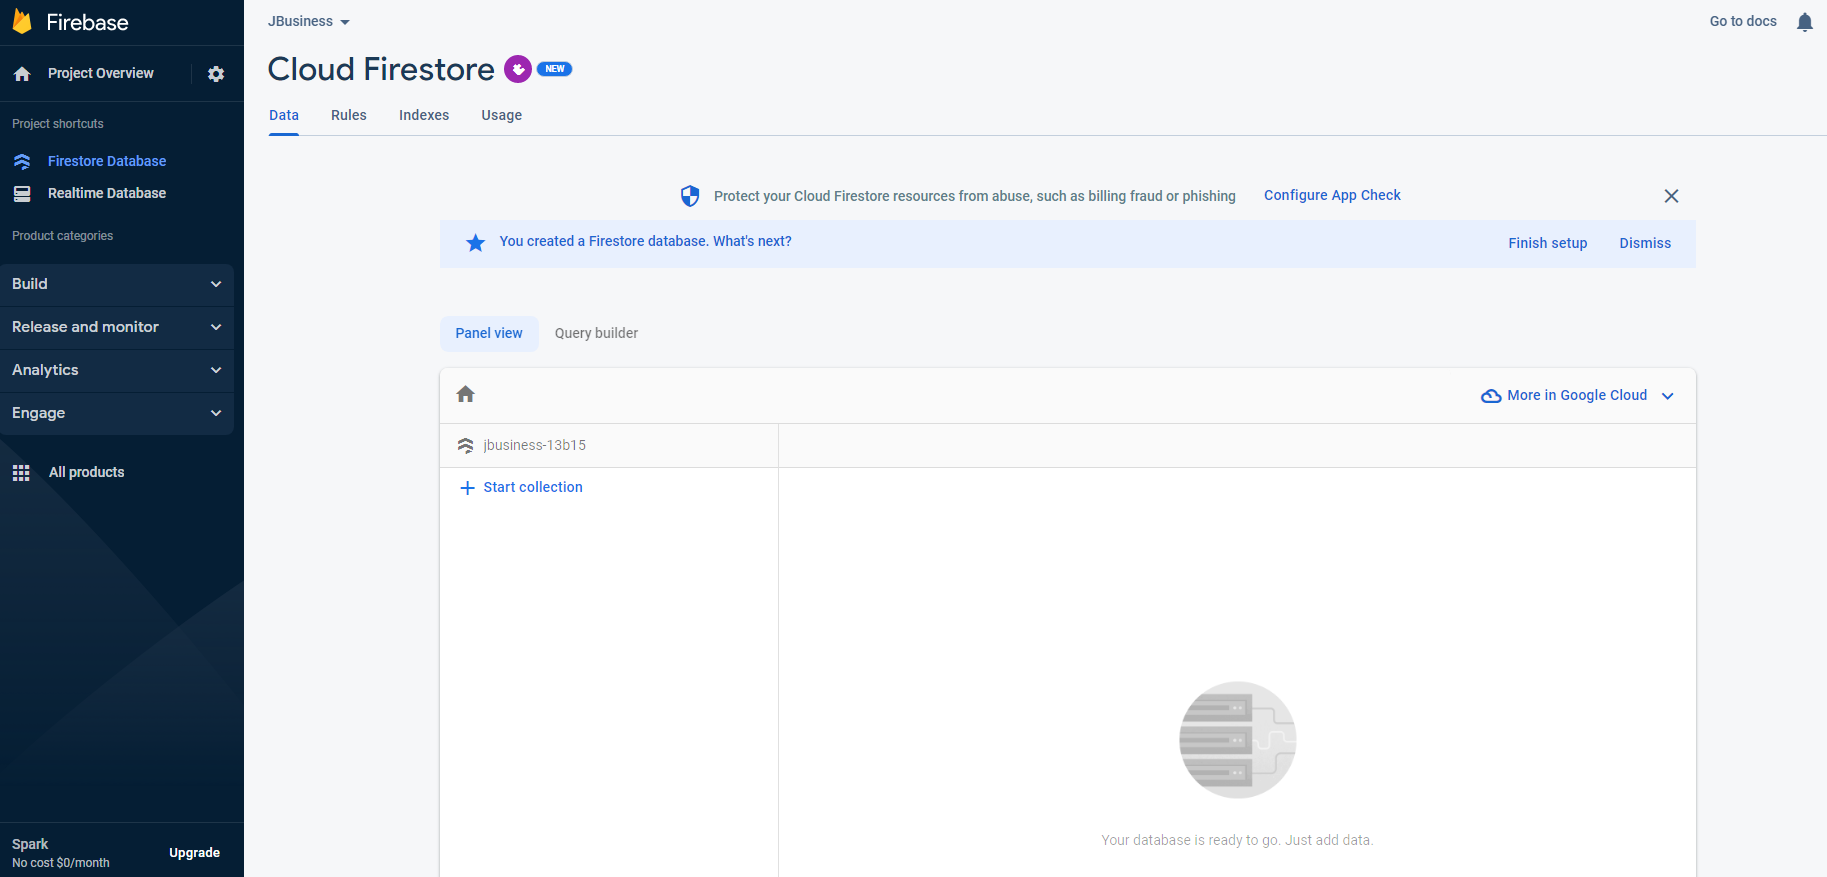
the Data tab should look like this
for the database please use the following rules:
{
  "rules": {
    ".read": true,
    ".write": true
  }
}
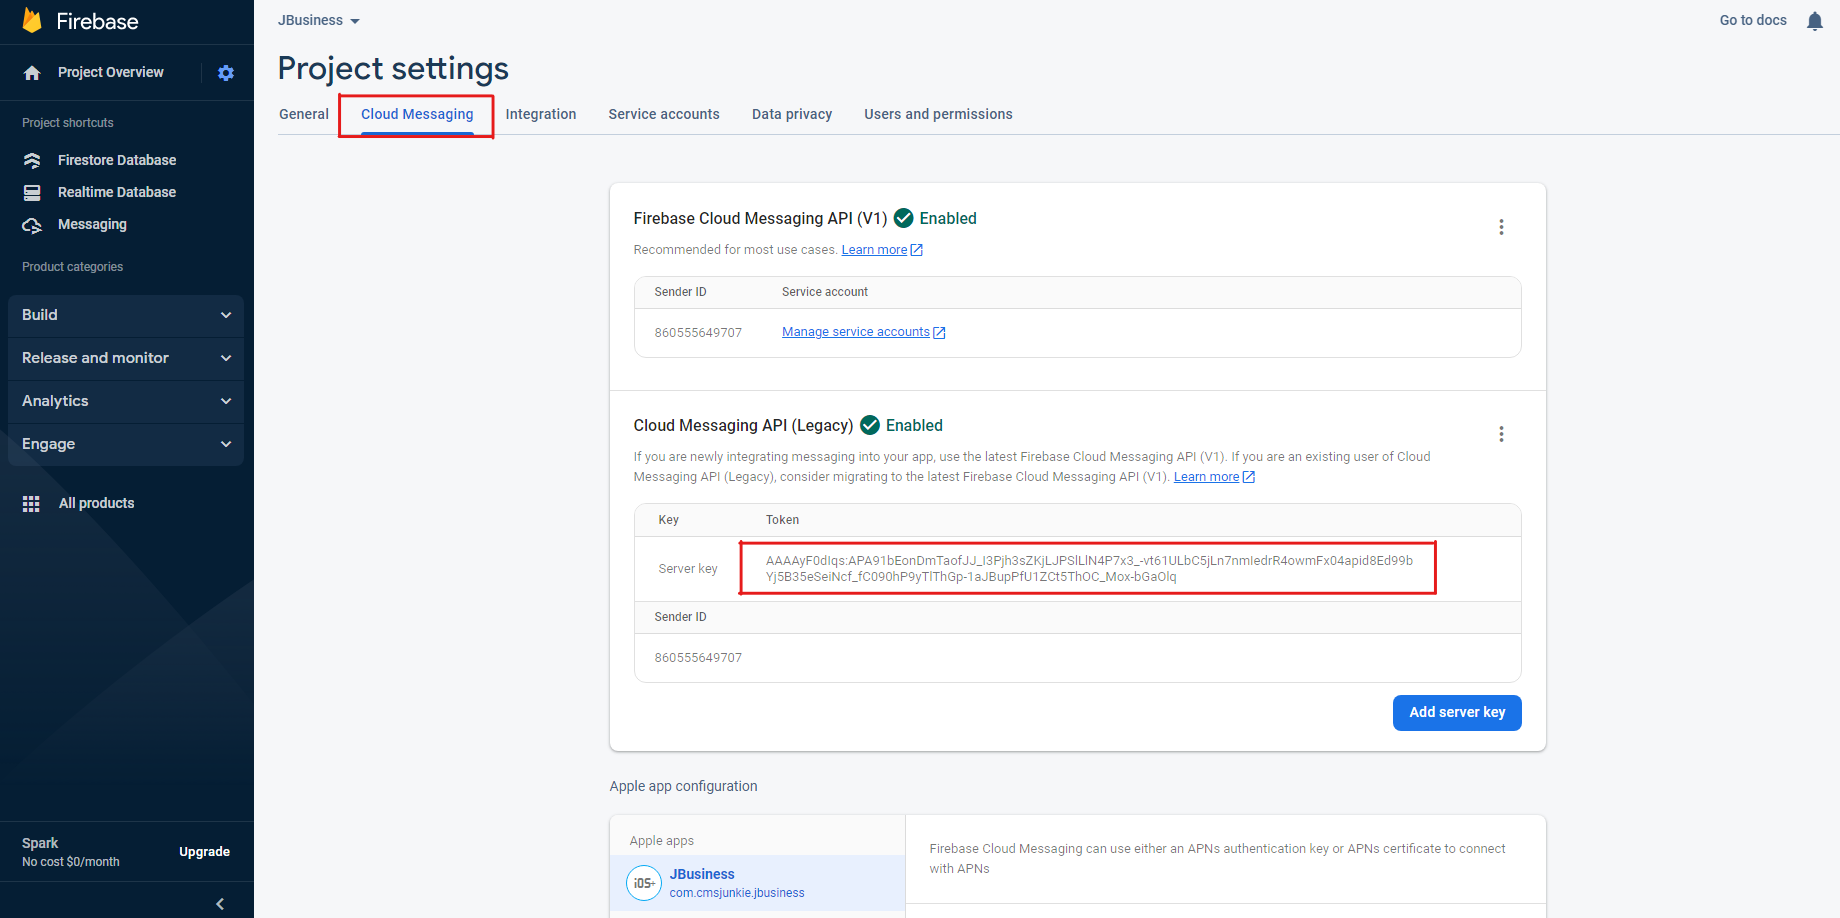
Get Web API Key
Settings -> Project Settings
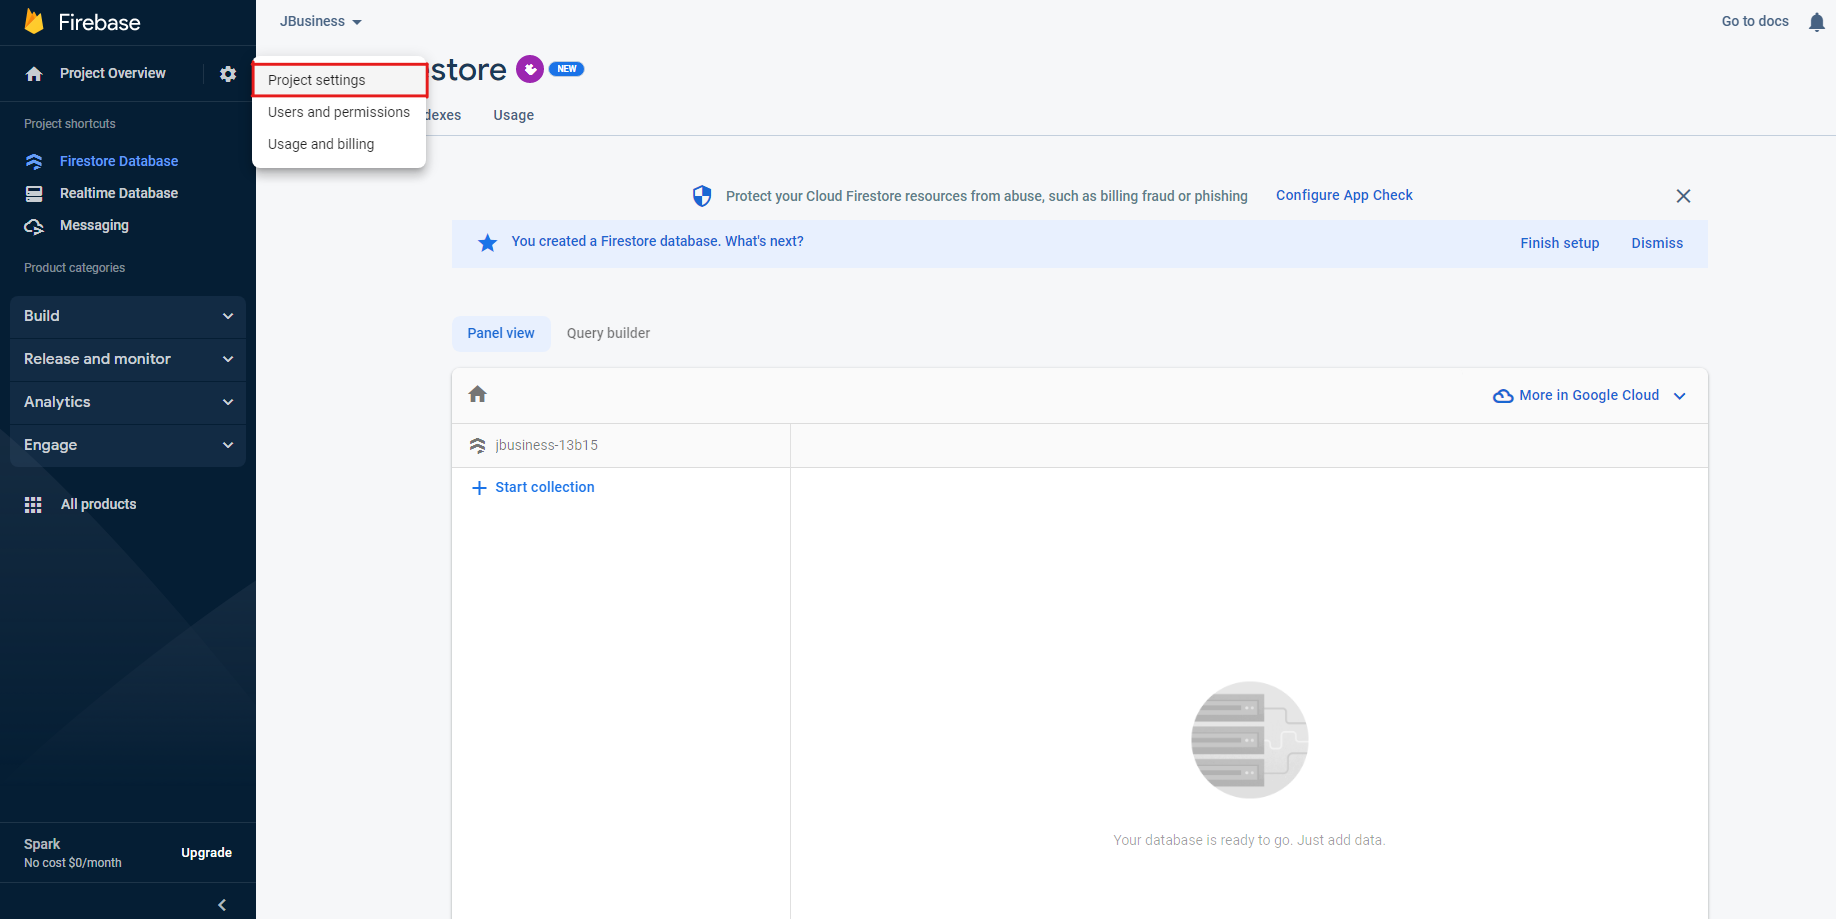
Cloud messaging -> Server Key
Copy paste key to Firebase server key on Mobile app configuration on the admin dashboard.
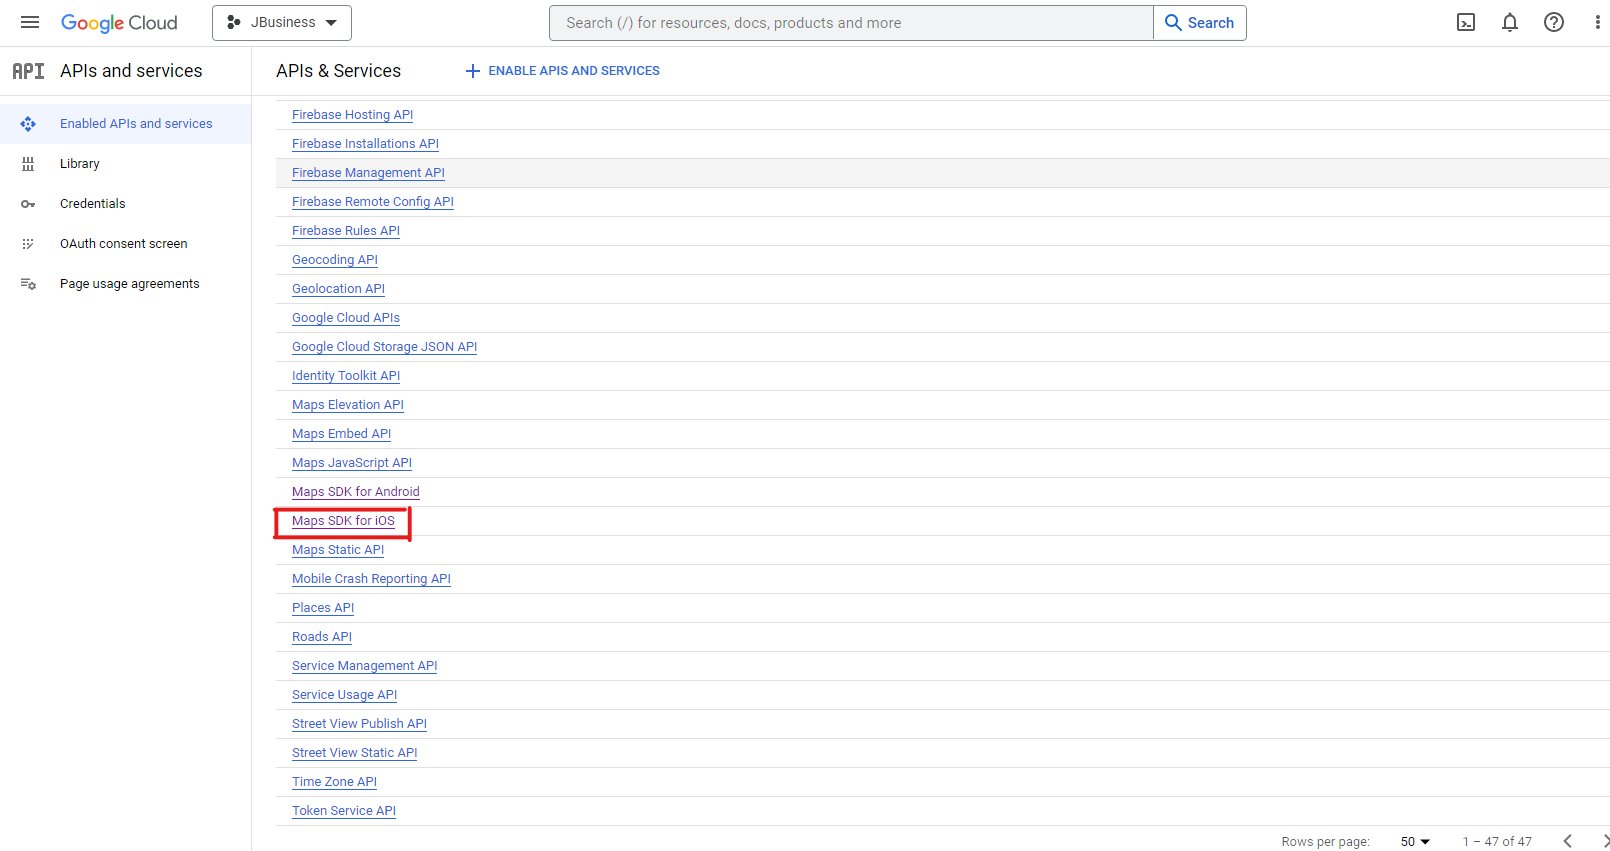
Google Maps API
Get API key for MAP SDK for iOS
Step 1

Step 2
Step 3
Registering for the Apple Developer Program
Begin registration as follows:
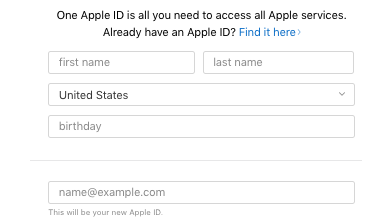
- Register at Apple to get an Apple ID. Or check if your company has an Apple ID already on the Apple support pages.
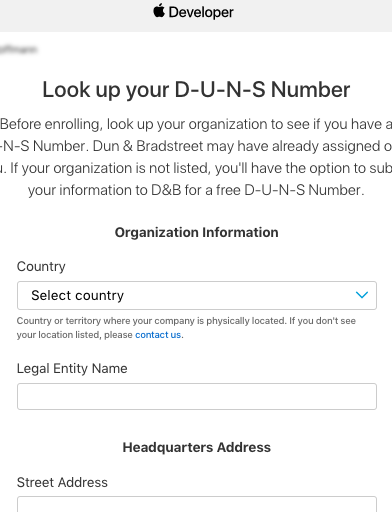
Register for a D-U-N-S number on the Apple D-U-N-S registration page.
- The D-U-N-S numbers are managed by Dun & Bradstreet and for free.
- Register for the Apple Developer Program. The membership costs $99 per year.

Within a few days following the registration, Apple will probably call you and ask you a few questions to ensure that your intentions for the app are in line with the Apple guidelines. Here are some possible questions and some ideas for your answers:
Q: What’s the name of the company that registers?
A: The name will be the same that was used to register for the D-U-N-S number.
Q: In which department does the contact person work?
A: Just state the department where you (the contact person for Apple) work.
Q: What is the purpose of the app?
A: To comply with Apple’s guidelines your app needs public relevance.You can easily create public relevance by explaining that your app will contain valuable information for a wide spread and public audience. For example, you can post job vacancies for potential new employees, company news for partners and customers, and offer additional information for employees that will be available after logging into the employee space.
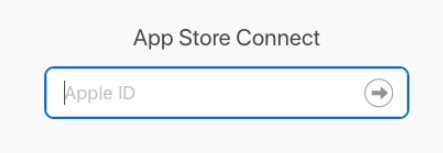
Log in to App Store Connect with your Apple ID to verify that everything works correctly.
Creating the iOS Distribution Certificate
The iOS distribution certificate ensures that the code of the app originates from the organization that signed the app and has not been altered.
Preparing the iOS Distribution Certificate
Log in to your Apple Developer account and navigate to Certificates, IDs & Profiles > Certificates > Production.
Add a new certificate.
Set up a certificate of type Production and activate App Store and Ad Hoc. .. image:: _images/rect826.png
Click Continue.
- To proceed with the next step you need a Certificate Signing Request (CSR). You leave the Apple Developer interface as is now and come back later when you have created a CSR.
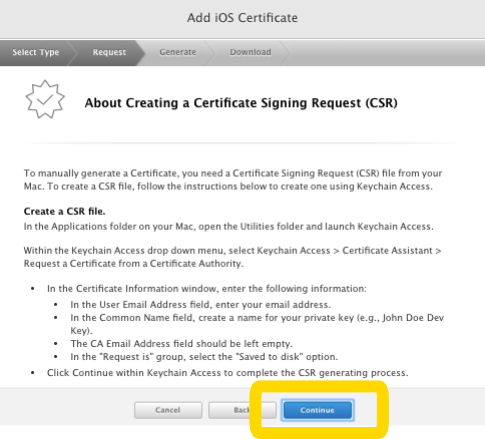
Preparing the Signing of the Certificate
You need a Mac for the next steps. In case you work on another operating system contact your Customer Success Manager to get further support.
On a Mac, open the Keychain Access program.
- In the menu bar, navigate to Keychain Access > Certificate Assistant > Request a Certificate From a Certificate Authority.
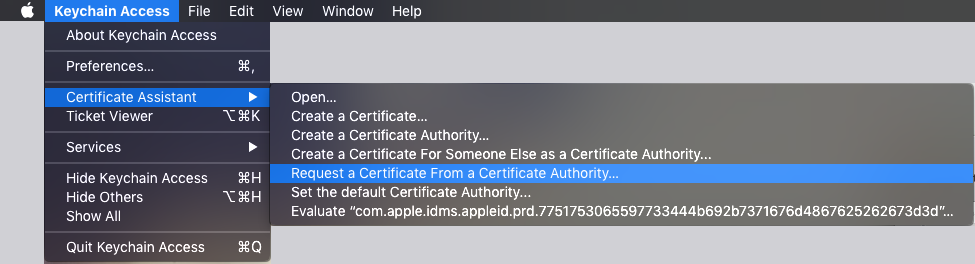
The Certificate Assistant opens and creates a Certificate Signing Request (CSR) that is submitted to a certificate authority that verifies the information in the request.
Enter your Apple ID and email address in the dialog.
Click Continue.
Select a folder for saving the CSR file.
Click Done.
Finalizing the iOS Distribution Certificate
Go back to the Apple Developer account where you started to create a certificate.
Click Continue.
Select the CSR file you just generated.
Click Continue.
The certificate is created and signed.
Download the newly created certificate.
The downloaded certificate will later be used in the Mobile Form
Click Done.
The certificates overview with your new certificate is displayed.
Obtaining the Certificate & Private Key(.p12)
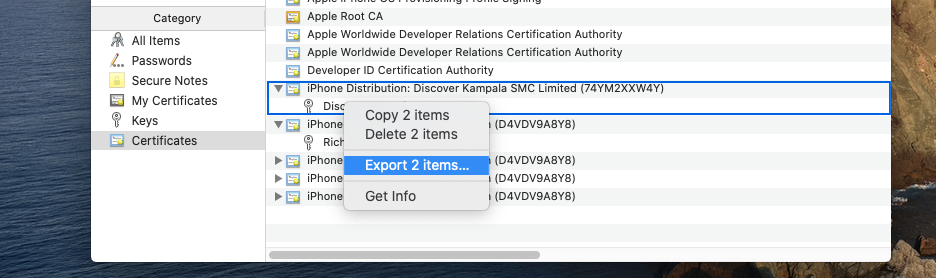
Open the certificate file downloaded in the previous step.
In the Keychain app on your Mac, click on the Certificates item on the left menu
Identify the certificate you just added and expand the certificate as per the image below
Select both the certificate and the private key
Right click on the items as select Export 2 items…
Set the password to jbusiness
Creating the iOS App ID
Creating the App ID
Log in to your Apple Developer account and navigate to Certificates, IDs & Profiles > Identifiers > App IDs.
Add a new app ID.
- Fill in a name. The name is not visible to the end user.
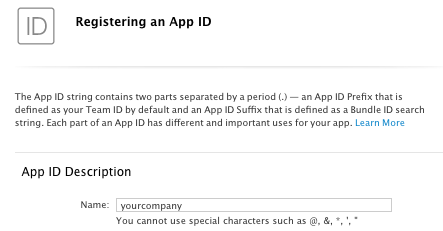
Activate Explicit App ID.
Fill in a Bundle ID. Best practice is to use your external domain name backwards + app name, for example com.yourcompany.app.
In the section App Services, leave the default activated. Activate Push Notifications.
Click Continue.
An overview of the entered data is displayed.
Check the data and click Submit.
Creating the iOS Provisioning Profiles
Creating the Provisioning Profile of Type App Store
Log in to your Apple Developer account and navigate to Certificates, IDs & Profiles > Identifiers > Provisioning Profiles.
- Add a new provisioning profile.
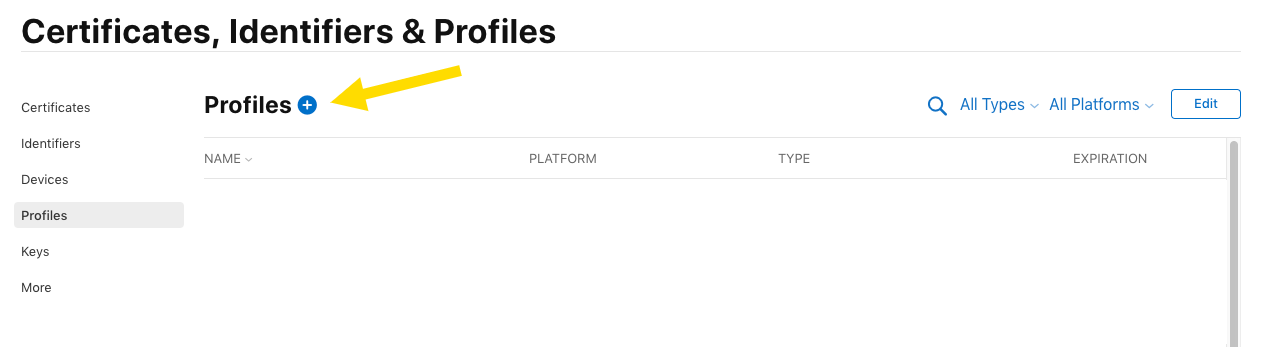
- Activate App Store.
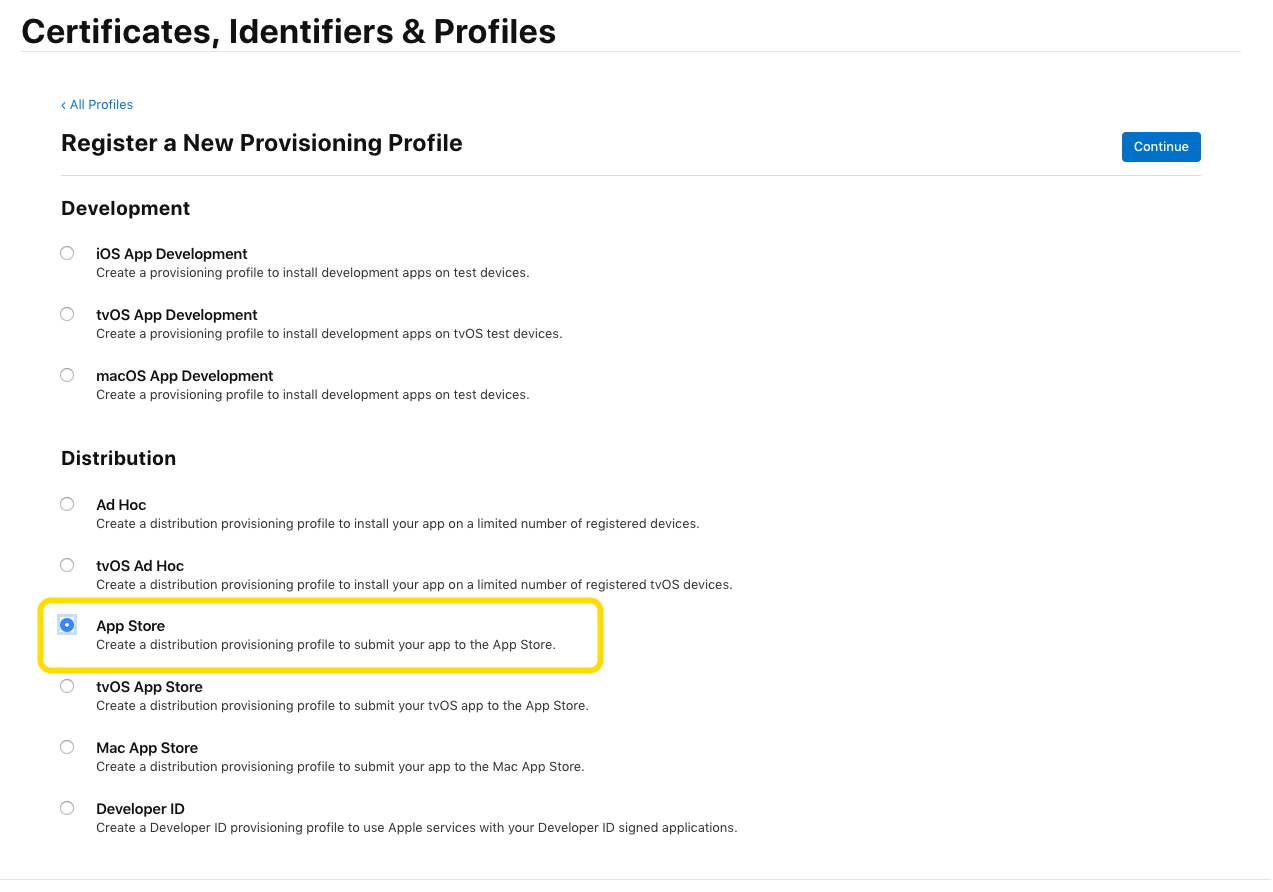
Click Continue.
From the dropdown menu, select the app ID you just created.
Click Continue.
Select the certificate you just created.
Click Continue.
Fill in a name of your choice. The name is not visible to end users.
Click Generate.
Download the provisioning profile.
Click Done.
The provisioning profiles overview with your new provisioning profile is displayed.
Creating the Provisioning Profile of Type Ad Hoc
In your Apple Developer account navigate to Certificates, IDs & Profiles > Identifiers > Provisioning Profiles.
- Add a new provisioning profile.
-
- Activate Ad Hoc.
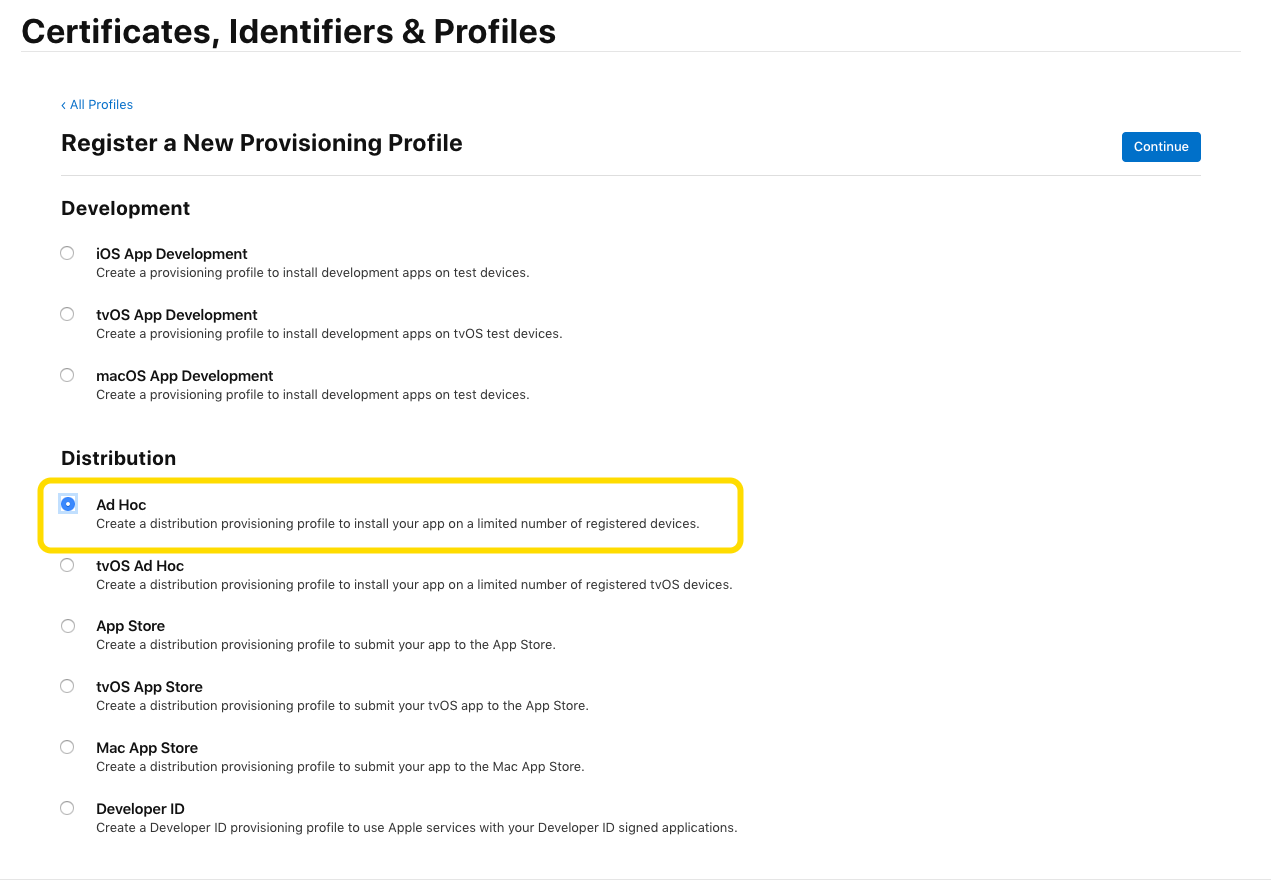
Continue with step 4 to 12 as described above.
Creating an App Profile in App Store Connect
Log in to App Store Connect and navigate to My Apps.
- Click on New App.
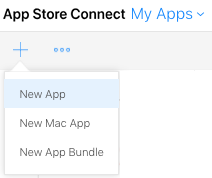
- This creates the profile for the app. The profile will contain all the settings related to the app and the Apple App Store.
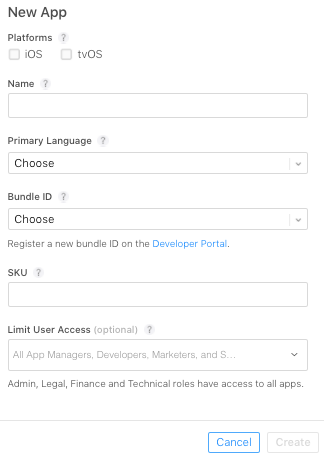
Fill in the app name.
The app name is reviewed by the Apple reviewer. If the app name does not fit with the Apple guidelines this will result in an app rejection.
Do not use “employee app” as your app name. Apple requires the app to have public relevance instead of focussing on a single target group.
Set the primary language.
Fill in a Bundle ID. The ID is not visible to end users.
Fill in a unique ID in the field SKU. The ID is not visible to end users.
Click Create.
Adding the App Store Information
Configuring the App Information
Log in to App Store Connect and navigate to My Apps and open the app profile you created earlier.
Make sure all the required languages are set.
Check the app name.
Add a link to the privacy policy in your app.
Select the categories for your app. CMSJunkie suggests Social network and News.
Click Save.
Configuring Pricing and Availability
Navigate to Pricing and Availability.
Set app pricing to free.
Adjust available countries if necessary.
If you restrict the availability of your app to certain countries, only employees with app store accounts in those countries will be able to find and download your app in the stores. The geographical location of the employee does not matter for accessing the app store.
For example, an app is only available in the French app store. In this case an US American employee would not be able to see the app. A French employee who resides in the USA will still be able to download and use the app while being in the USA.
Select Available with no discount.
Click Save.
Configuring the Current Version of the App
CMSJunkie provides you with files and information you need to fill into your app profile:
Screenshots of your app
The version number of your app file
Reviewer login credentials
Navigate to iOS App current version, usually 1.0.
For each language:
Fill in the app information.
Add the store description.
Your app needs public relevance to get into the Apple App Store. You create an app store description that creates public relevance by mentioning the following points:
Introduce your company, e.g., your field of service and your typical customers.
Describe your app’s target audience as partners, employees, and customers.
Explain the content that will be available in the public area, e.g., company news, event reviews, and jobs.
Mention features like push notifications.
Example: This app keeps you up-to-date regarding listing information, offers and event about company ABC. With push notifications, you know what’s going on - always and everywhere. On top of that, the app offers the following features: […] Stay tuned!
Add more keywords that fit the company name and description, e.g. info, feed, events, information, notification.
Add the support URL and marketing URL, both can be your homepage.
Adjust version to the version number you received from CMSJunkie.
Fill the Copyright section with your company information.
Edit the rating. In most cases select None or No.
Add the credentials of the reviewer login to the ones you received from CMSJunkie.
Adjust the release timing if necessary
Click Save.
Add CMSJunkie to the Developer Account
Adding a new Developer to your developer.apple.com account To access your account, a new Developer user will need to be invited.
To invite team members
Login to App Store Connect (https://appstoreconnect.apple.com/).
Open the Users and Access section.
Click the ‘+’ button in the top-left corner of the page.
Enter the new users details. Please use support@cmsjunkie.com as email
Grant the user with at least the Admin or App Manager role.
Enable ‘Access to Certificates, Identifiers & Profiles’.
Click Invite to send an invite.

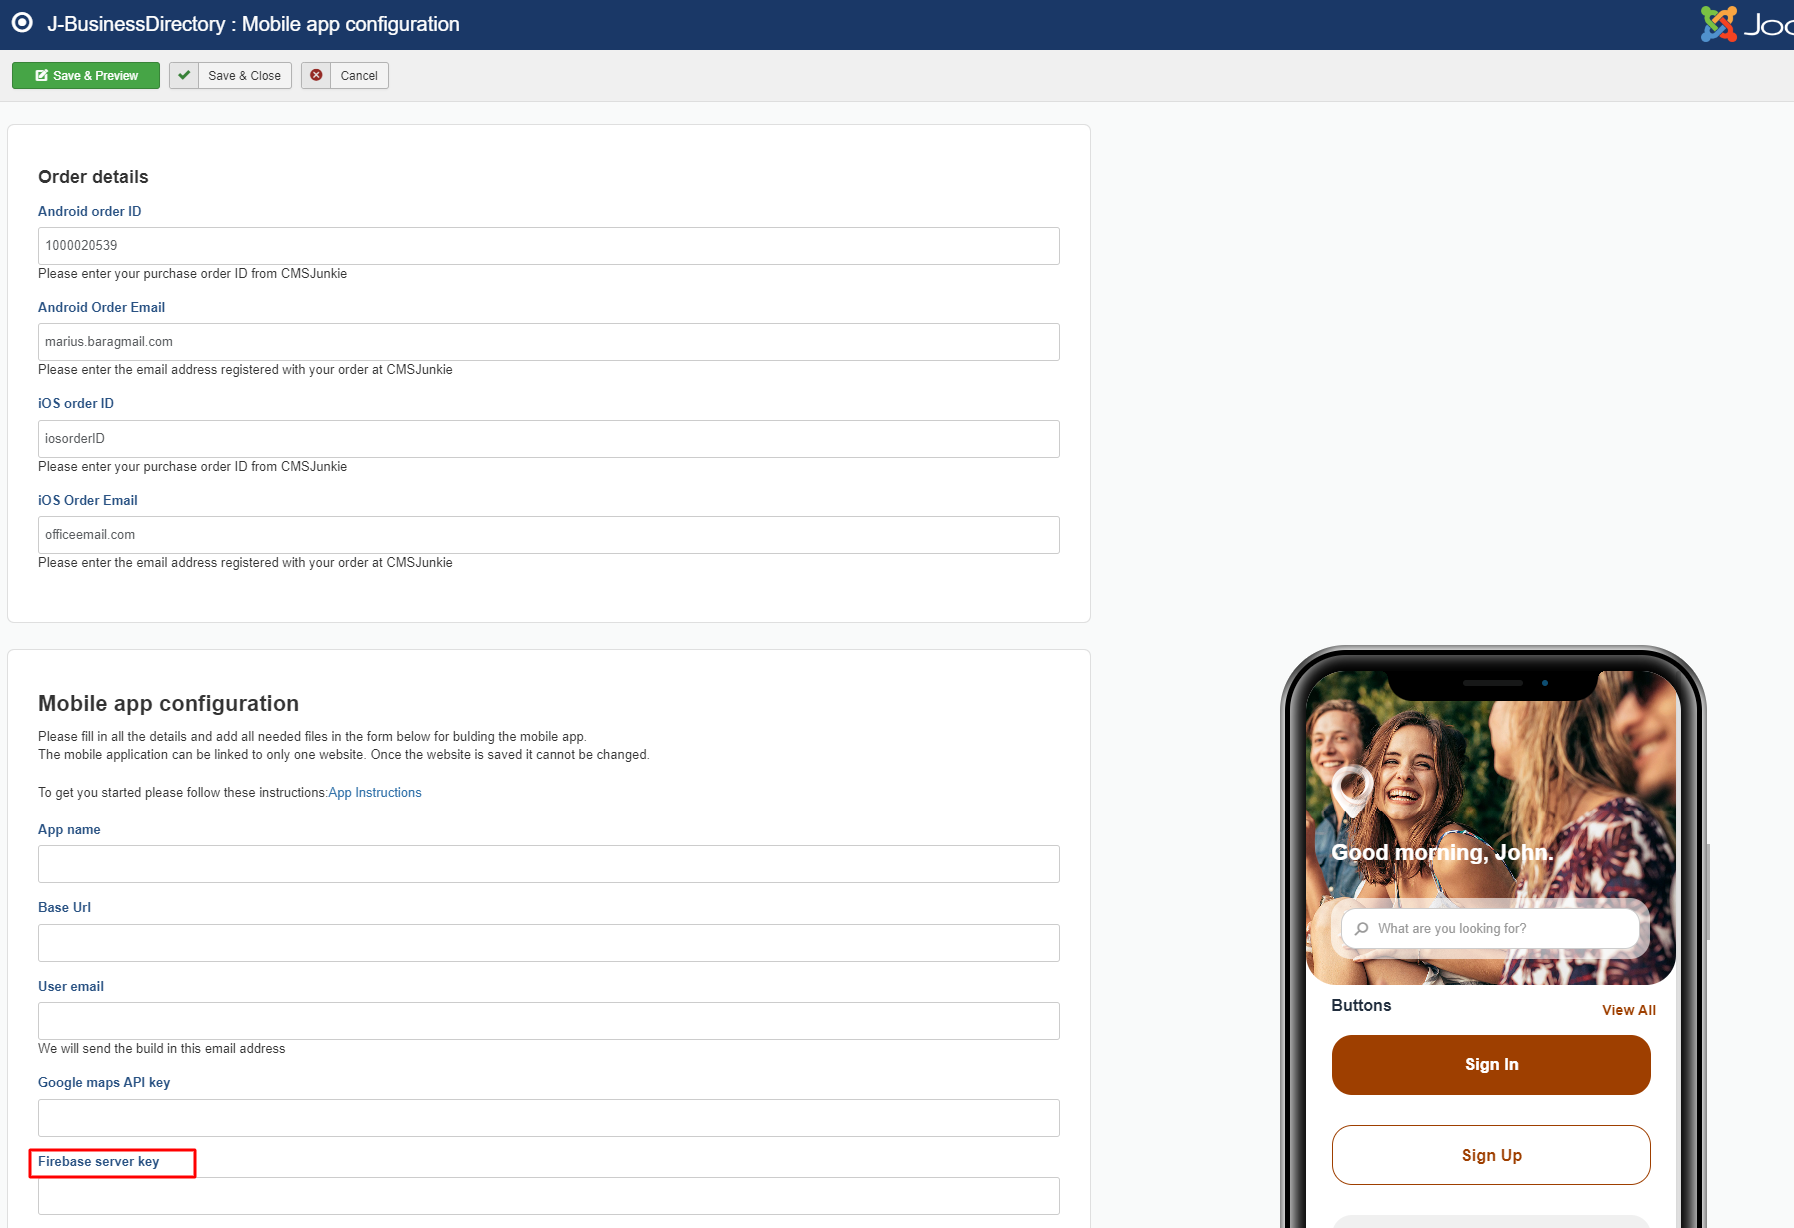
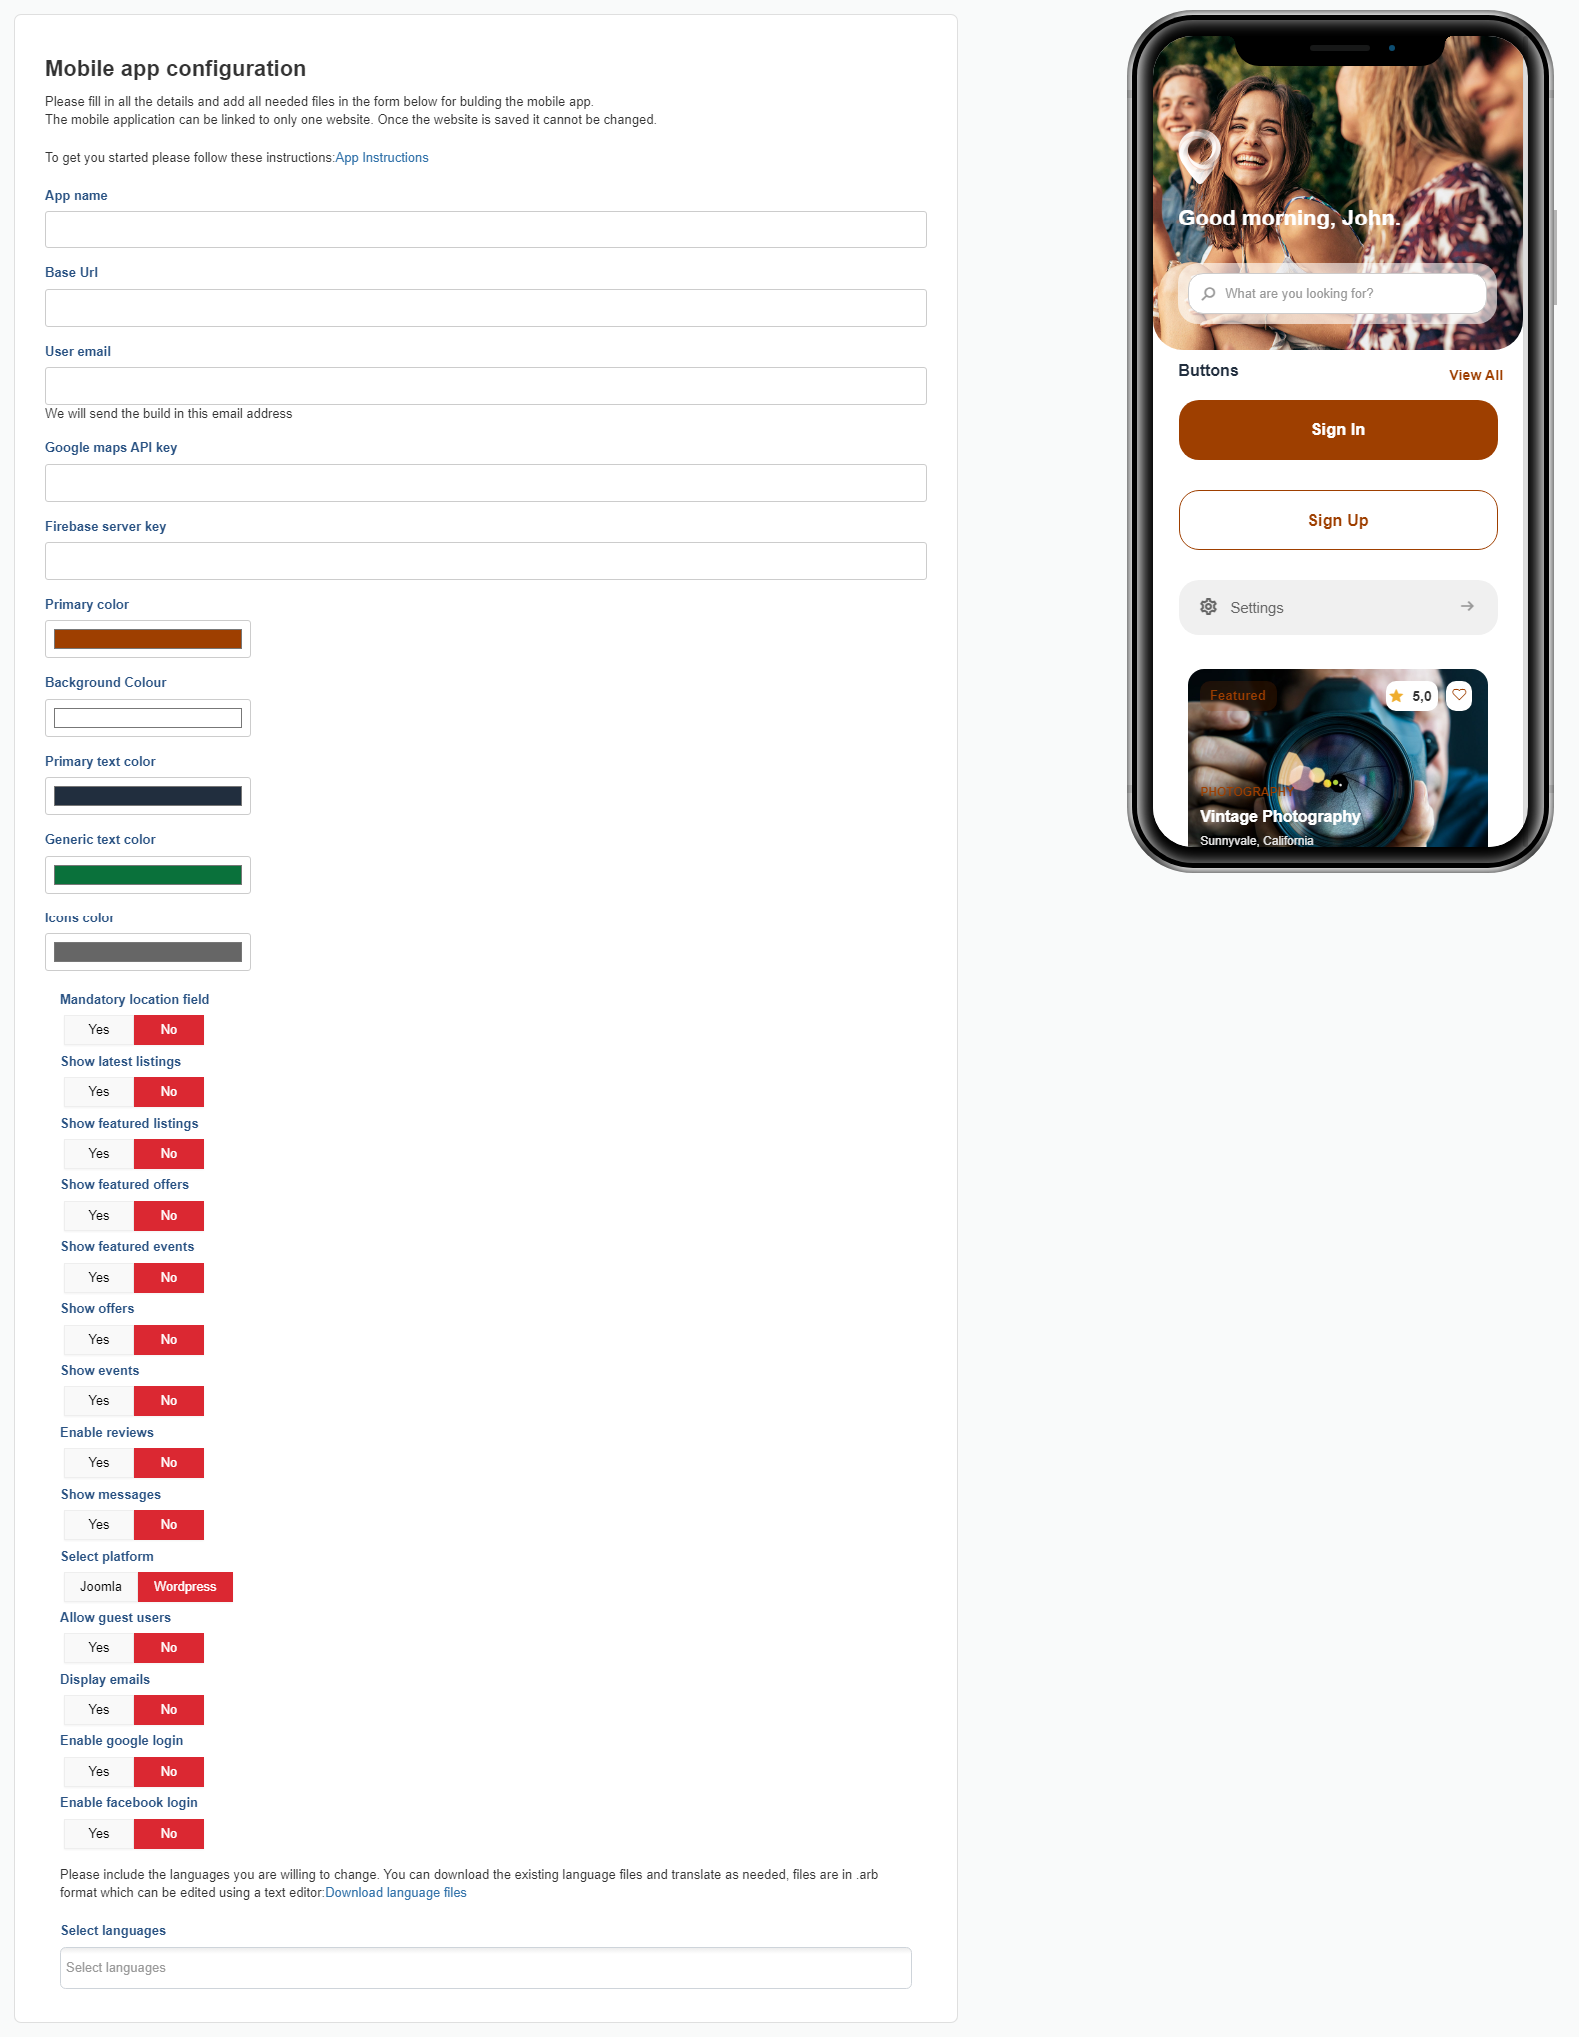
Online build form
To continue with the iOS App Build firstly add the ‘iOS order ID’ and ‘iOS order Email’ on the edit button as in the picture and then click on the ‘Build iOS app’ button.

Using the form
Please fill in all the details and add all needed files in the form below for bulding the mobile app. The mobile application can be linked to only one website. Once the website is saved it cannot be changed.
App name: the name of the app
Base URL: the website Url
User email: the email the build will be sent to.
Google maps API key: set here the Google Map API key you want to use for maps.
Firebase server key: the key generated by Firebase for the mobile app
Mandatory location field: if yes, will make location mandatory when searching for a business/offer/event.
Show latest listings: if yes, will shown all latest listings on the screen.
Show featured listings: will show/hide featured listings sections on home screen.
Show featured offers: will show/hide featured offers sections on home screen.
Show featured events: will show/hide featured events sections on home screen.
Show offers: if set to no, offers will be removed from the app altogether
Show events: if set to no, events will be removed from the app altogether
Enable reviews: if yes, user will be allowed to enter reviews and also see the existing reviews for businesses/offers.
Show messages: if yes , the messages will appear.
Select platform: select between joomla and wordpress
Allow guest users: if the setting is set to yes, the user will be allowed to open the app without having the need to be registered or login
Display emails: if it’s set to yes the emails will be displayed
Enable google login:if it’s set to yes , the google login will be available
Enable facebook login: if it’s set to yes , the facebook login will be available but before will have to complete the details
Select languages: select between english, french, german and italian.
NOTE: Please include the languages you are willing to change. You can download the existing language files and translate as needed, files are in .arb format which can be edited using a text editor
All the settings/images/data explained in the sections above can be fed into our online form in order to generate the application. This form can be accessed after purchasing the app.
Custom menu
Configure custom menu items for the user dashboard. Please note that the changes take effect immediately and no app rebuild is required.
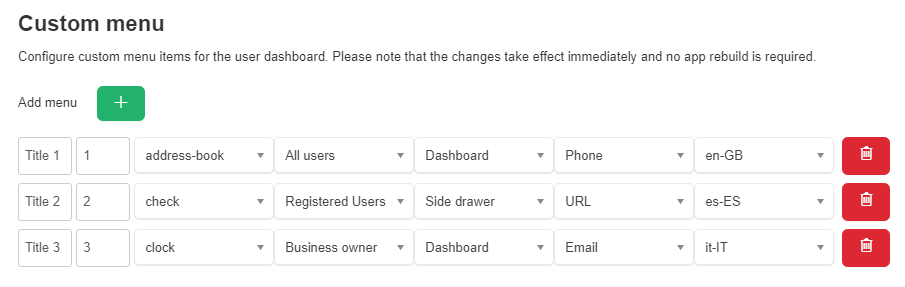
The user can add custom menus where can define the title, menu,icon, user types,where to be located(dashboard or side drawer),type(phone, URL or Email) and languages.
NOTE : The menus that will show, will be depending from the language selected, the language is chosen from the settings on the device
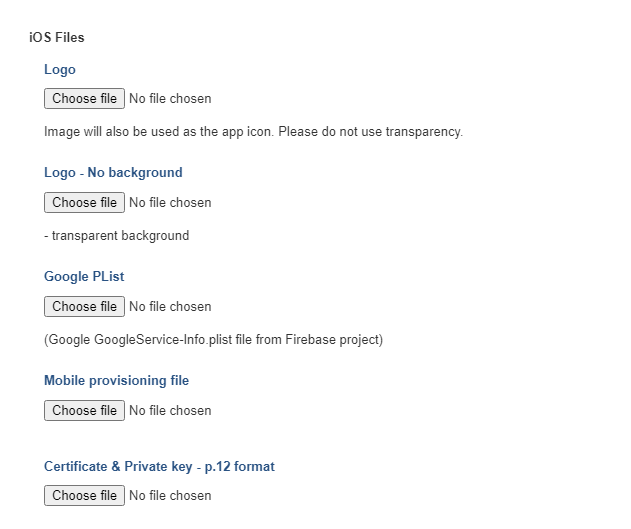
Logo - logo image that will be used as the app icon aswell.
Logo - No background - this is the logo image, that doesn’t contain the black background.
Google PList - use this input to upload the Google Plist info file downloaded from the Firebase console.(Google GoogleService-Info.plist file from Firebase project)
Mobile Provisioning File - use this input to upload the Mobile Provisioning File file downloaded from the Apple account.
Certificate & Private key - use this input to upload the p.12 file obtained in the Obtaining the Certificate & Private Key section
Mobile app server configurations
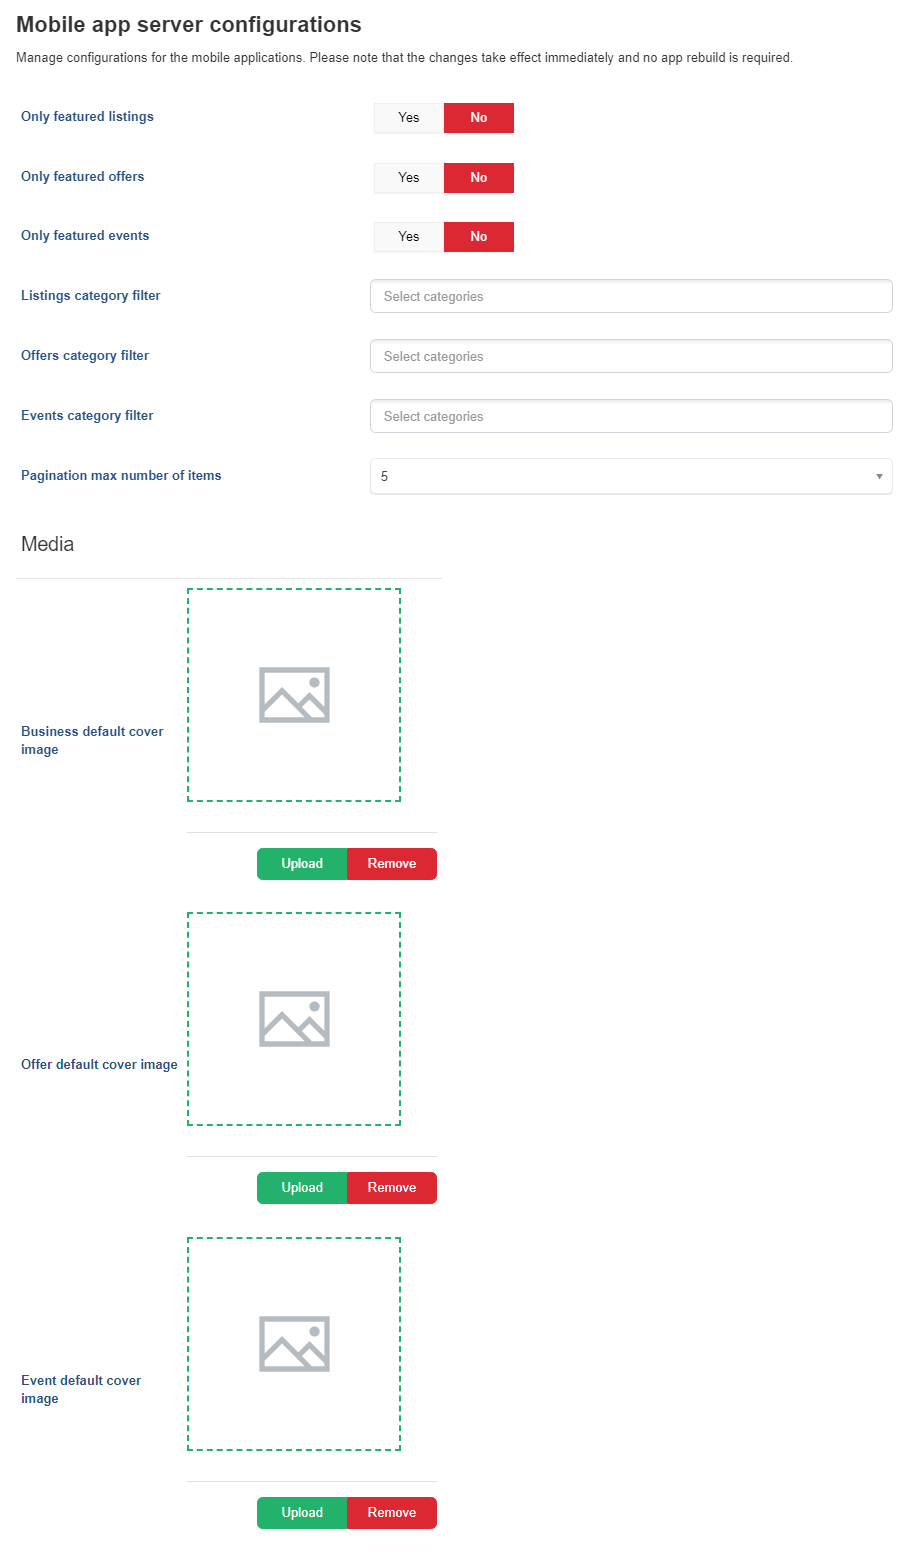
Only featured listings - if set to yes, only featured listings will be displayed.
Only featured offers - if set to yes, only featured offers will be displayed.
Only featured events - if set to yes, only featured events will be displayed.
Listings category filter - select the categories that will be shown on the listing search filter
Offers category filter - select the categories that will be shown on the offer search filter
Events category filter - select the categories that will be shown on the event search filter
Pagination max number of items - admin can set the maximum number of items displayed on the pagination
Business default cover image - default cover image for all listings ( it is used if no cover image is uploaded for the listing or the selected package does not include a cover image)
Offer default cover image - default cover image for all offers ( it is used if no cover image is uploaded for the offer or the selected package does not include a cover image)
Event default cover image - default cover image for all events ( it is used if no cover image is uploaded for the event or the selected package does not include a cover image)
After finalizing, all the changes can be saved and previewed on the mobile device on the right side of the screen.
Language
The language section allows you to set your own language in order to have the content of your app in the desired language(s). By default we add the English language in the app building process. To add a new language follow the steps below. Please note that only the defined languages will be considered.
To add a new language:
You can download the existing English file and translate as this file as you need: Download English File
Once you’ve finished creating your language files, one strings.xml per language, select the desired languages from the language select and then upload the file for each language.
Publishing your app
Submitting the App to the Apple App Store for the First Time
CMSJunkie provides you the ipa file. Once the build process triggered by the build form has finished you’ll receive via email the ipa file.
Log in to App Store Connect.
Upload the ipa file.
This can take a couple of minutes. If the upload was successful you will get a success message.
Apple is now processing the app and it can take several minutes until the app is available in App Store Connect.
In App Store Connect, navigate to the app profile you created.
Select the newly uploaded app in the Build section.
Double check all inputs.
Click Save.
Answer all questions with No.
Click Submit.
The app is send to the Apple reviewer. You can see the status of the review in App Store Connect. After a successful review the app is available in the stores immediately or at the date you specified.
In case you work on another operating system contact your Customer Success Manager to get further support.
Android Mobile App
The Android App shows data in real time from the business directory website. The Business Owner will have the possibility to manage his/her own listings, offers, events, as well as private messages from the other business owners / users.
A section dedicated to The Business Owner’s profile will be present. From the profile menu, The Business Owner can manage its own bookmarks and reviews (for both, Listings and Offers). This section offers also the possibility to edit the current profile, to change the settings and to access the Front–End Control Panel.
Building the app - Prerequisites
After purchasing the application, you can access our online form for the application building process. A couple of configuration data and images are needed for the customization process.
You would have to provide the website address of the business directory extension, the images, the desired colors and the language.
Images
Landing Screen Images
These are the images that will appear when first opening the app.
slider_image_1.jpg
slider_image_2.jpg
slider_image_3.jpg
After the landing screens it will appear the sign in/up screen with the option to continue as a guest aswell.
Home Screen Header
This is the header image on top of the main screen of the application.
home_header_image.jpeg
Listing No Image
featured_listing_placeholder.jpg - when the listing won’t have a logo image added, this image will be displayed instead in the list view.
Logo
ic_jbd_logo_24dp.xml (SVG) – this is the logo image that contains the black background as shown in the home screen header. Logo should always be in a SVG format.
ic_jbd_logo_nobg_24dp.xml (SVG) – this is the logo image, that doesn’t contain the black background, as shown in the above three landing screen images. Logo should always be in a SVG format.
Note: These two logos can actually be the same image, but it is recommended, for design purposes, to have two different versions of the logo as described above.
Colors
The main color values used are: colorPrimary, colorPrimaryText, colorIcons, colorBackground, colorGenericText
Firebase Set up
Firebase is used to push notifications to you audience as well as storing app data. Please do the set up below.
Create project in firebase
Firebase Landing Page
Firebase Add a New Project Dialog
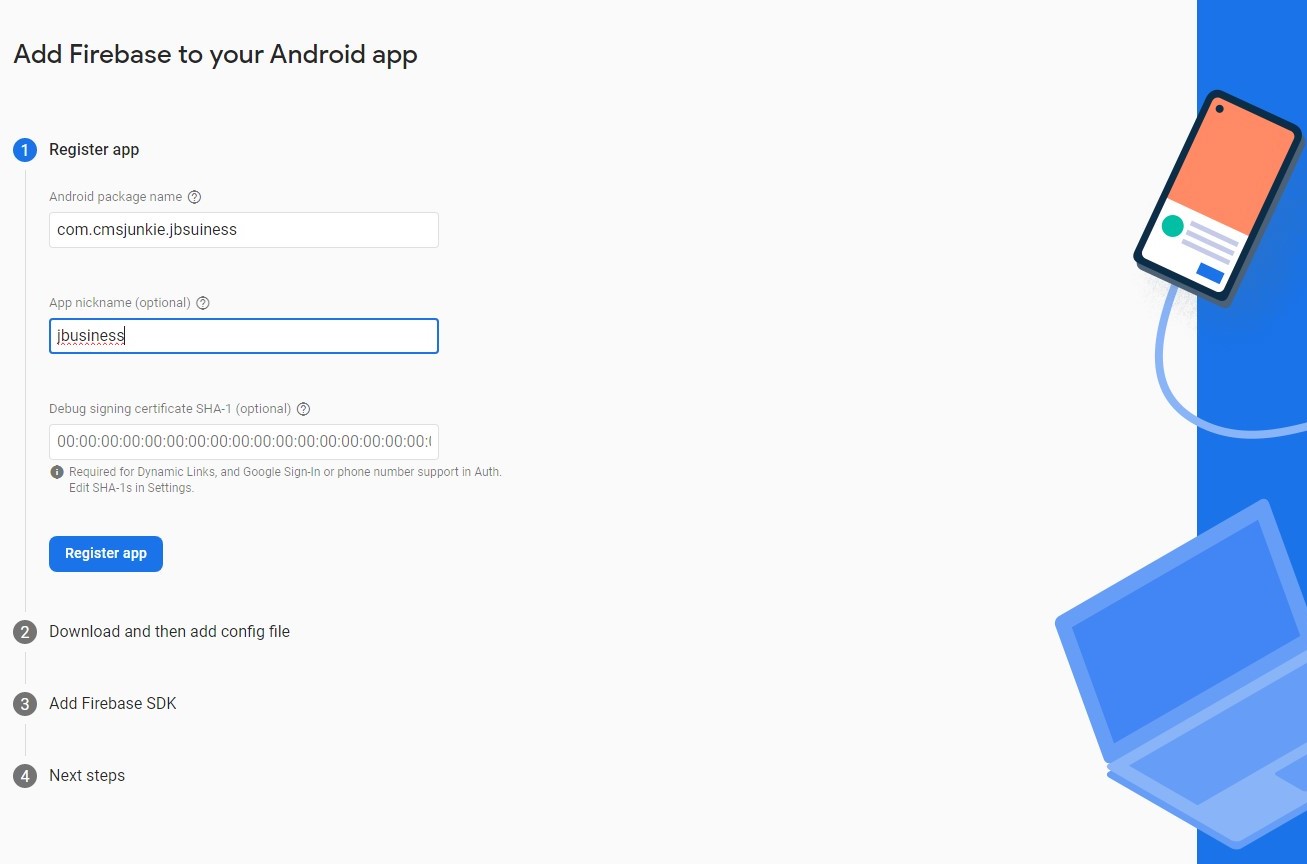
Add Android app to project
The Android Package name has to be in the following format: com.cmsjunkie.jbusiness.yourcompany
replace yourcompany at the end with the name of your company.
Download GoogleServices-info.plist

Firebase Download GooglServices-info.plist
Firebase Verify Your Installation
Setup Database
Go to database section
Create database
Start in test mode -> Enable
the Data tab should look like this
for the database please use the following rules:
{
  "rules": {
    ".read": true,
    ".write": true
  }
}
Get Web API Key
Settings -> Project Settings
Cloud messaging -> Server Key
Copy paste key to Firebase server key on Mobile app configuration on the admin dashboard.
Google Maps API
Get API key for MAP SDK for Android
Step 1
Step 2

Step 3

Online build form
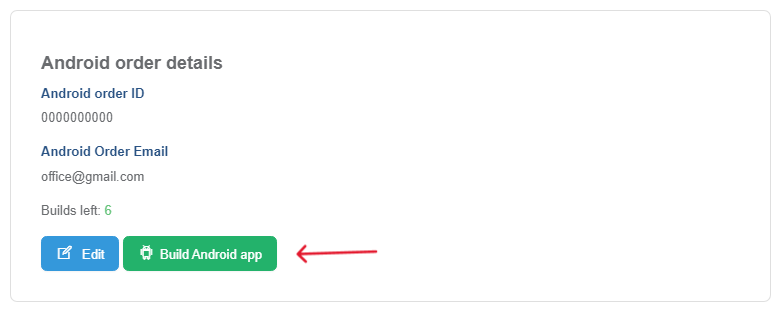
To continue with the Android App Build firstly add the ‘Android order ID’ and ‘Android order Email’ on the edit button as in the picture and then click on the ‘Build Android app’ button.
Using the form
Please fill in all the details and add all needed files in the form below for bulding the mobile app. The mobile application can be linked to only one website. Once the website is saved it cannot be changed.
App name: the name of the app
Base URL: the website Url
User email: the email the build will be sent to.
Google maps API key: set here the Google Map API key you want to use for maps.
Firebase server key: the key generated by Firebase for the mobile app
Mandatory location field: if yes, will make location mandatory when searching for a business/offer/event.
Show latest listings: if yes, will shown all latest listings on the screen.
Show featured listings: will show/hide featured listings sections on home screen.
Show featured offers: will show/hide featured offers sections on home screen.
Show featured events: will show/hide featured events sections on home screen.
Show offers: if set to no, offers will be removed from the app altogether
Show events: if set to no, events will be removed from the app altogether
Enable reviews: if yes, user will be allowed to enter reviews and also see the existing reviews for businesses/offers.
Show messages: if yes , the messages will appear.
Select platform: select between joomla and wordpress
Allow guest users: if the setting is set to yes, the user will be allowed to open the app without having the need to be registered or login
Display emails: if it’s set to yes the emails will be displayed
Enable google login:if it’s set to yes , the google login will be available
Enable facebook login: if it’s set to yes , the facebook login will be available but before will have to complete the details
Select language: select between english, french, german and italian.
NOTE: Please include the language you are willing to change. You can download the existing language files and translate as needed, files are in .arb format which can be edited using a text editor
All the settings/images/data explained in the sections above can be fed into our online form in order to generate the application. This form can be accessed after purchasing the app.
Custom menu
Configure custom menu items for the user dashboard. Please note that the changes take effect immediately and no app rebuild is required.
The user can add custom menus where can define the title, menu,icon, user types,where to be located(dashboard or side drawer),type(phone, URL or Email) and languages.
NOTE : The menus that will show, will be depending from the language selected, the language is chosen from the settings on the device

Logo - logo image that will be used as the app icon aswell. Logo - No background - this is the logo image, that doesn’t contain the black background. Google Services JSON - google-services.jason file from Firebase project
Mobile app server configurations
Only featured listings - if set to yes, only featured listings will be displayed.
Only featured offers - if set to yes, only featured offers will be displayed.
Only featured events - if set to yes, only featured events will be displayed.
Listings category filter - select the categories that will be shown on the listing search filter
Offers category filter - select the categories that will be shown on the offer search filter
Events category filter - select the categories that will be shown on the event search filter
Pagination max number of items - admin can set the maximum number of items displayed on the pagination
Business default cover image - default cover image for all listings ( it is used if no cover image is uploaded for the listing or the selected package does not include a cover image)
Offer default cover image - default cover image for all offers ( it is used if no cover image is uploaded for the offer or the selected package does not include a cover image)
Event default cover image - default cover image for all events ( it is used if no cover image is uploaded for the event or the selected package does not include a cover image)
After finalizing, all the changes can be saved and previewed on the mobile device on the right side of the screen.
Language
The language section allows you to set your own language in order to have the content of your app in the desired language(s). By default we add the English language in the app building process. To add a new language follow the steps below. Please note that only the defined languages will be considered.
To add a new language:
You can download the existing English file and translate as this file as you need: Download English File
Once you’ve finished creating your language files, one strings.xml per language, select the desired languages from the language select and then upload the file for each language.
Publishing your app
Submitting the App to the Google App Store
Sign up on Google Play Console
You can sign up on the google play console by using the following link
There are 4 steps to complete the registration. After reading the Google play store developer distribution agreement, agree to the terms by clicking on the check box.
Now you will need to pay a one time ‘Developer Registration Fee’ to Google. You can upload an unlimited number of applications from a single account with a limit of uploading 15 apps per day.
After completing your account details for the Google developer account, it is time to create the application.
Publishing App
Click on the create application button, and enter the name of your app on the form. Fill in the other information as well (short description, full description etc.)
After this you need to put up some screenshots from the application. The minimum required number is 2 and maximum is 8.
Once this step is done, you will need to put a high resolution icon or logo with a size of 512x512 px.
You will also need to put a feature graphic of 1024x500 px.
Scroll down to complete the other details including application type, category, website, email and phone number.
After this check privacy policy and then click save as draft and go to the app release and click on manage production.
Now you will see a create release button, go ahead and click on it. You will be prompted with an upload files form, you can upload here the signed .apk file of your application. Once the upload is successful , scroll down and click on the review button.
Go to Content Rating section and click continue. Fill in all the details which include email addresses and select your categories as well. Fill in all the other required fields.
After completing all fields, click on the Apply Rating button. Select your pricing and distribution based on how you want users to access your App. Fill in all mandatory information marked with a *, and click Save draft after completing all needed information.
For the last step, click on the Manage Production, Edit Release and lastly on the Review button. A new button will appear named “Start Rollout to Production” . You can click on this button and after confirming, your submission will be finally complete and you will need to wait up to 6 hours for approval.s