Directory Apps
You can enhance the directory functionality with multiple directory applications that can be found on our store.
WBD Appointments
WBD Appointments is an application that extends the directory functionality by adding the possibility of booking services and appointments for a business. The WBD Appointments application can be purchased separately from our store on https://www.cmsjunkie.com/wordpress-business-directory/wbd-appointments
Installing the application
To begin the installation of the WP-BusinessDirectory Appointments application, log in into your wordpress backend, access the directory dashboard and follow the steps as described below:
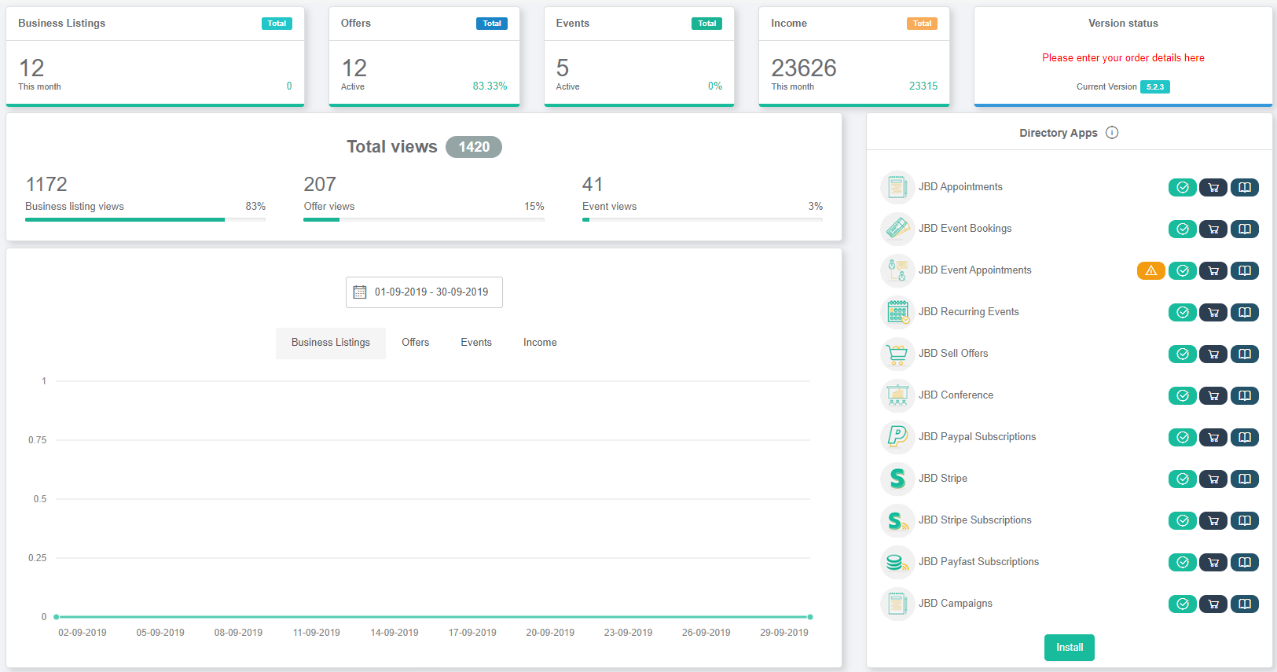
In the main dashboard, you will be presented with the Directory Apps section.
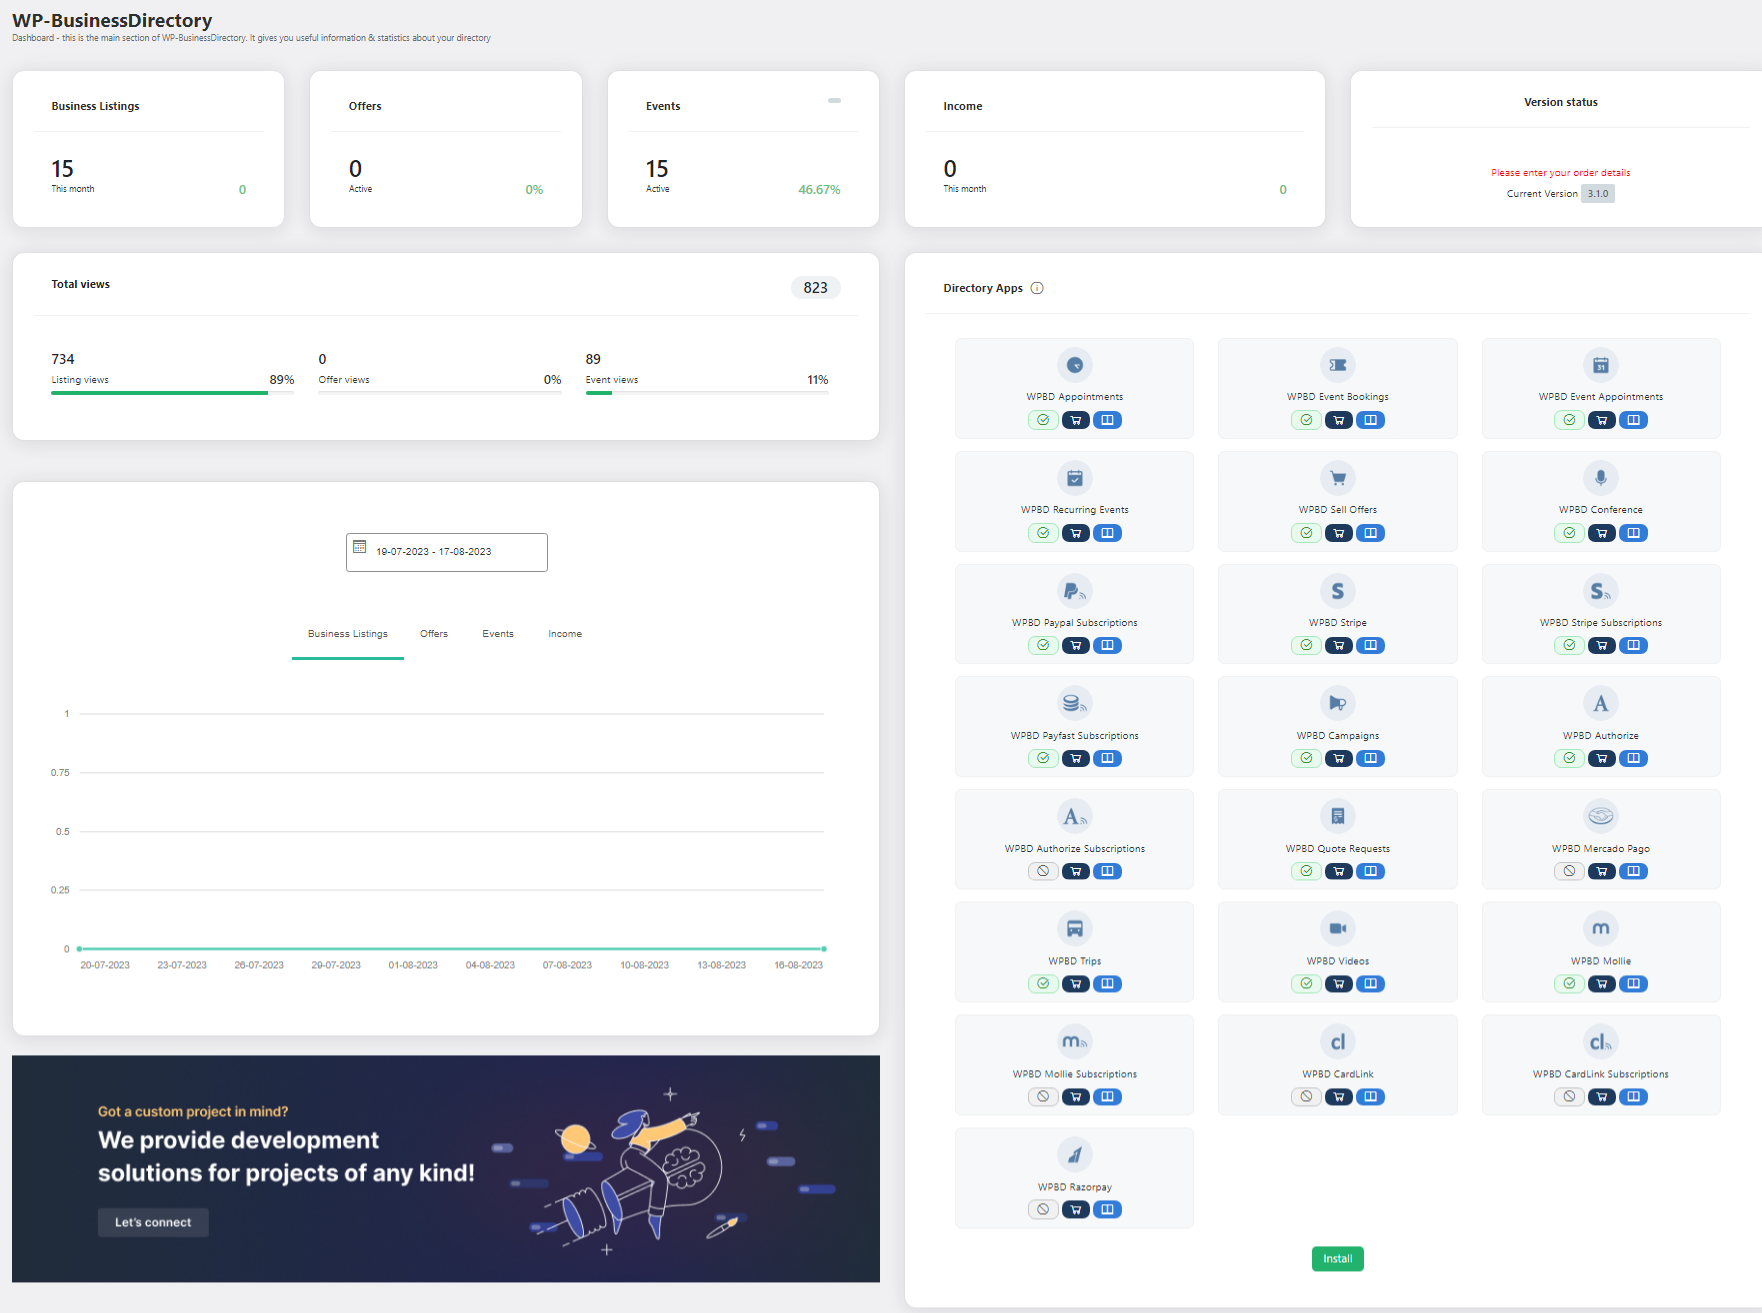
Click the Install button (on the bottom of the Directory Apps section).
Choose your downloaded WBD Appointments archive (wpbd-appointments.zip).
You will receive a confirmation message upon successful installation completion
Setup and configuration
When application is installed, in the general settings (business listings tab) a new setting called “Enable company services” will be displayed.
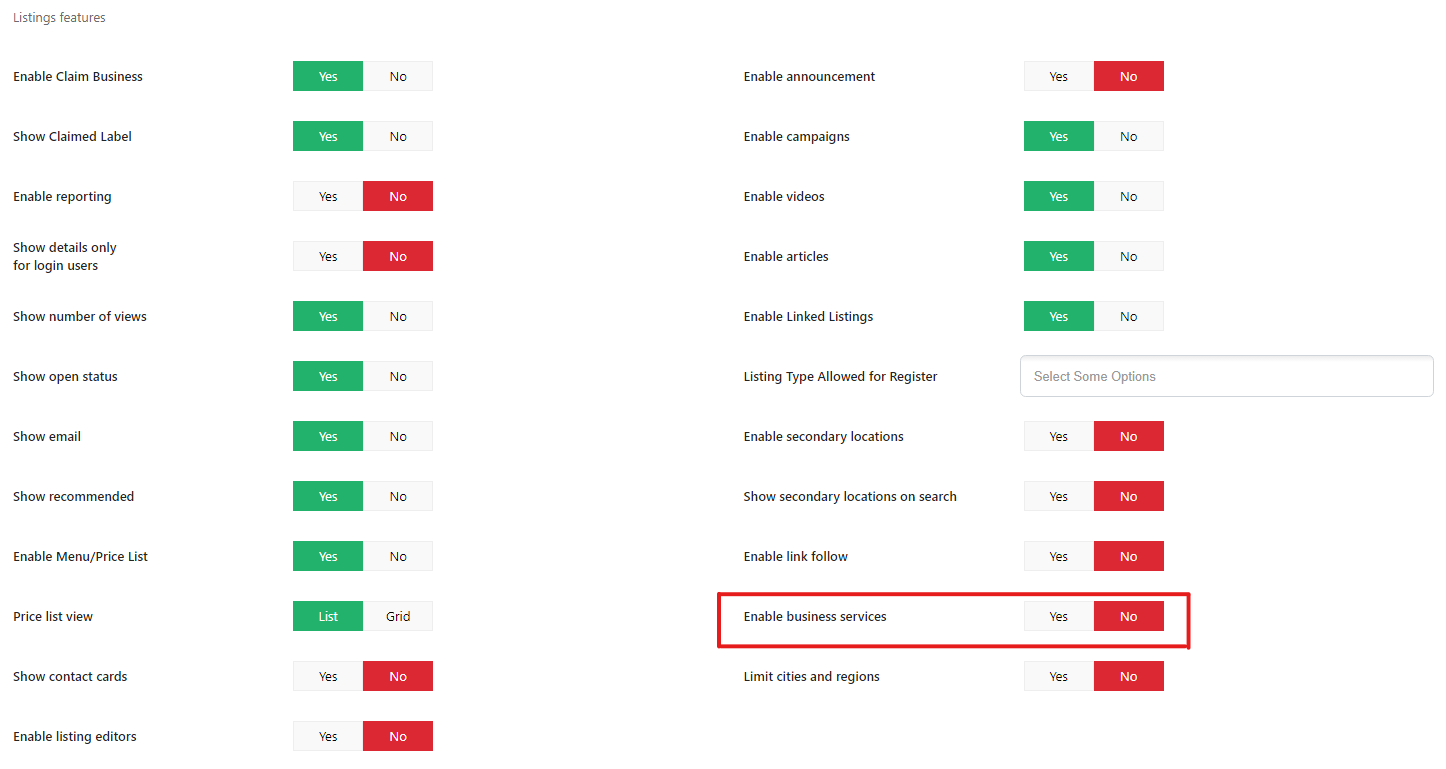
When the setting will be set to yes by the administrator, on the dashboard menu items, for both admin and front-end Control Panel, new menu items will be visible under the Business Listings menu item.
How it works
For each business you can define a different number of services that will be performed by the service providers based on an availability schedule. When services are defined for a business listing, on the front-end business listing details page, a new section will appear, Services. The services can be booked by the end users based on the current availability, and for each booking the business owner and the site admin will be notified with the booking details.
Business services
This section contains the services that will be defined by the business owners.
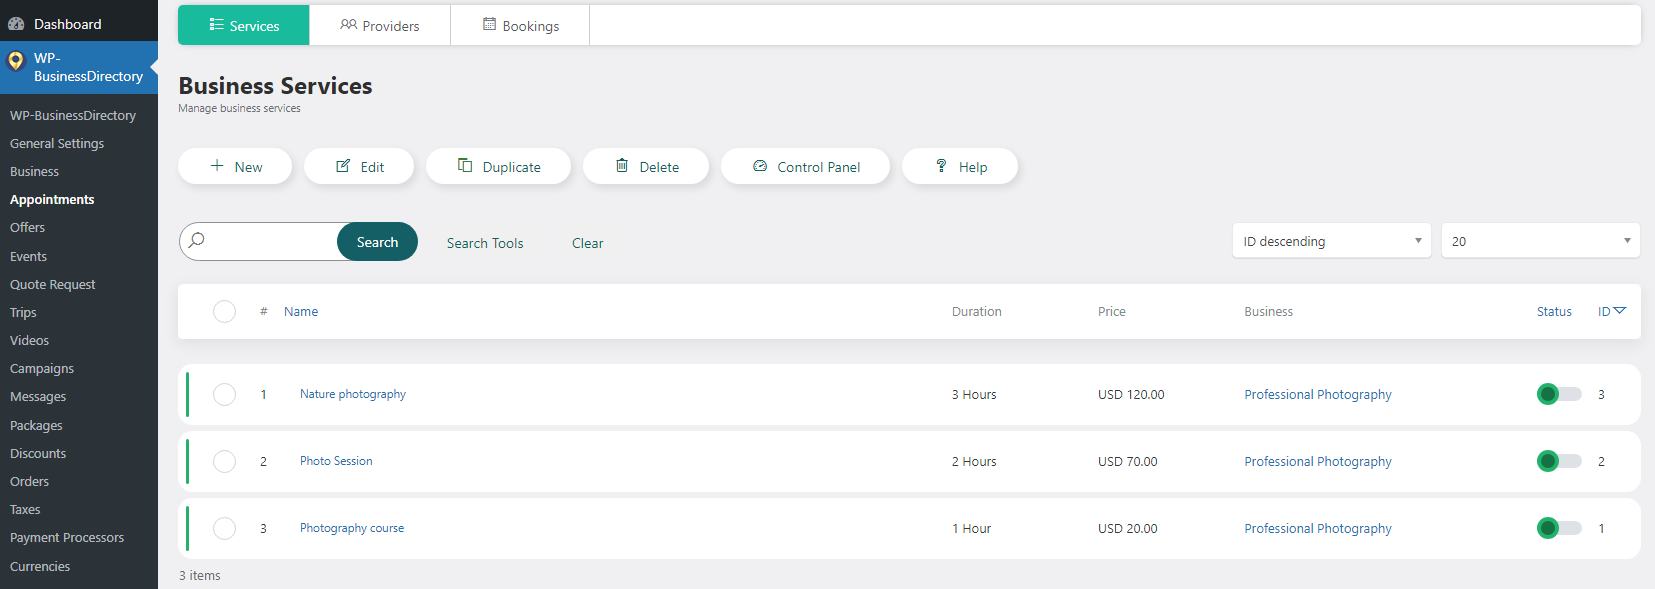
A business service can be added from both admin or front-end area, and contains the following details:
Name – name of the service
Description – description of the service
Status – setting if the service will be published or not
Duration – setting the duration of the service in hours and minutes
Show duration – setting if the duration of the service will display or not in front – end
Business – selecting the listing, that will contain this service
Currency – the currency
Price – the price of the service
Max number of bookings per service – the max number of time that the service can be booked
After all the details are filled by the user and saved, the services will be displayed in the Business Services section.
Service providers
This section contains the business service providers.
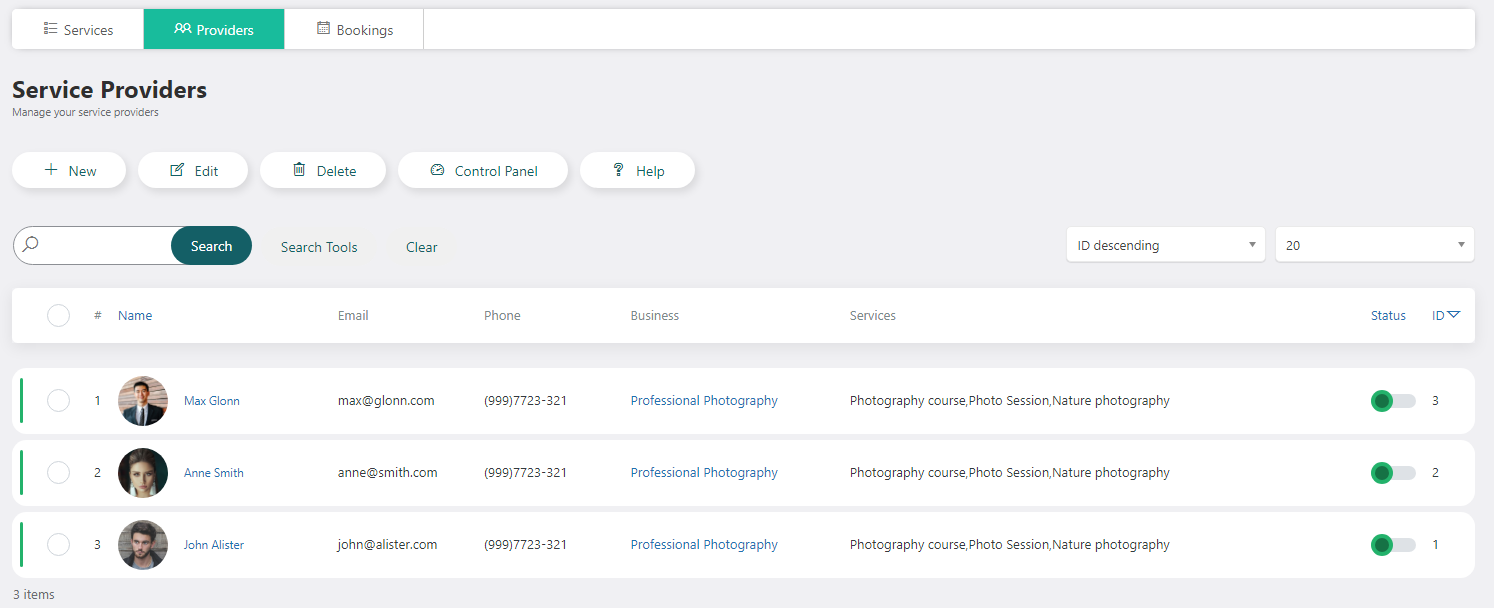
Each service has to be associated with a provider, in order to display in the listings details view and to be booked. A service provider can be added from both, admin area and front – end control panel and contains the following details.
Name – name of the service provider
Description – description of the service provider
Email – the email of the service provider
Telephone – the phone number
Max number of clients to be served – the max number of persons that can book the same service on the same date and the same time
Business – the business which the provider belongs to
Services – services that belong to the actual provider; the services are showing based on the selected business
Status - setting if the service will be published or not
Working hours – the hours for which the service provider will be available for booking
Break hours – the break hours of the provider
Yearly unavailability – the vacation period of the provider; the user can add several vacation periods for the provider and during these periods, the provider dates won’t be active and available for booking.
Booking a service
All services that are associated with at least one service provider will be shown on the business listing details page and it will be available for booking.
Step 1: Access the services section of the business listing details page
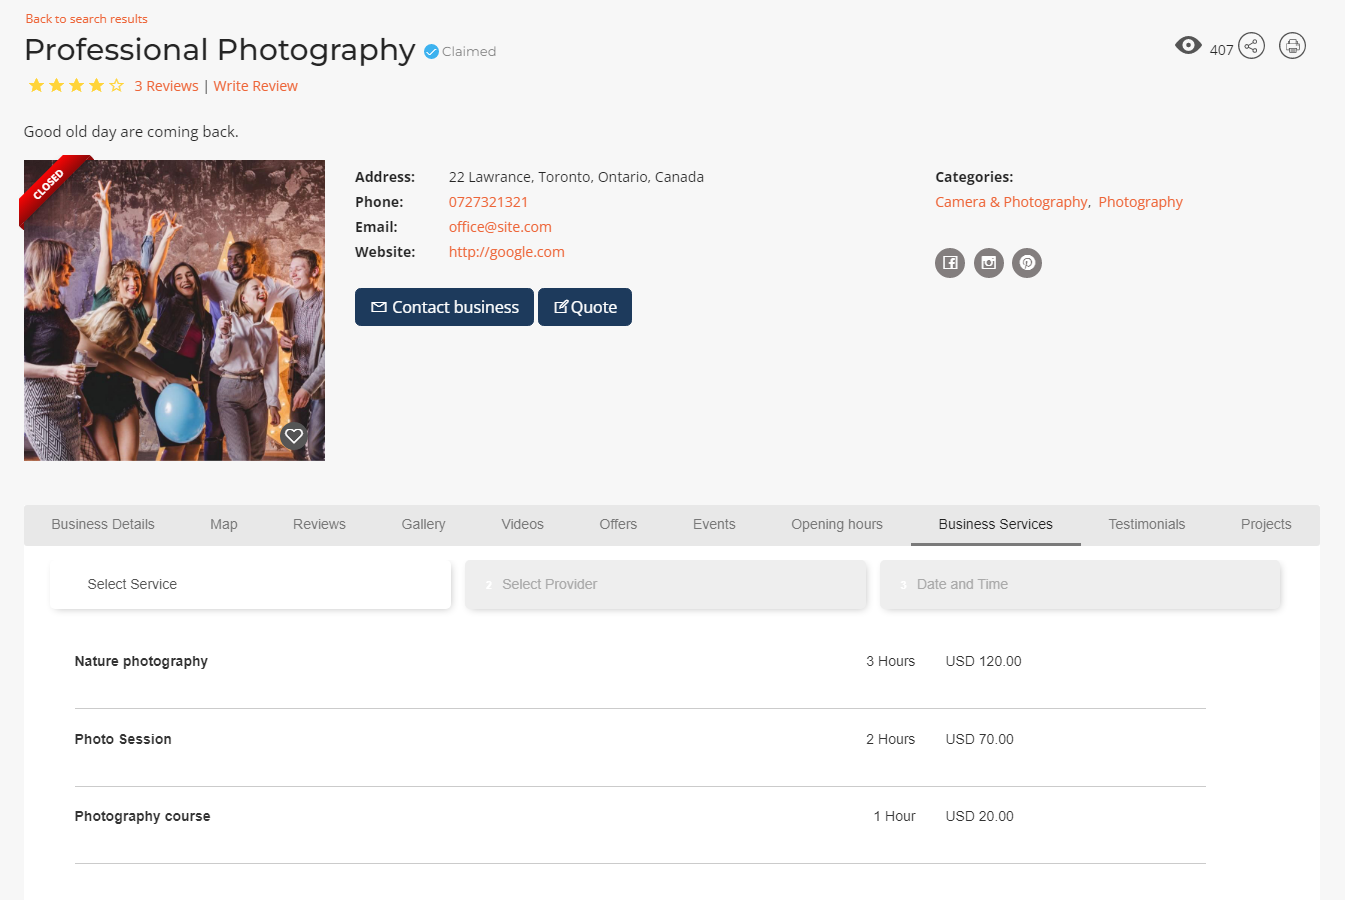
Step 2: Select the service and the service provider
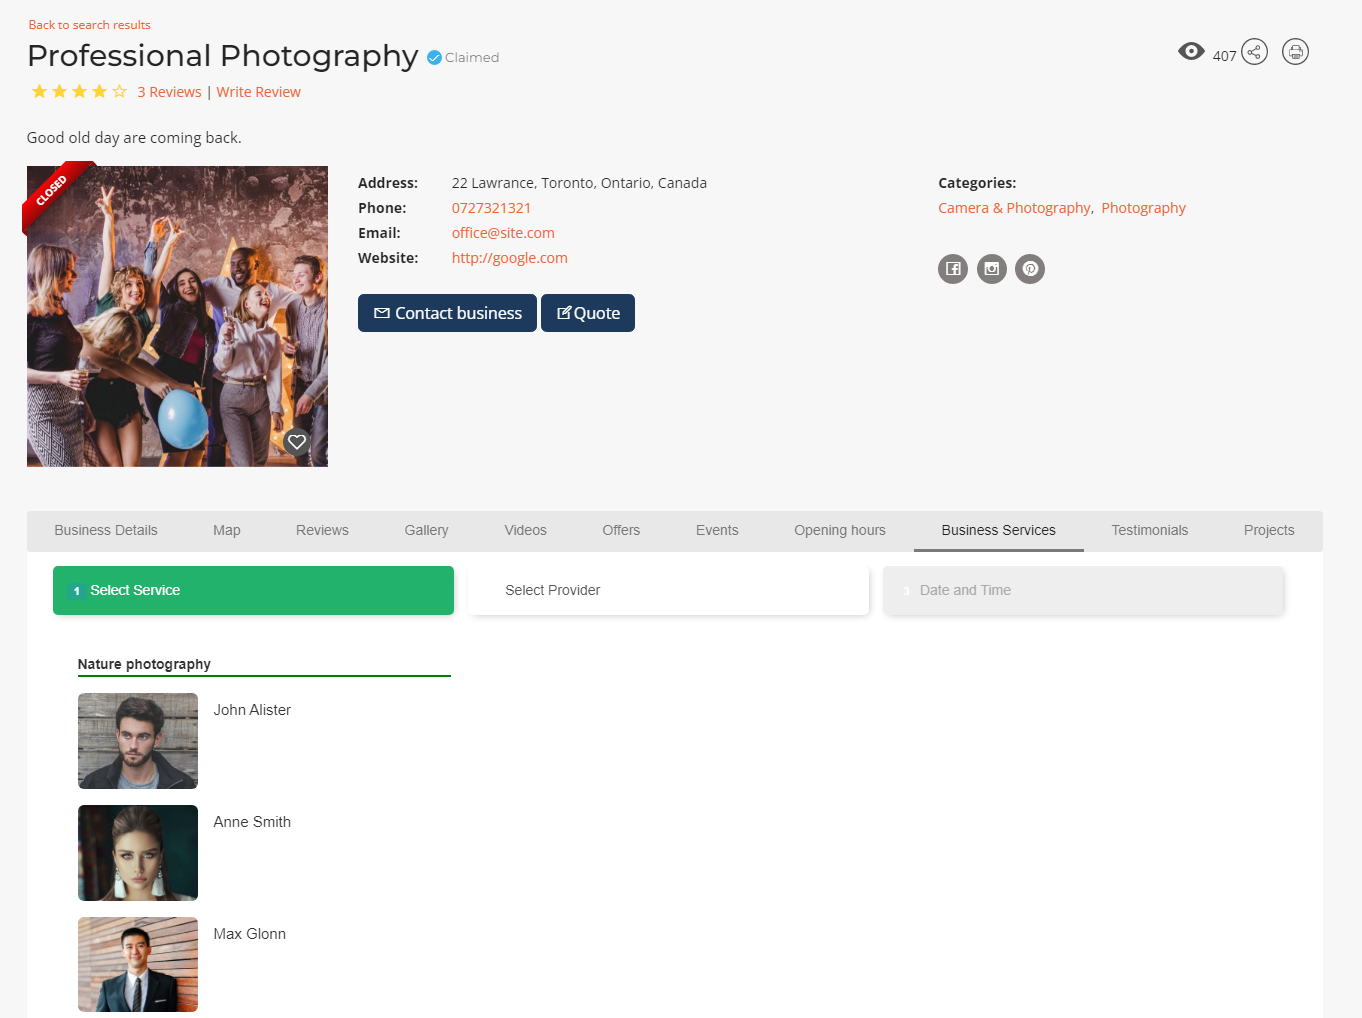
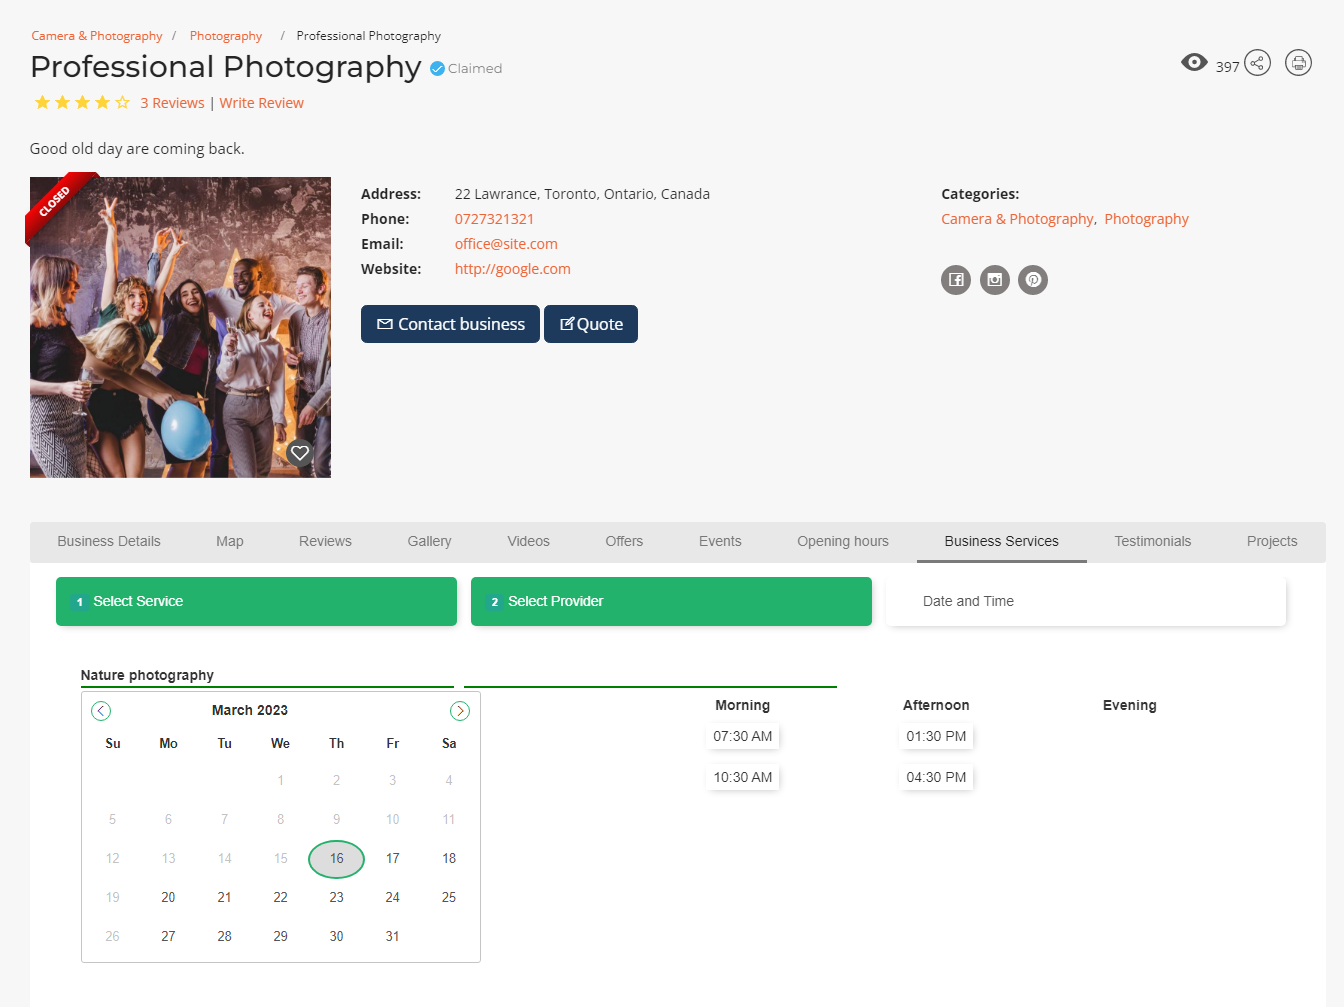
Step 3: Select the available dates After the provider is selected, the available dates and working hours for each date will display so that the user can book the desired date and time.
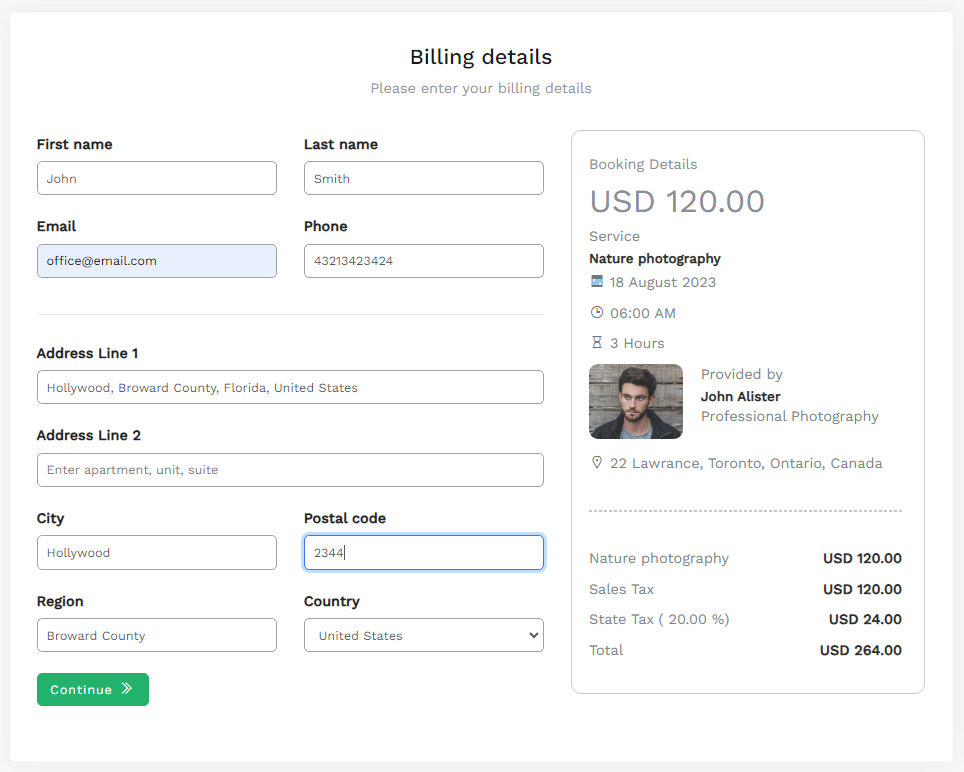
Step 4: Complete the guest details
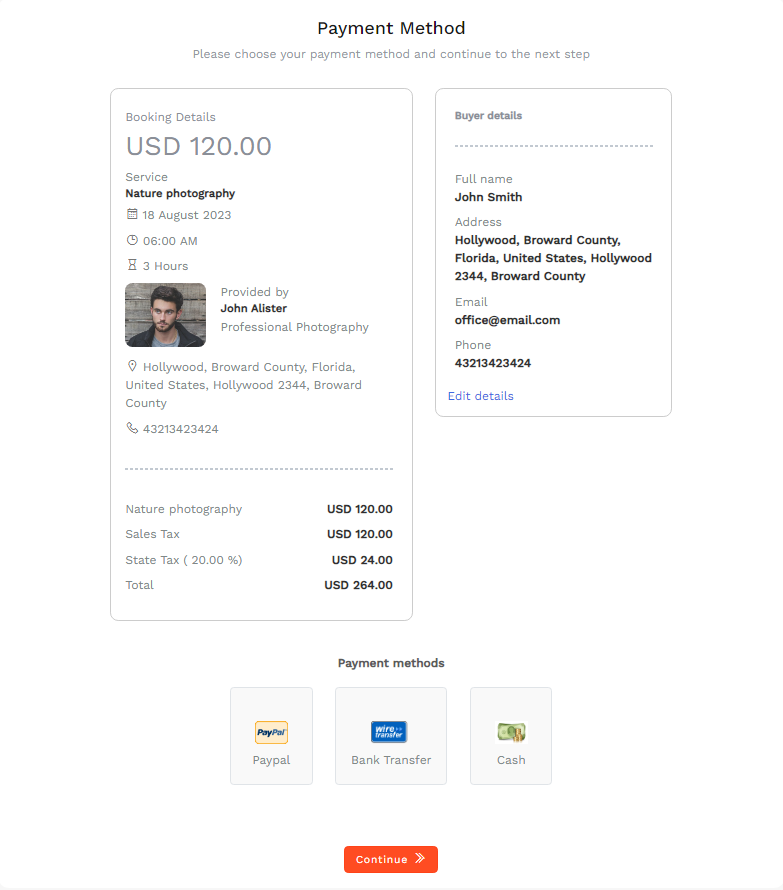
Step 5: Select the payment method and perform the payment
Step 6: Booking confirmation

Manage service bookings
The business service bookings will be listed in the company service bookings section.

WBD Sell Offers
WBD Sell Offers is an application that extends the WP-BusinessDirectory Offers functionality by adding the possibility of selling/buying an offer. The WBD Sell Offers application can be purchased separately from our store on https://www.cmsjunkie.com/wordpress-business-directory/wbd-sell-offers
Installing the application
After purchasing the WBD Sell Offers application, you can install the zip with all the files. After running the installation, you will be able to access the application from the component menu in the backend. To begin the installation of the WBD Sell Offers application, log in into your wordpress backend and follow the steps as described below:
In the main menu, you will be presented with the Directory Apps section.
Click the Install button.
Choose your downloaded copy of the WBD Sell Offers archive (wpbd-sell-offers.zip).
You will receive a confirmation message upon installation completion
After the plugin has been installed successfully, you will be able to access the Offer Orders menu item in the administrator and front - end areas, under the Offers menu item.
Setup and configuration
When this application is installed, in the general settings (offers tab) two new settings called “Enable offer selling” and “Enable shipping” will be displayed.
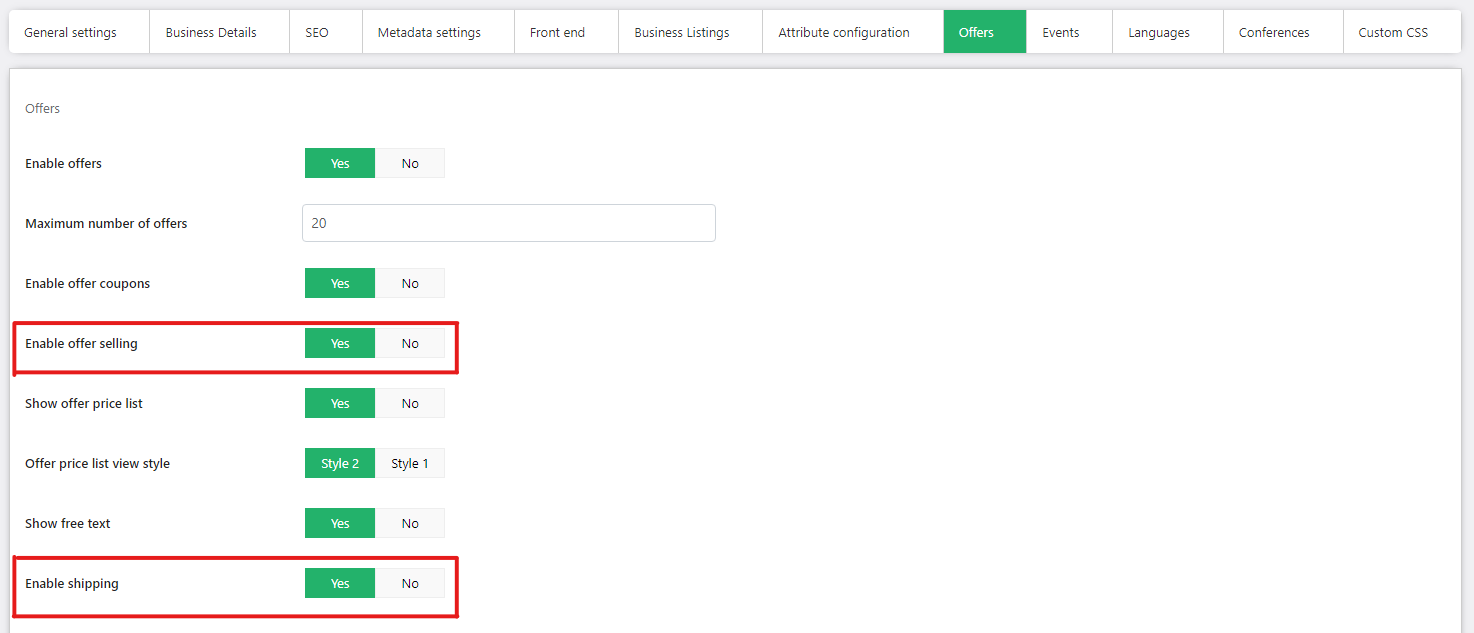
After these settings will be set to yes by the administrator, also the menu items will be visible under the Business Listings menu item, on both admin area and front – end Control Panel.
How it works
Once the settings on general settings are set to yes, in the offers edit view will be displayed two new sections.
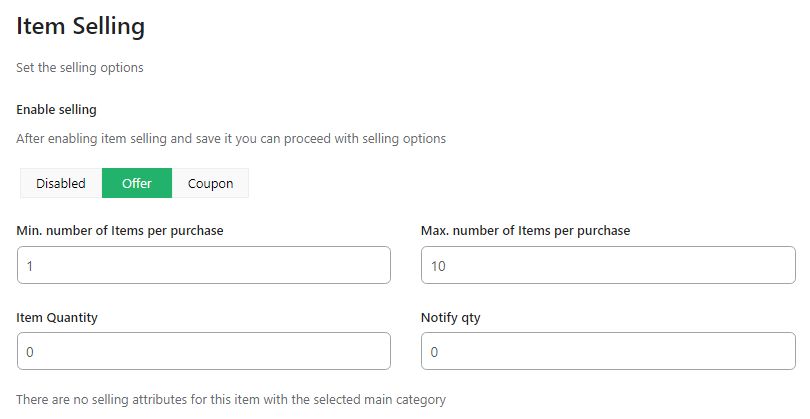
The “Enable offer selling” setting will also be shown on offer level to enable or not the selling for the actual offer. The item quantity can be set here, to set a restriction on the quantity of orders that can be done on the actual offer. Also, the minimum and maximum number of purchases can be added to set a minimum and maximum on the user on how many orders he can do at the same time.
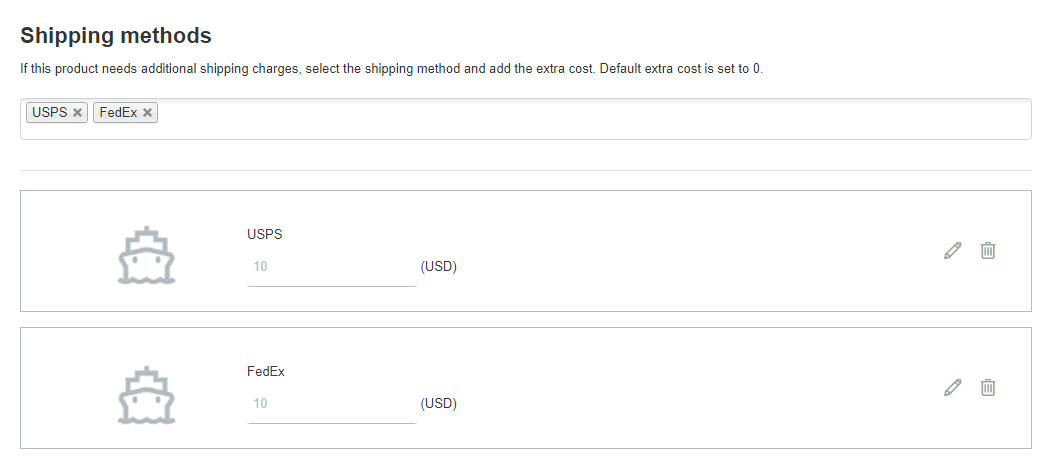
The shipping methods will be shown when shipping methods will be created by the site administrator, at their respective section on admin. When the shipping method is selected, its price will be added to the offers’ price when the order will be made. The shipping method should also belong to the same business owner that owns the offer, in order to be shown.
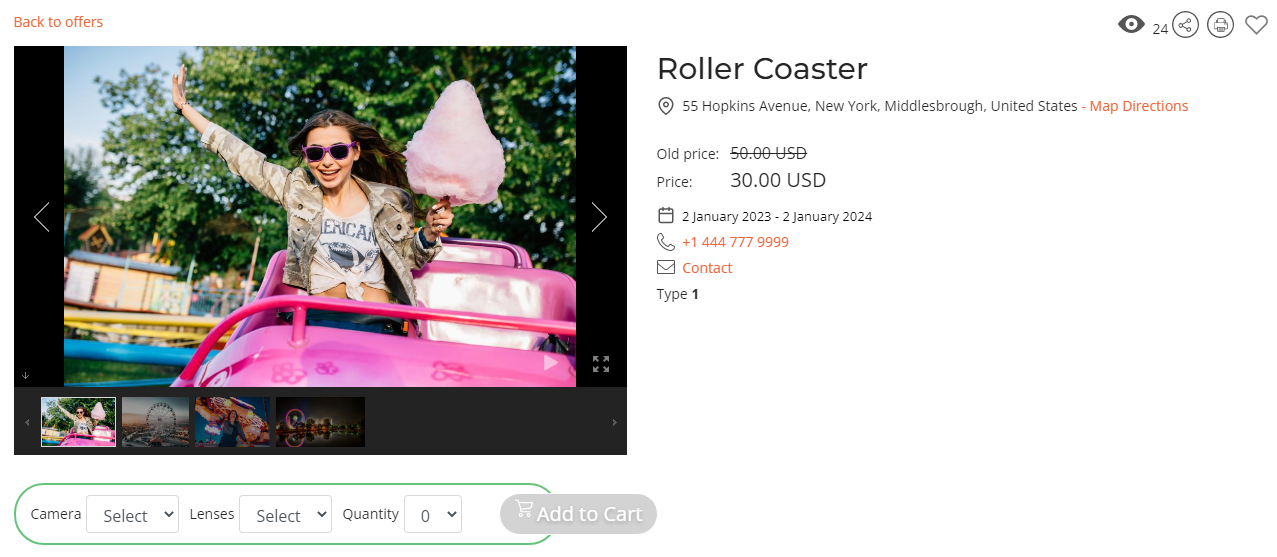
Once all the information is set, in the offers’ detail view will display a quantity selector and a “Add to cart” button. Once, the maximum of purchases has been reached, the quantity selector will not be displayed anymore.
Buying an offer
Once all the details are filled in and set, the user can proceed to add items (offers) to the cart.
Step 1: Access the offer and select a certain quantity to add to the cart
Step 2: Access the shopping cart view
After selecting the desired quantity and the “Add to cart” button, a popover will be displayed notifying the user that the item has been successfully added to the cart.
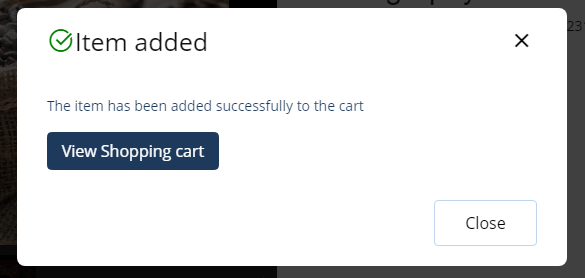
The user can either continue shopping or can view the shopping cart.
Step 3: Checkout the selected items
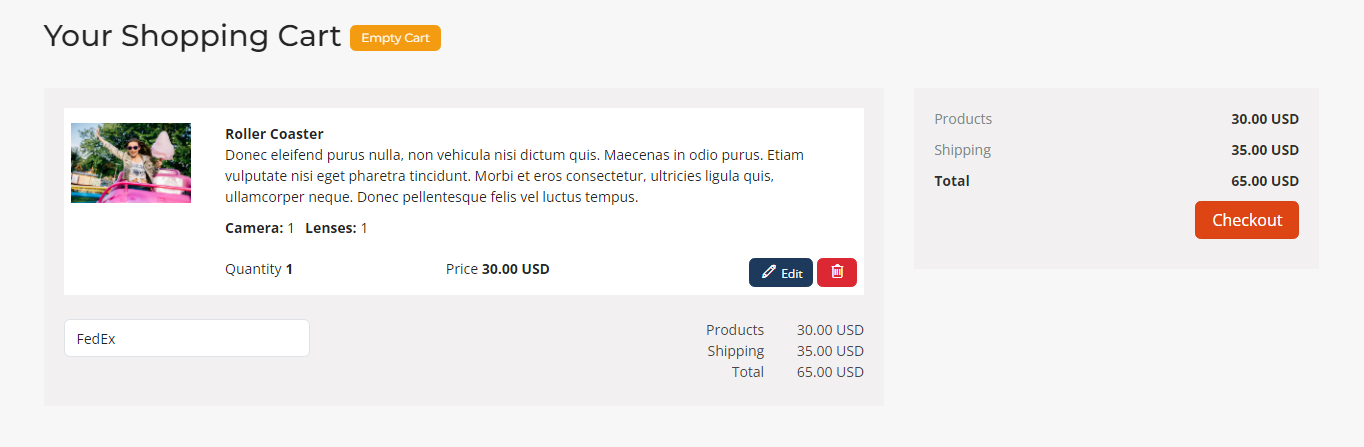
The chosen item can be edited or also removed.
After selecting the “Checkout” button, the user will be redirected to the guest details to fill in the personal information and after that to the payment page to complete the payment of the items that were on the cart.
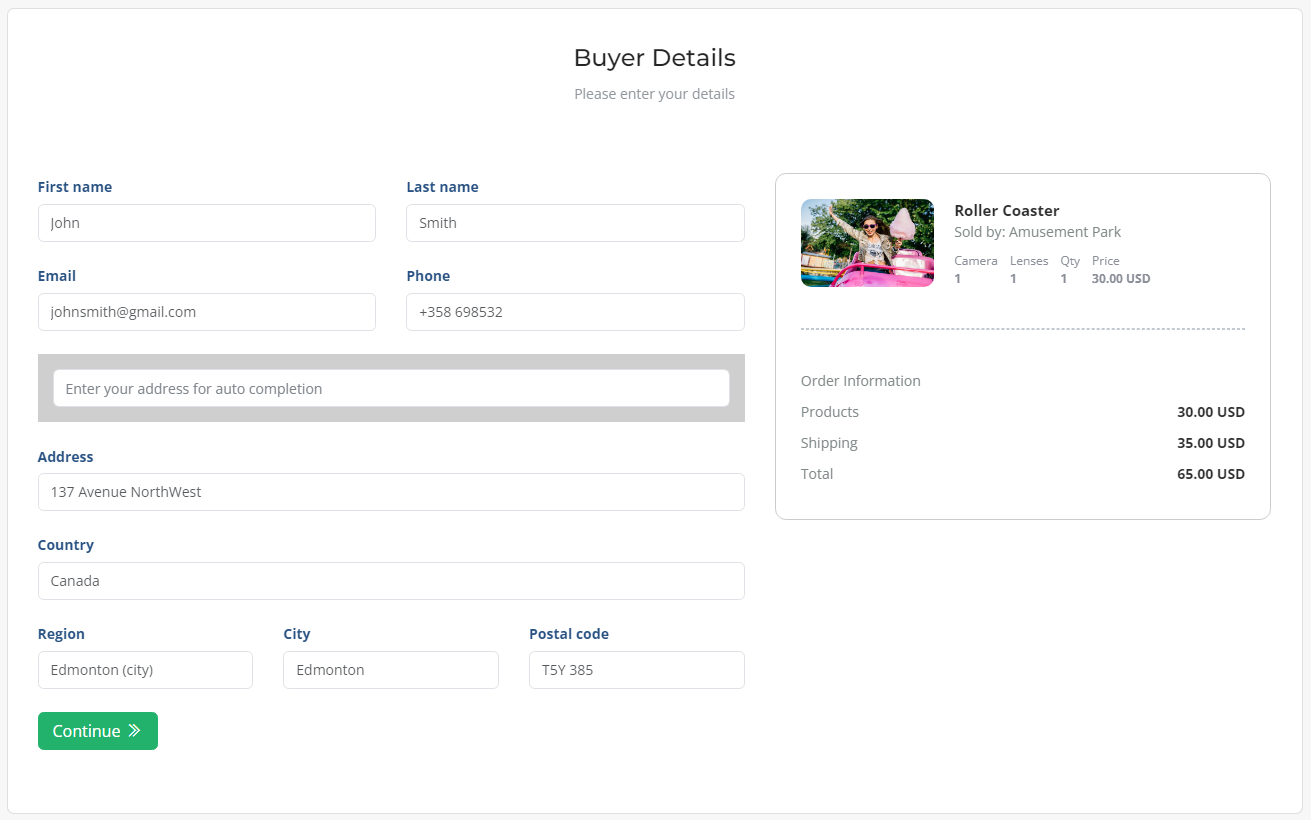
Step 4: Complete the guest details
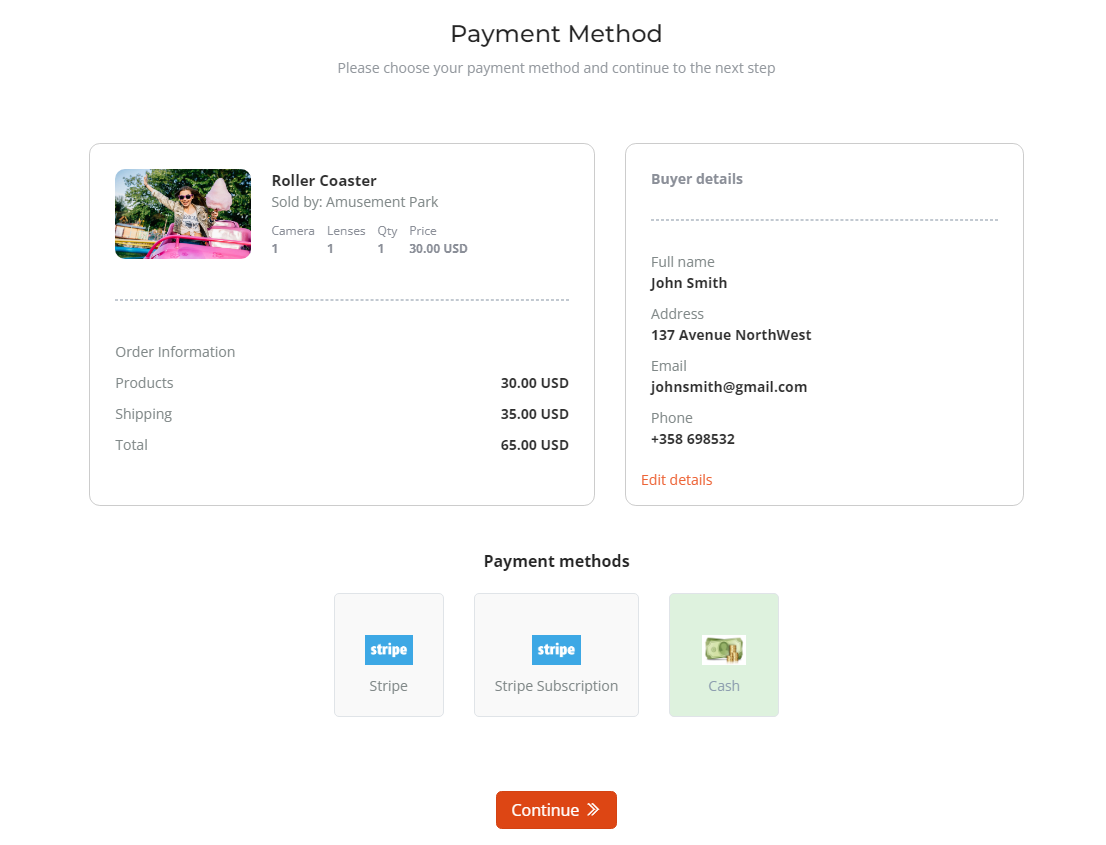
Step 5: Select the payment method and perform the payment
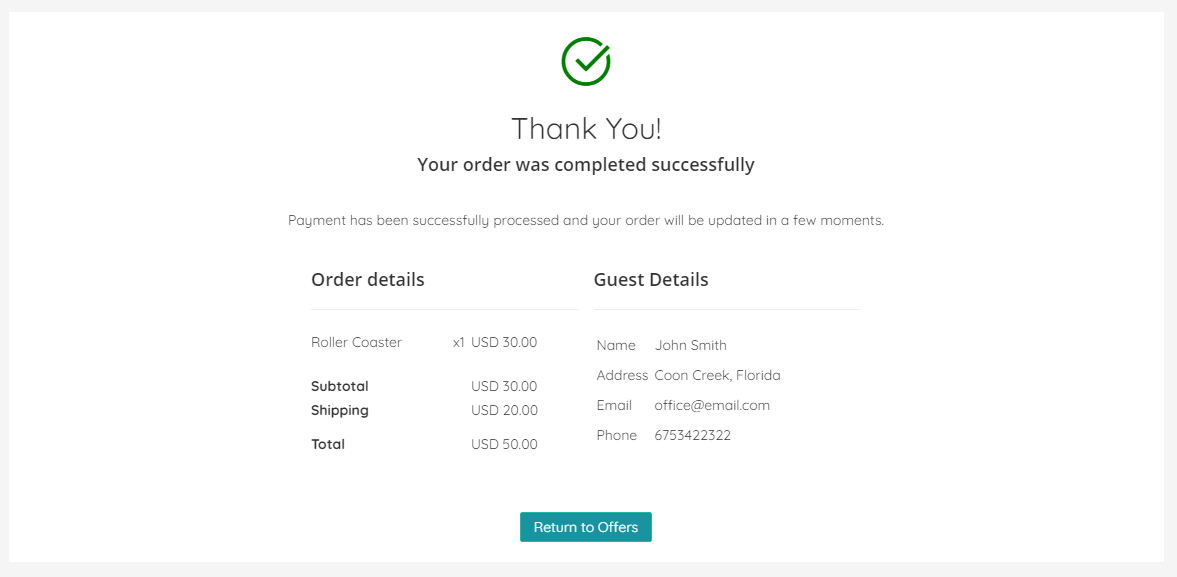
Step 6: Booking confirmation
Manage offer orders
The orders are listed in the Offer Orders menu item, where they can also be edited by the site admin.
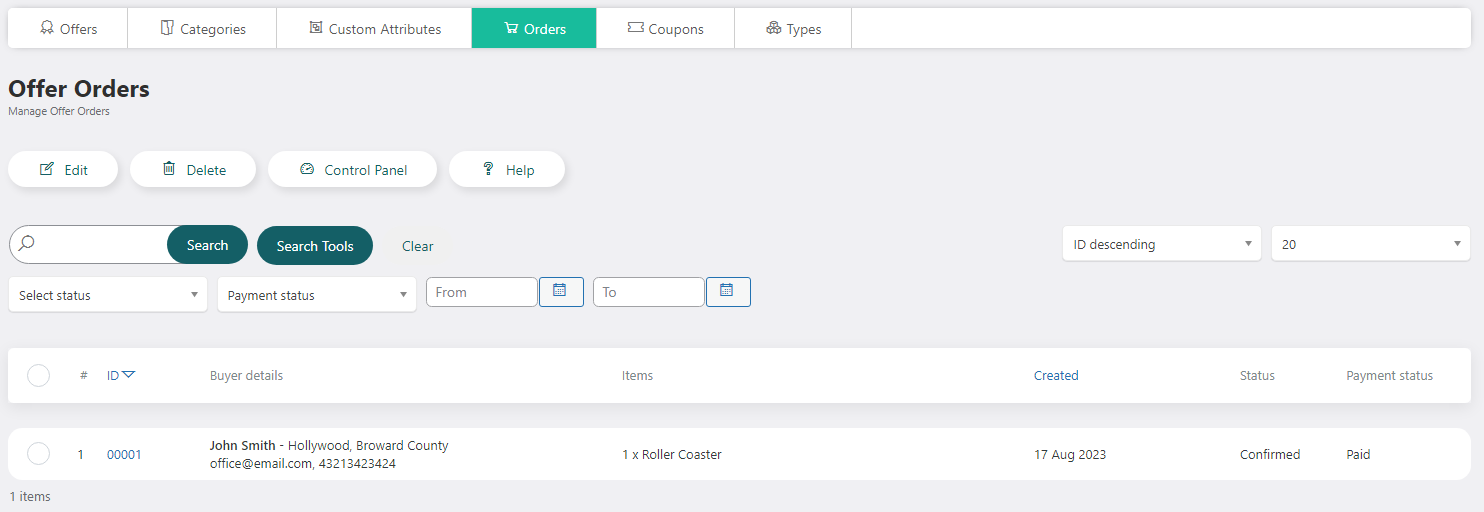
Or they can be accessible and edited by the offer owner, in the front – end control panel section.
WBD Event Appointments
WBD Event Appointments is an application that extends the WP-BusinessDirectory Events functionality by adding the possibility of booking an appointment. The WBD Event Appointments application can be purchased separately from our store on https://www.cmsjunkie.com/wordpress-business-directory/wbd-event-appointments
Installing the application
After purchasing the WBD Event Appointments application, you can install the zip with all the files. After running the installation, you will be able to access the application from the component menu in the backend. To begin the installation of the WBD Event Appointments application, log in into your wordpress backend and follow the steps as described below:
In the main menu, you will be presented with the Directory Apps section.
Click the Install button.
Choose your downloaded copy of the WBD Event Appointments archive (wpbd-event-appointments.zip).
You will receive a confirmation message upon installation completion
Setup and configuration
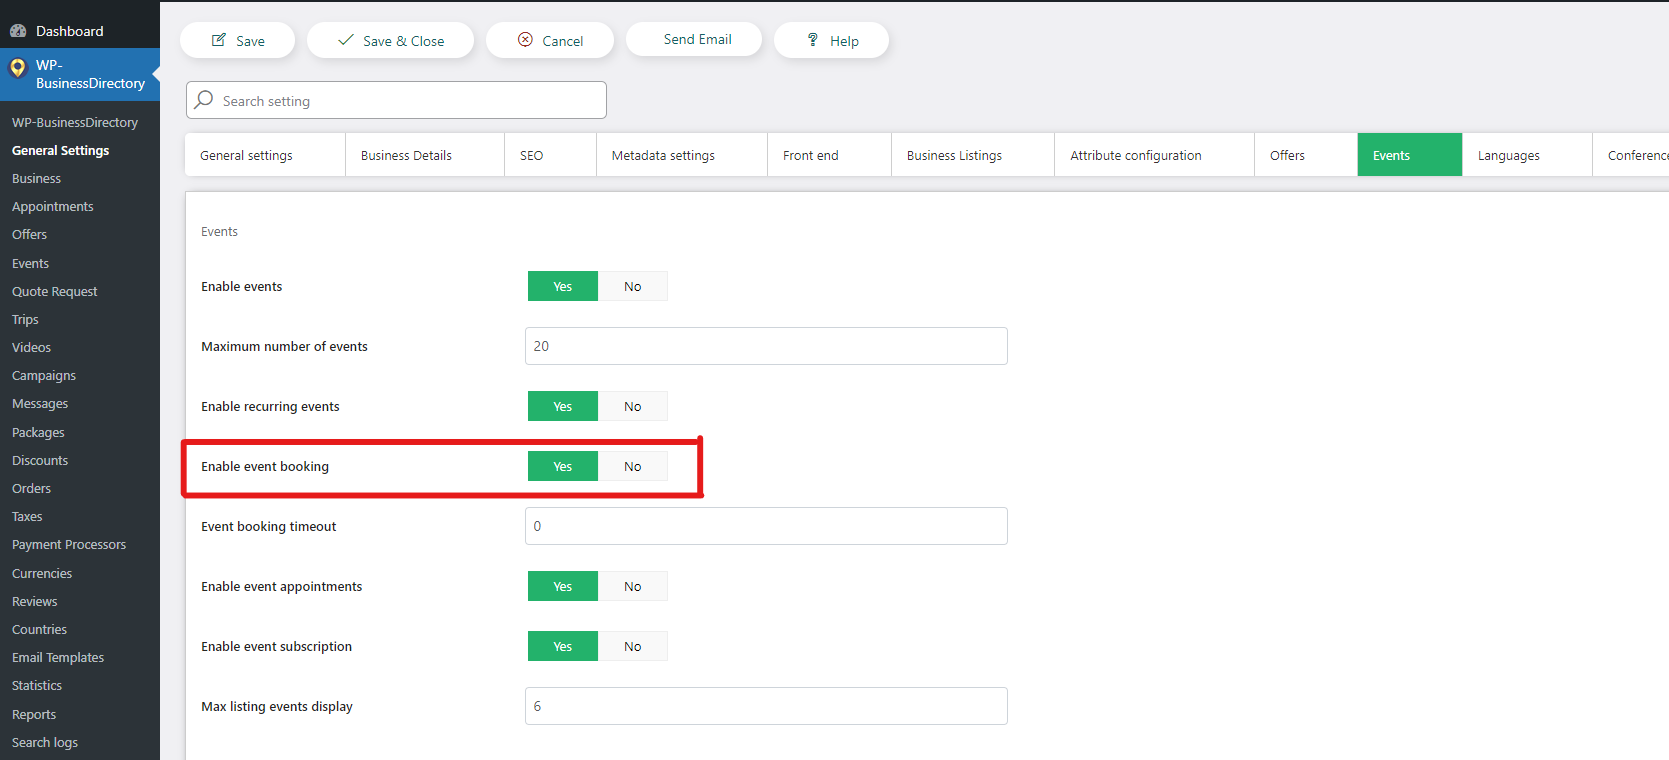
When this application is installed, in the general settings (events tab) a new setting called “Enable event appointments” will be displayed.
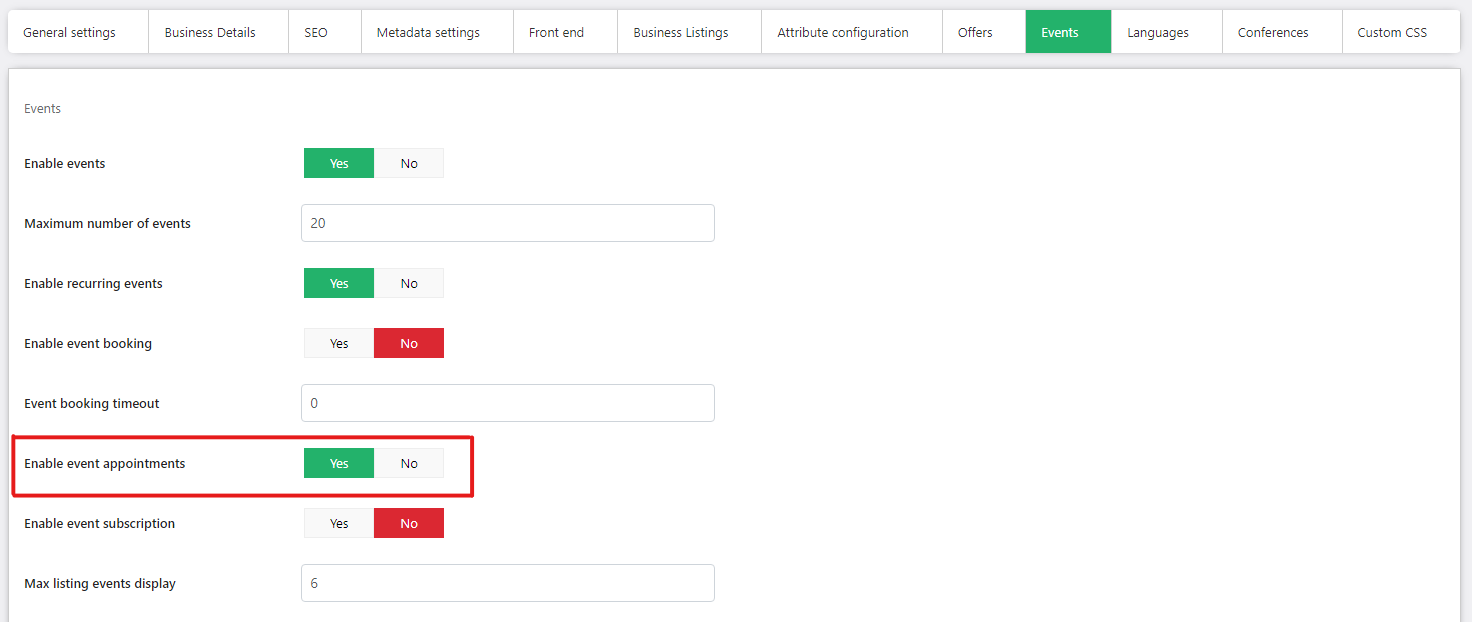
After this setting will be set to yes by the administrator, also the menu item will be visible under the Events menu item, on both admin area and front – end Control Panel.
How it works
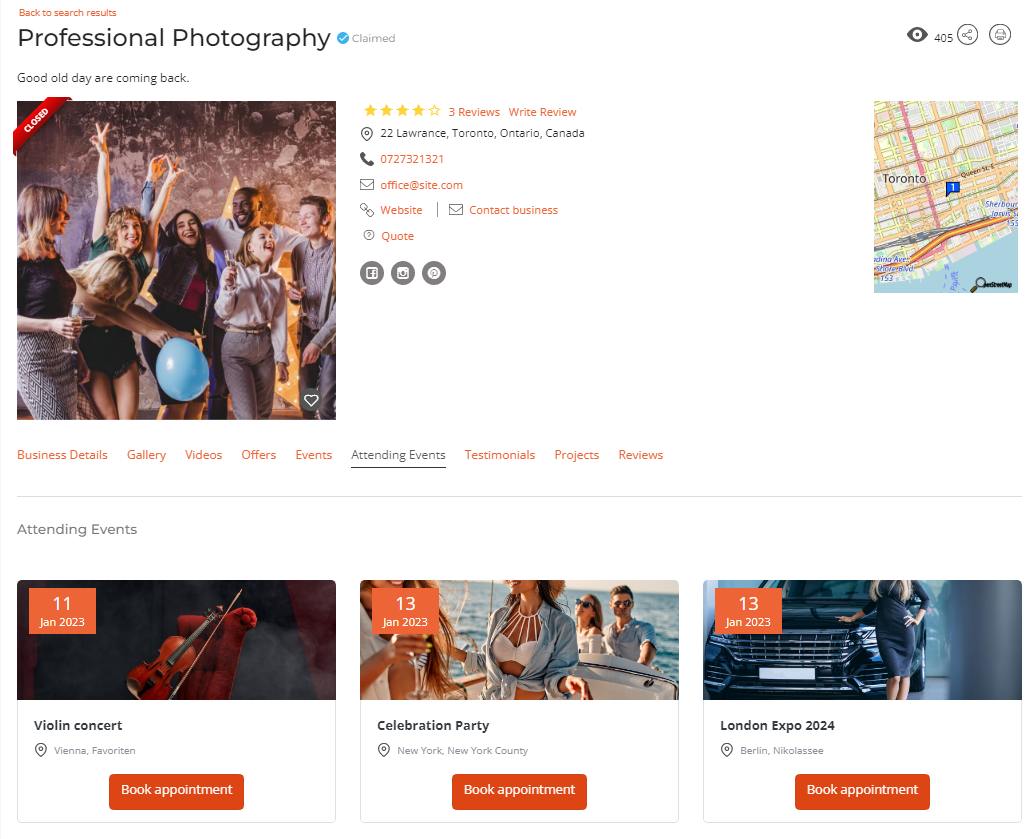
For each event, you can define the participating companies. The event, for which these companies are chosen, will be displayed in each of the selected companies details views under the “Attending events” section.
So, once the WBD Event appointments option is set to yes, in each event a new button will be displayed, called Book appointment.
Booking an appointment
Once all the details are filled in and set, the user can proceed to book the event.
Step 1: Access the business listing details view and go in the Attending events section
Step 2: Fill in the details and book the appointment
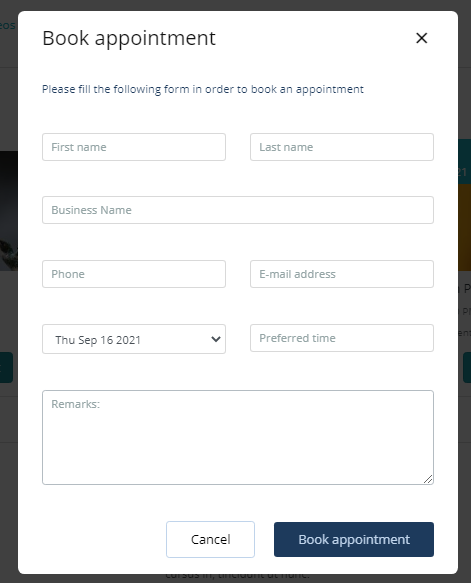
First name – the first name of the client
Last name – the last name of the client
Business name – the business name
Phone – the phone number
Email address – the email address of the client; a confirmation email is sent to the client after the appointment is booked
Preferred time – the desired time asked for the booking
Date – the date interval varies based in the start/end date of the event itself
Remarks – remarks from the client, if any
Manage event appointments
An event appointment is created with an ‘Unconfirmed’ status by default. It is up to the events’ owner whether to confirm or deny the appointment. For both cases, the client that booked the appointment will be notified by email.
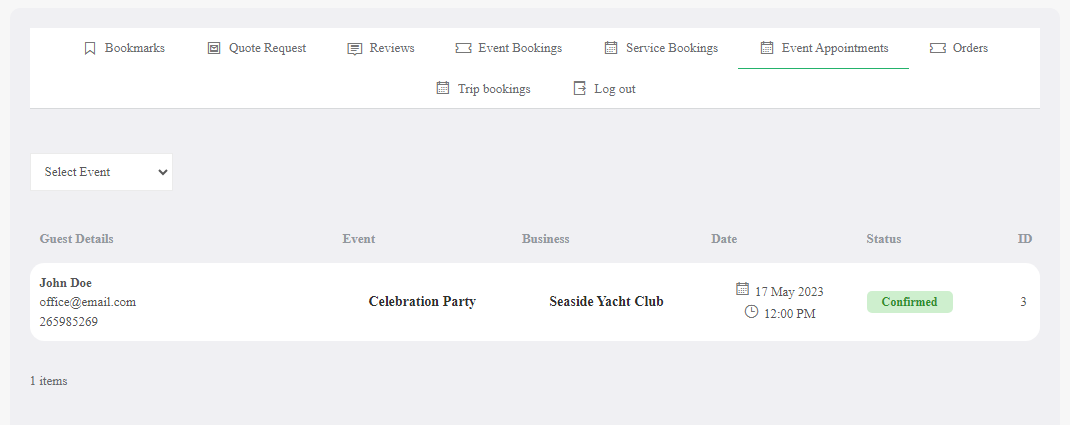
The appointments are listed in event appointment menu item, in the administrator area.
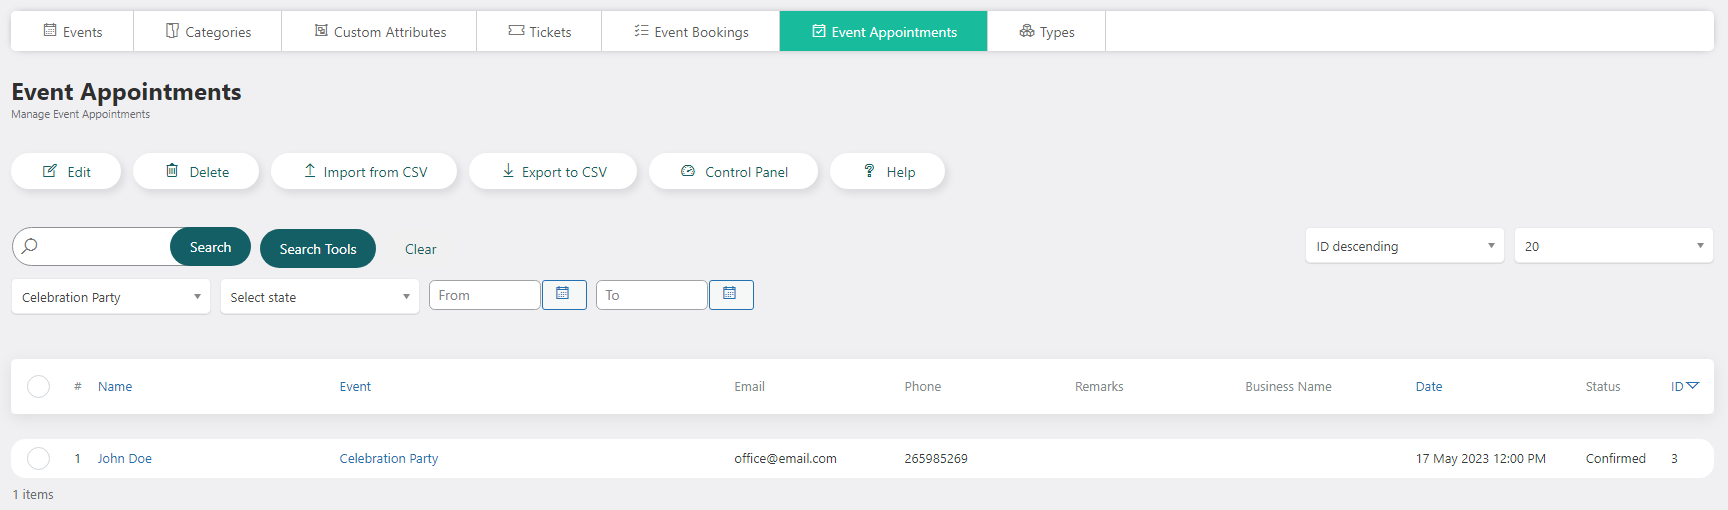
Also, the event owner can access the event appointments in the front – end control panel section, to confirm or deny the appointment.
WBD Event Booking
WBD Event Booking is an application that extends the WP-BusinessDirectory Events functionality by adding the possibility of booking an event. The WBD Event Booking application can be purchased separately from our store on https://www.cmsjunkie.com/wordpress-business-directory/wbd-event-booking
Installing the application
After purchasing the WBD Event Booking application, you can install the zip with all the files. After running the installation, you will be able to access the application from the component menu in the backend. To begin the installation of the WBD Event Booking application, log in into your wordpress backend and follow the steps described below:
In the main menu, you will be presented with the Directory Apps section.
Click the Install button.
Choose your downloaded copy of the WBD Event Booking archive (wpbd-event-bookings.zip).
You will receive a confirmation message upon installation completion
Setup and configuration
When this application is installed, in the general settings (events tab) a new setting called “Enable event reservation” will be displayed.
Once this setting is set to yes, the “Event tickets” and the “Event reservations” menu items will be shown on both, admin area and front – end Control Panel.
How it works
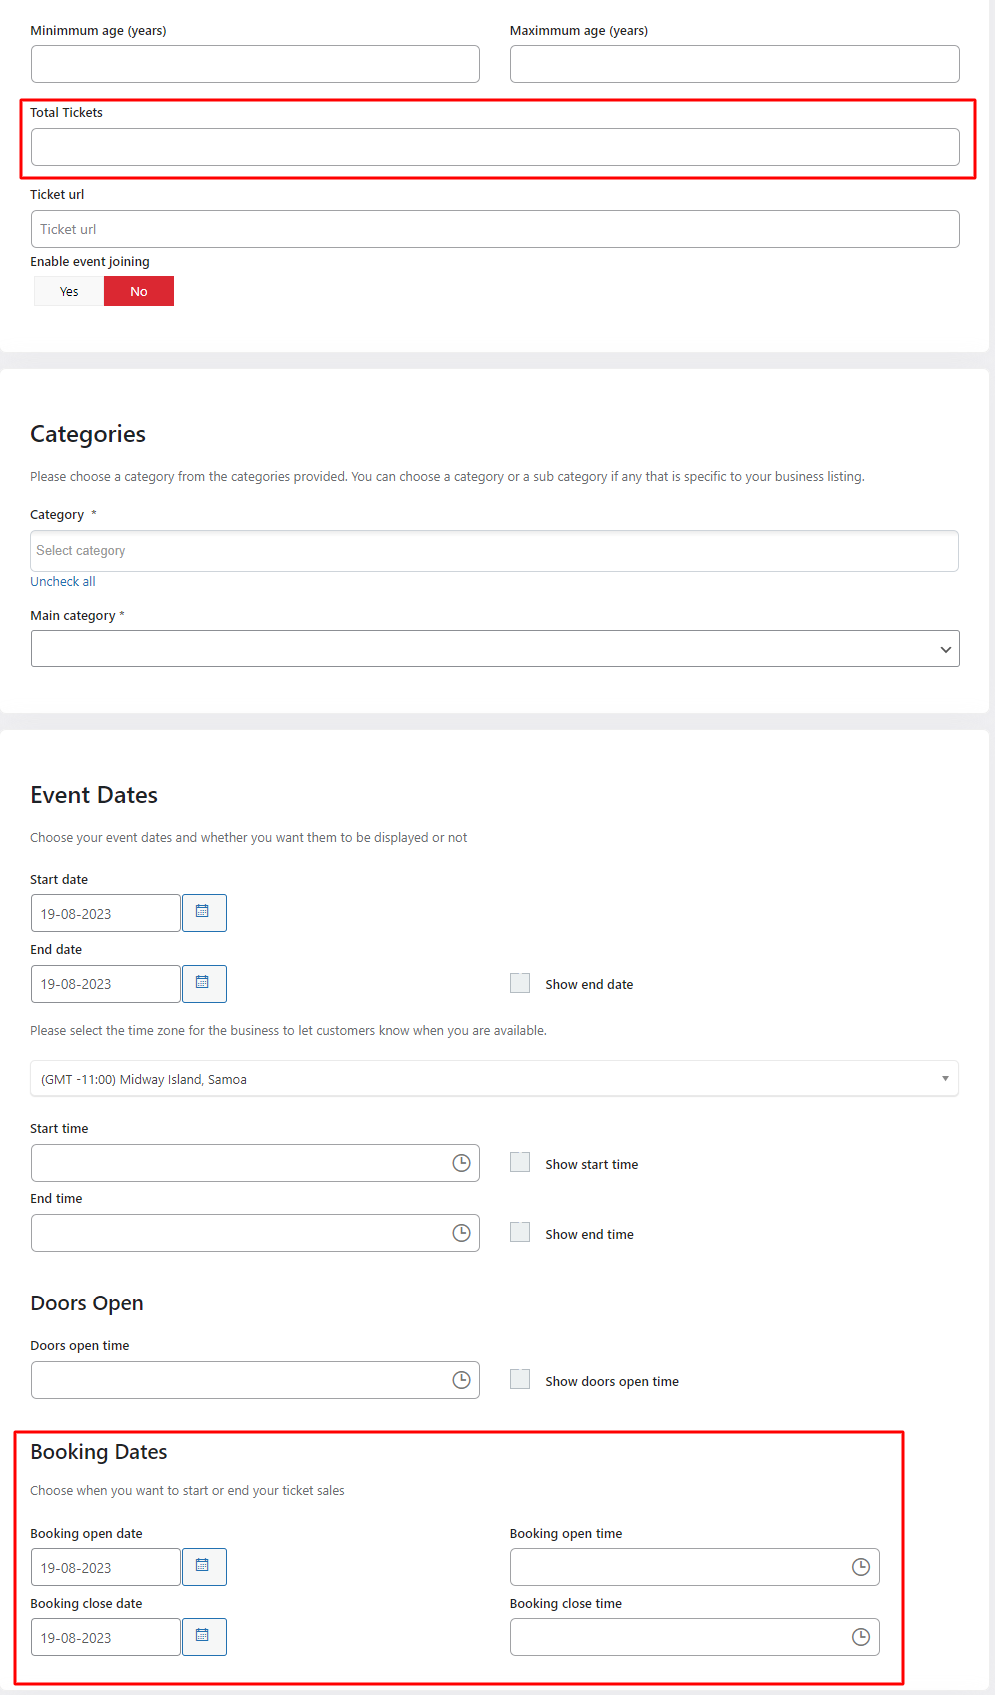
For each event, you can define a total number of tickets and the start/end booking dates. The total of tickets set on event level will always have priority and sets the total capacity for the actual event.
When tickets are defined for an event, on the front-end event details page, a new section containing the tickets will appear. The tickets can be booked by the end users based on the current quantity, and for each booking the event owner and the site admin will be notified with the booking details.
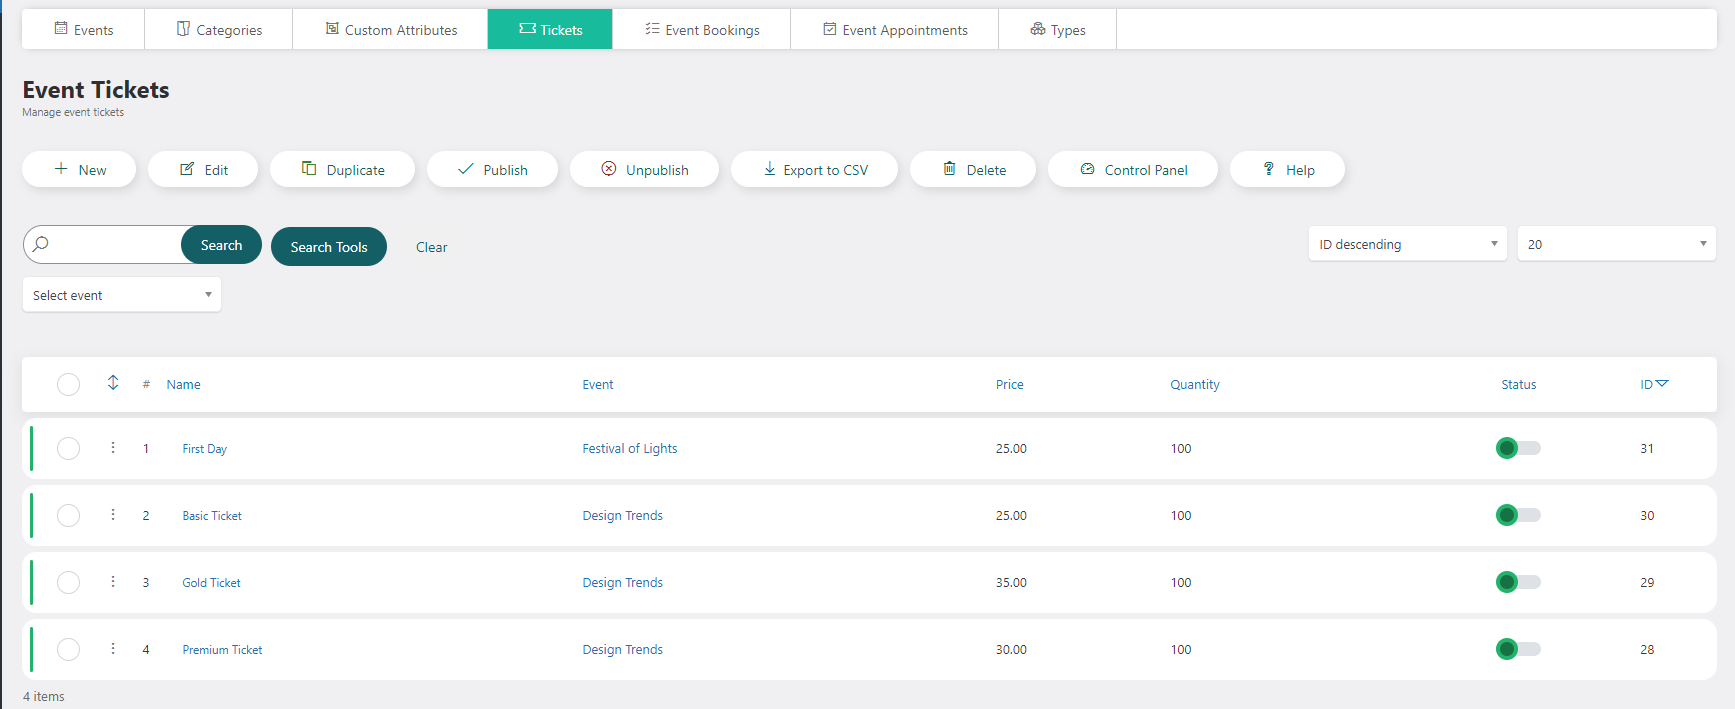
Event tickets
This section contains the tickets that will be defined by the event owners.
An event ticket can be added from both admin or front-end area, and contains the following details:
Name – the ticket name
Description – the ticket description
Status – setting the ticket to published or not
Min number of tickets per booking – the minimum number of tickets that can be booked
Max number of tickets per booking – the maximum number of tickets that can be booked
Ticket price – the price of the ticket
Ticket quantity – the available quantity for the actual ticket
After all the details are filled in and saved, the tickets will be listed in the event tickets section.
Booking an event ticket
All the tickets associated with an actual event will be displayed in the events details view.
Step 1: Access the tickets section in the events details view
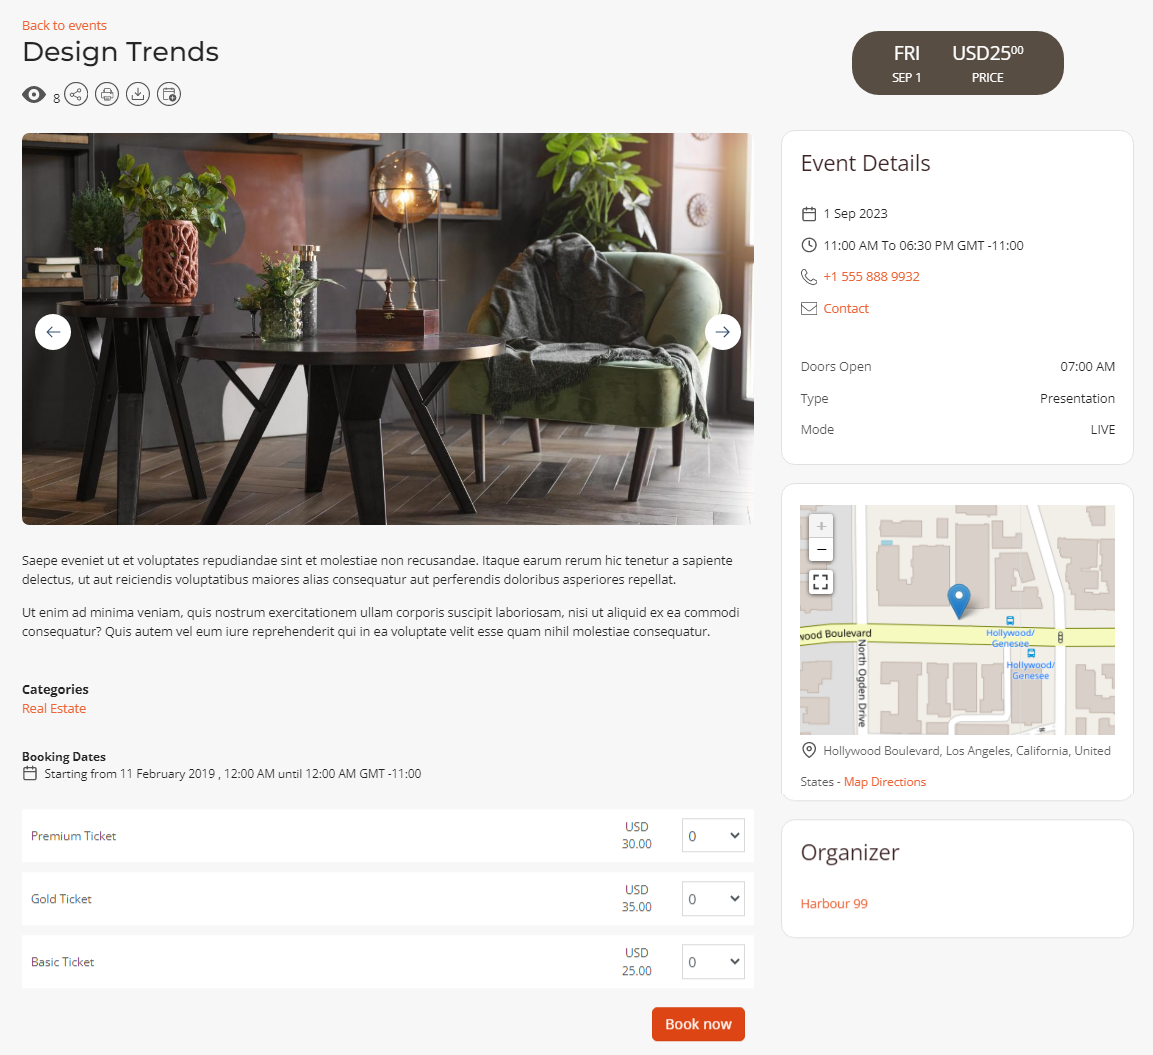
Step 2: Select the desired ticket quantity and book them
The user can select the quantity for the desired ticket and book them. After the “Book now” button is selected, the user will be redirected to the guest details page.
Step 3: Complete the guest details

Step 4: Select the payment method and perform the payment

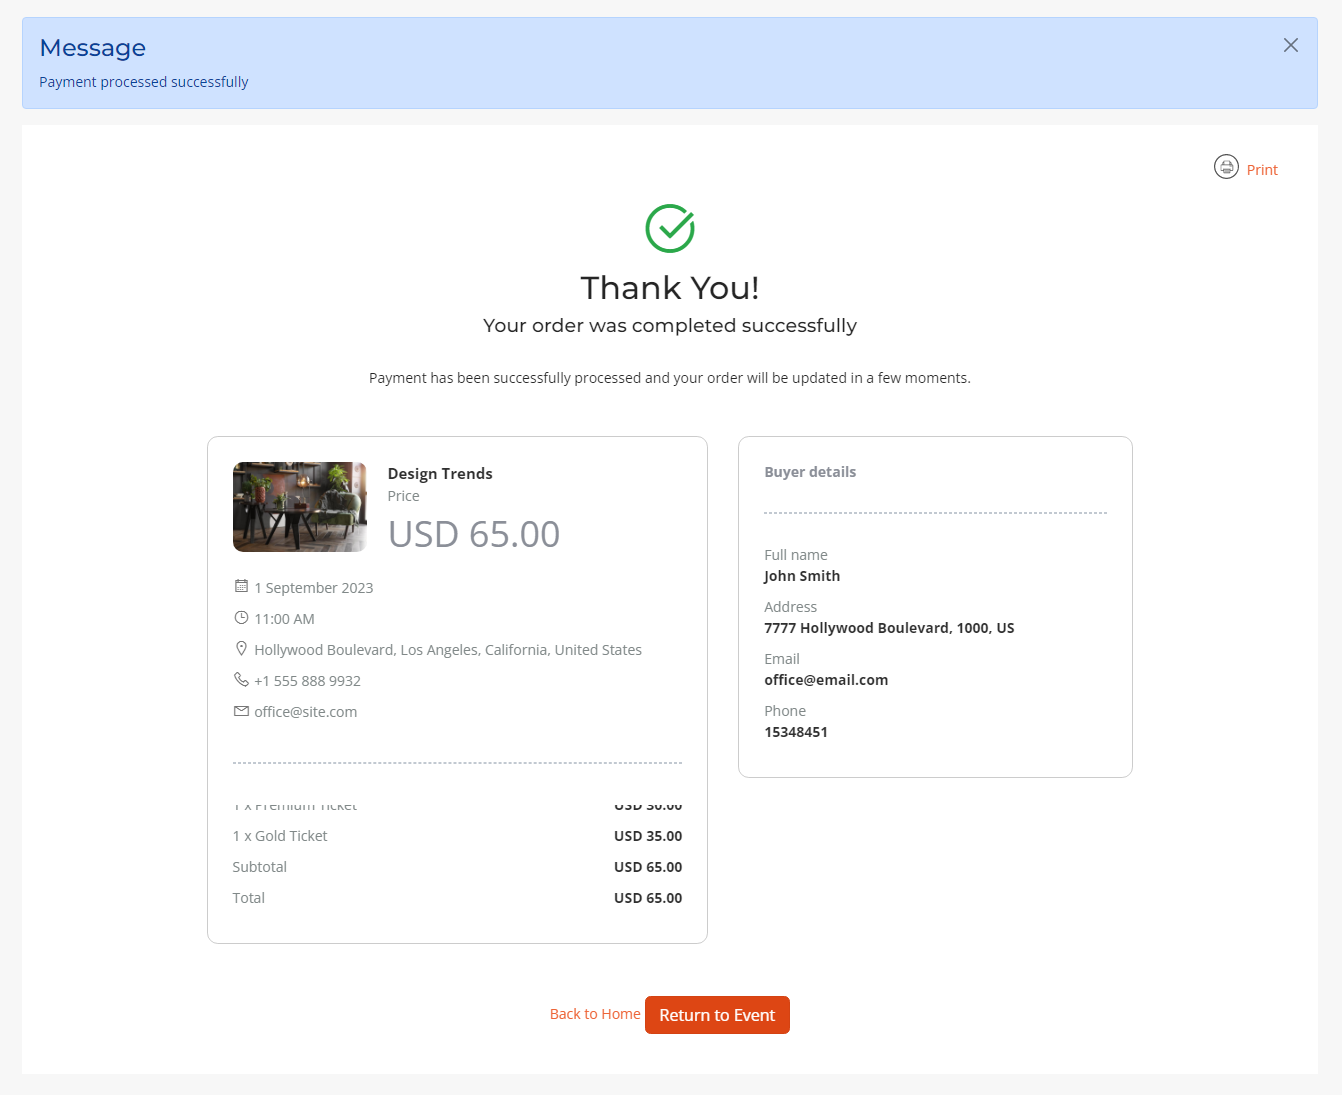
Step 5: Booking confirmation
Manage event bookings
The booked tickets will be listed in the event bookings section on both, admin area and also in the front – end Control Panel.
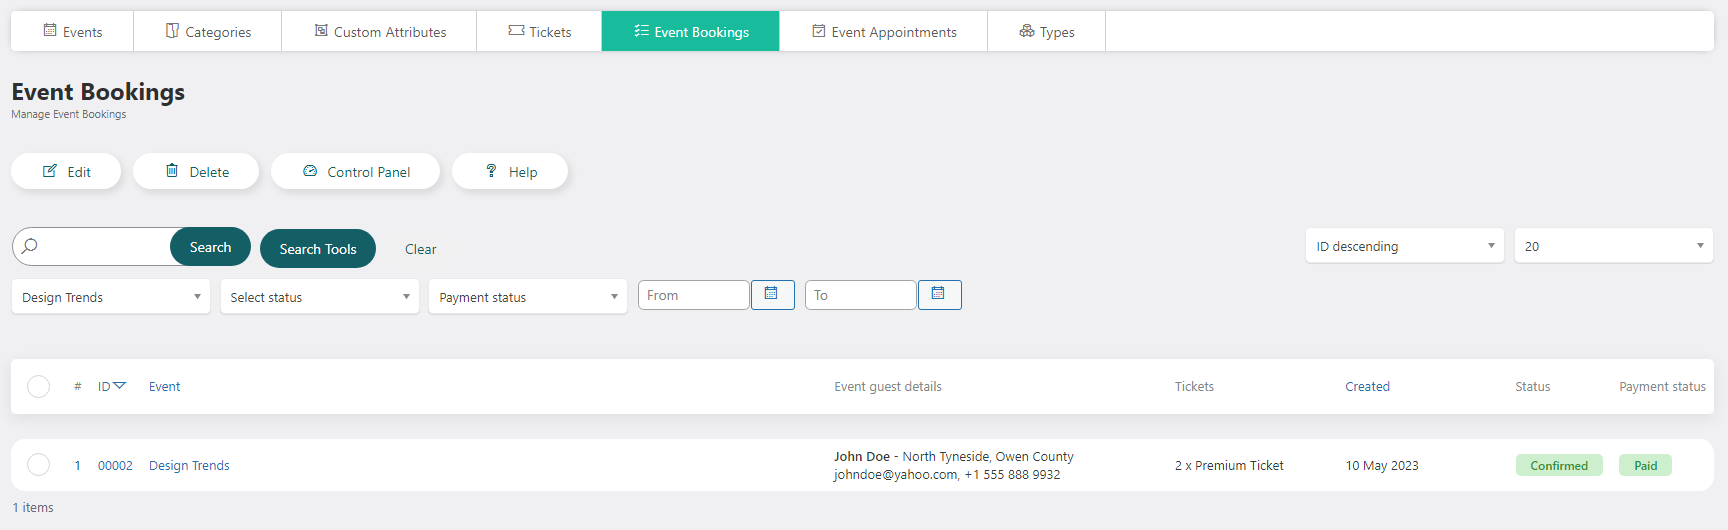
Both, event tickets and event reservations can be accessed, edited and deleted also by the event owners, in the front – end control panel section.
WBD Campaigns
WBD Campaigns is an application that brings new ways of business listing advertising and also a new tool for monetizing your website. The WBD Campaigns application can be purchased separately from our store on https://www.cmsjunkie.com/wordpress-business-directory/wbd-campaigns
Installing the application
To begin the installation of the WP-BusinessDirectory Campaigns application, log in into your wordpress backend, access the directory dashboard and follow the steps as described below:
In the main dashboard, you will be presented with the Directory Apps section.
Click the Install button (on the bottom of the Directory Apps section).
Choose your downloaded WBD Campaigns archive (wpbd-campaigns.zip).
You will receive a confirmation message upon successful installation completion
Setup and configuration
When the application is installed, two new menu items will be displayed in the sidebar called Campaigns and Campaign Plans. The Campaigns menu item will be visible also in the front-end Control Panel section.
How it works
The website owner can create multiple places on his website to offer the possibility for the business owner to advertise his business listing on those places. For each place, a new campaign plan and a new module position should be created. For each website place, the website owner can create a campaign plan with different prices, depending on the importance of the position.
A budget can be set for each campaign and after the budget limit will be reached, the campaign will not be active anymore.
Campaigns
This section contains the campaigns that will be defined by the business owners.
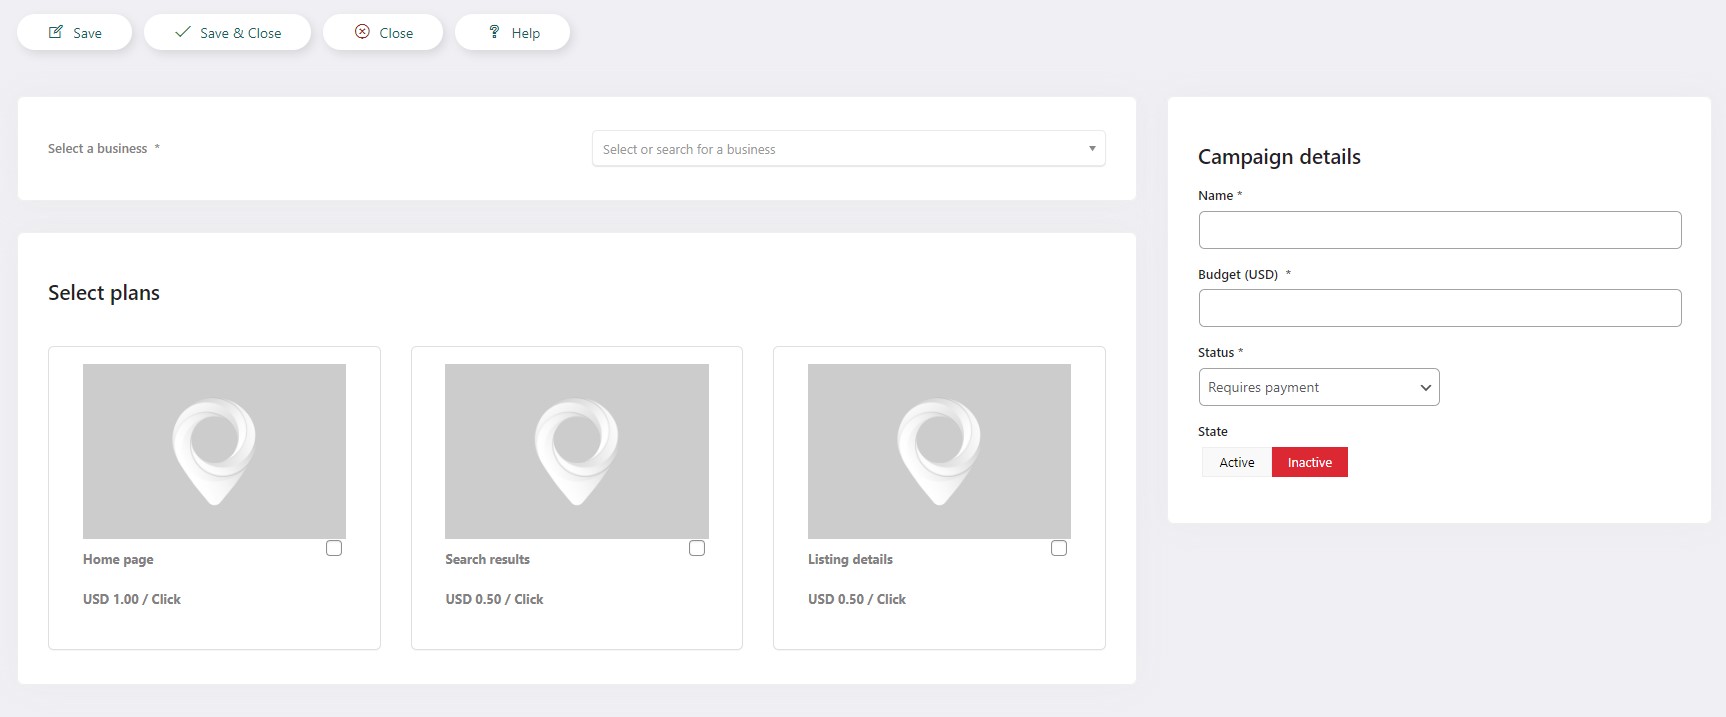
A campaign can be added from both admin or front-end area, and contains the following details:
Select a listing – the site admin can select a listing to which this campaign will belong to
Select plans – all the campaign plans created will be listed here; only one plan per campaign can be selected.
Name – the name of the campaign
Budget – the budget set per campaign
Status – shows whether the campaign is paid or not
State – set whether the campaign is active or not
After all the details are filled by the user and saved, the campaigns will be displayed in the Campaigns section.
Campaign Plans
This section contains the campaign plans.
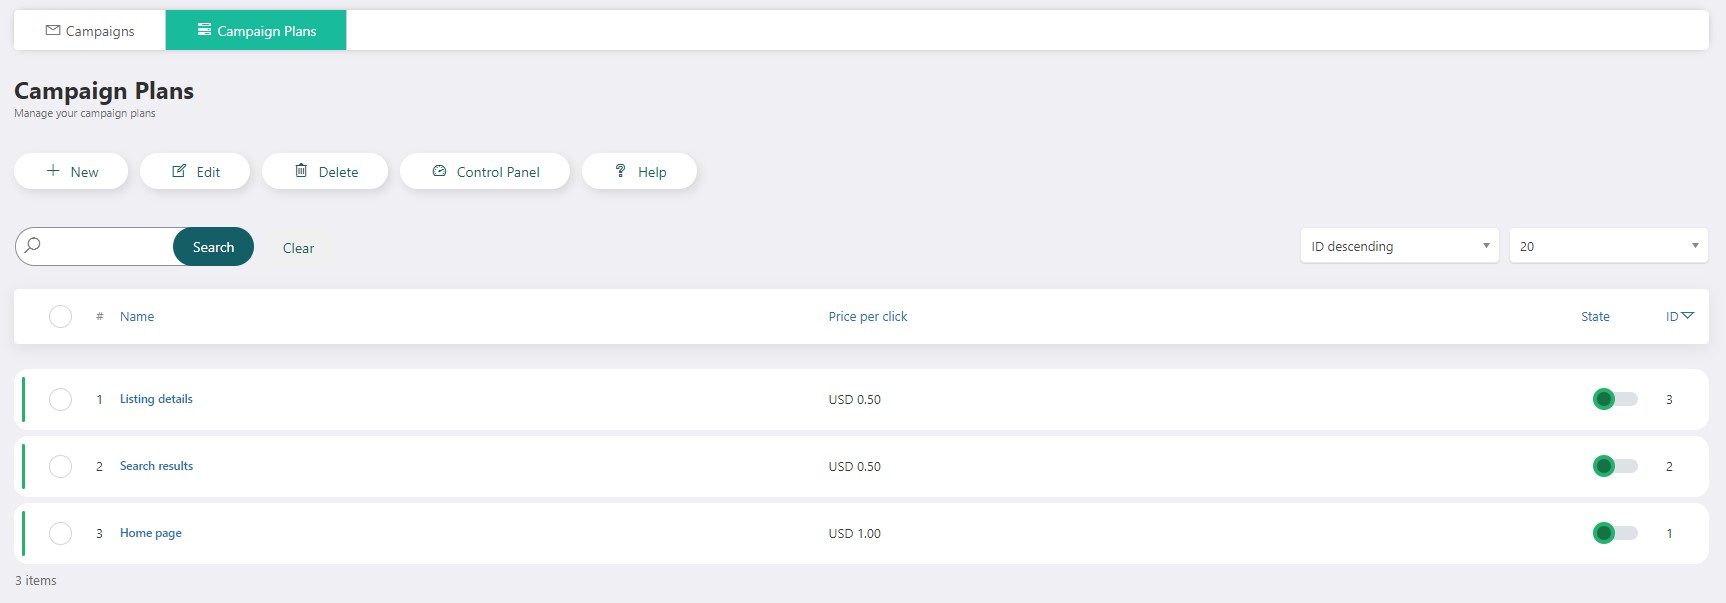
Each campaign has to contain a campaign plan in order to be functional. Campaign plans can be added only by the site admin.
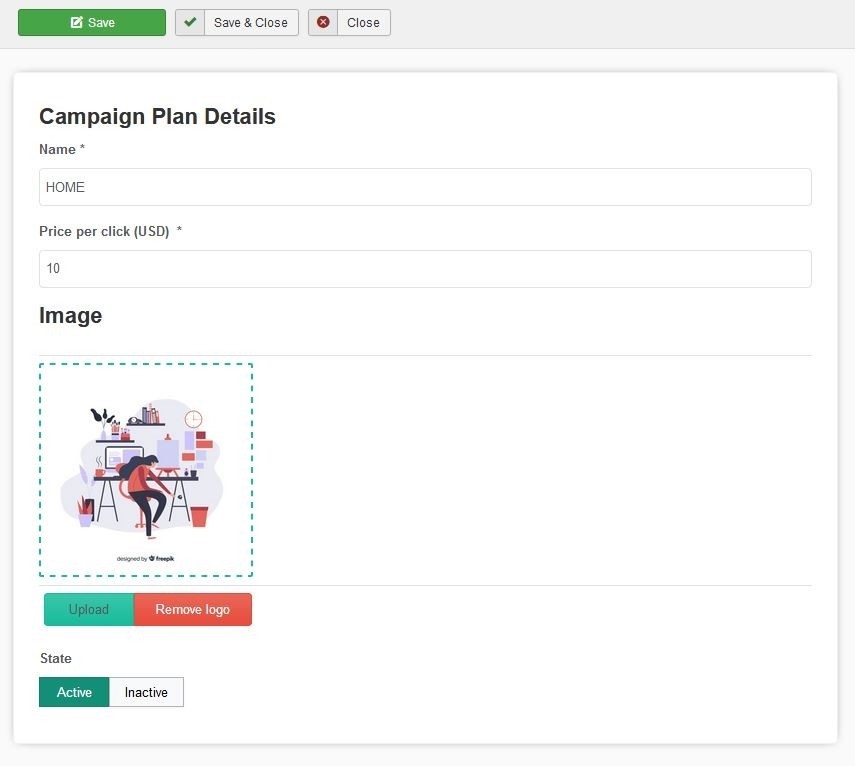
A campaign plan contains:
Name – name of the campaign plan
Price per click - set the price per click
Image – set the image of the campaign plan
State – set the campaign plan to active or inactive
Manage Campaigns
When the WBD Campaigns application is installed, in the WBD Business Listings module, two new options are shown:
Campaign position – choose the campaign position
Only campaigns – set whether to display only campaigns or not
Only when this setting is set to yes, in the module will be shown only listings associated with paid campaigns in the chosen position.
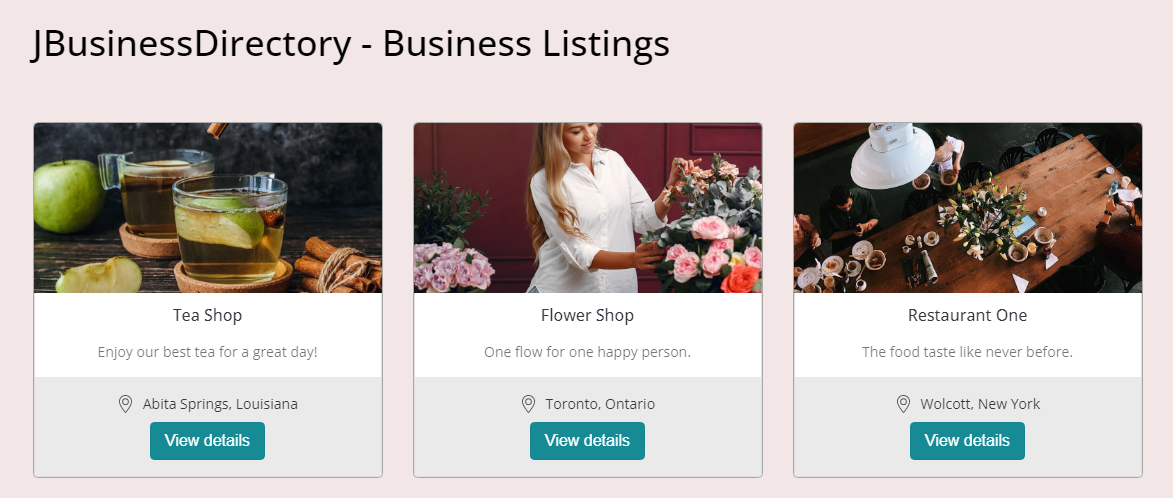
Whenever one of the listings is clicked, the budget set per campaign will be decreased by the price per click set in the campaign plan. When the budget limit will be reached, then the listing associated with the campaign will not be visible anymore in the module.
WBD Recurring Events
WBD Recurring Events is an add-on that extends the WP-BusinessDirectory Events functionality by adding the possibility of having recurring events.
Installing the application
To begin the installation of the WP-BusinessDirectory Recurring Events application, log in into your wordpress backend, access the directory dashboard and follow the steps as described below:
In the main dashboard, you will be presented with the Directory Apps section.
Click the Install button (on the bottom of the Directory Apps section).
Choose your downloaded WBD Recurring Events archive (wpbd-recurring-events.zip).
You will receive a confirmation message upon successful installation completion
How it works
When the installation is completed on the edit event view the following section should be shown.
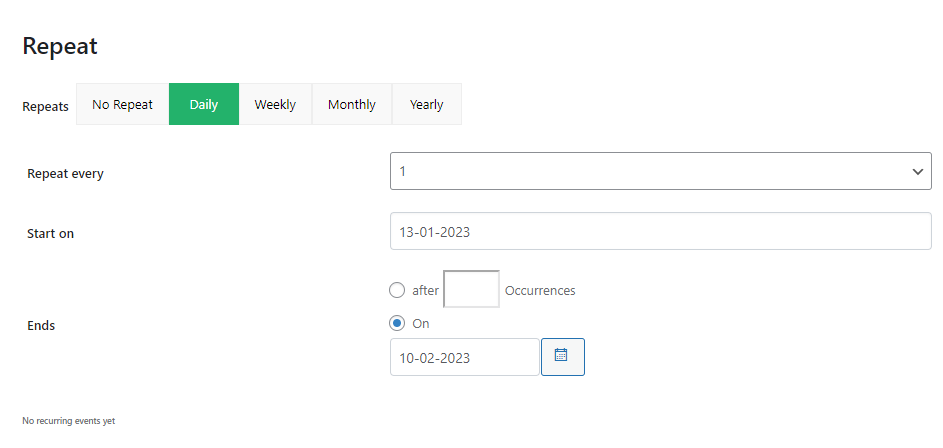
You can find below the description for each field.
Repeats: set the recurring method: daily, weekly, monthly and yearly.
Repeat every: set the recurring interval for the events series
Start on: set the start date of the recurring series.
Ends: there are 2 options available. You can set an end date or you can set the number of occurrences. The start and end date are always linked to the event start and end date. The events will be created until the end date is lower than the end day set on the date field or when the number of occurrences is reached.
When an event that is part of a recurring series is saved the following popup is shown.
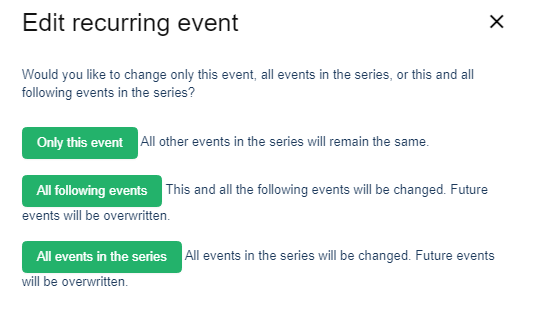
You have the possibility to save the modifications for the recurring event, for the events that follow the current event or for all the events in the series.
WBD Quote Request
WBD Quote Request is an application that brings new ways for end users to get in contact easier with the businesses. The WBD Quote Request application can be purchased separately from our store on https://www.cmsjunkie.com/wordpress-business-directory/wbd-quote-requests
Installing the application
To begin the installation of the WP-BusinessDirectory Quote Request application, log in into your wordpress backend, access the directory dashboard and follow the steps as described below:
In the main dashboard, you will be presented with the Directory Apps section.
Click the Install button (on the bottom of the Directory Apps section).
Choose your downloaded WPBD Quote Request archive (wpbd-quote-requests.zip).
You will receive a confirmation message upon successful installation completion
Setup and configuration
When the application is installed, in the directory general settings, three new settings will be shown:
Enable request quote app (Business listings tab) – enables the request quotes views on both, admin and site
Choose request quote usergroup (Front-end tab) – the default usergroup set for the new users created during the quote requesting process
Request quote radius (Front-end tab) – the radius set for the location search
When the Enable request quote app setting will be set to yes by the administrator, on the dashboard menu items, for both admin and front-end Control Panel, new menu items will be visible.
How it works
The quote requests mechanism can be accessed in two ways:
by enabling the WPBD Quote Request widget, assigning it to a certain page and if a category search is performed, for which there are existing request questions, the button will be shown.
by enabling the Link with quote request option in the WPBusinessCategories widget; if this widget is active and the selected category for the module has available request questions, the mechanism will be applied.
Quote request process
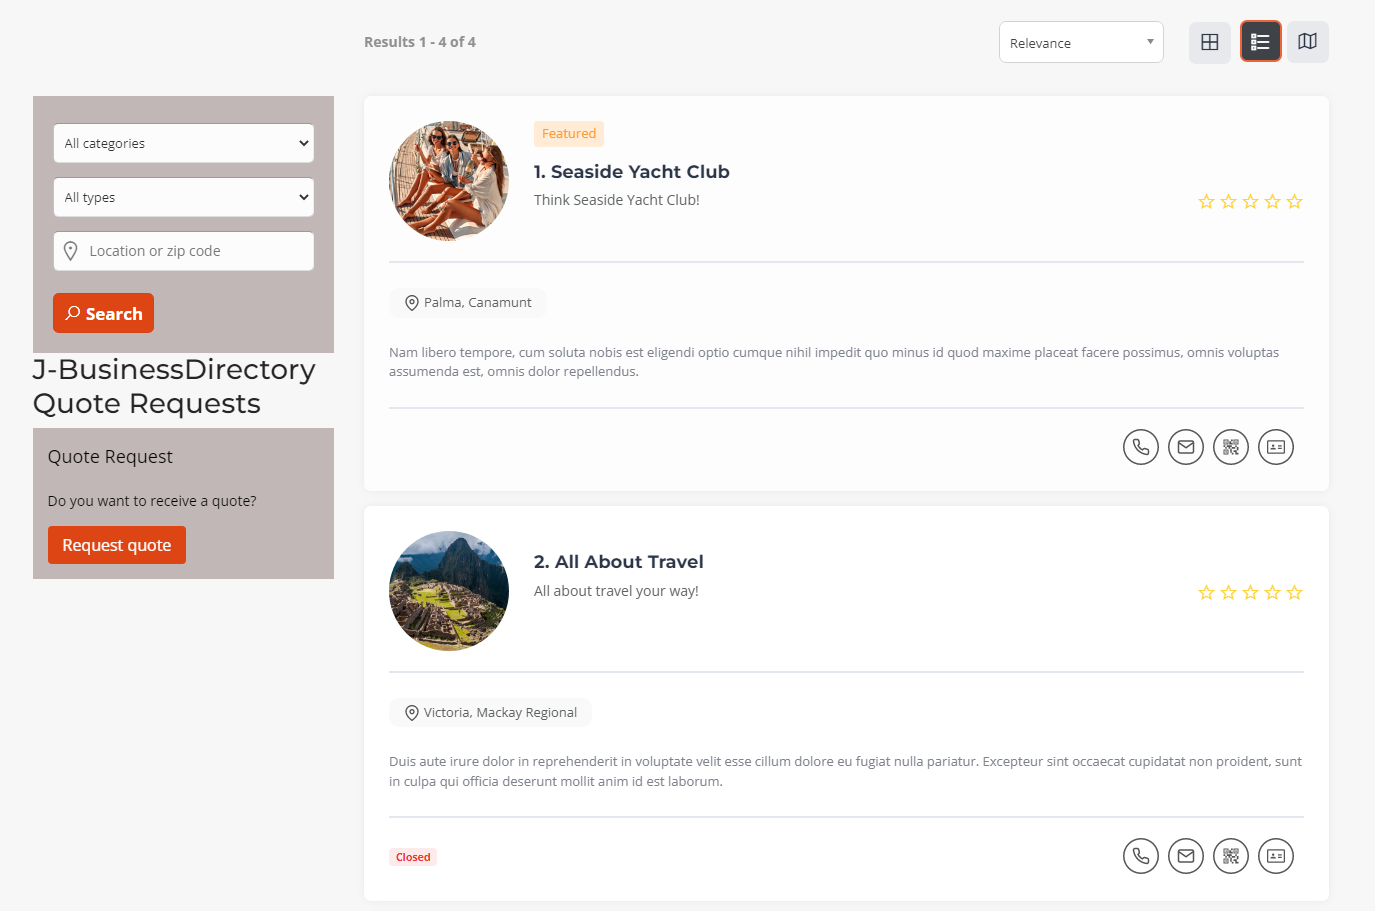
Step 1: Perform a category search
Search for the desired category and then press the Request Quote button, which appears on the search results on the position set on the WPBD Quote Request widget
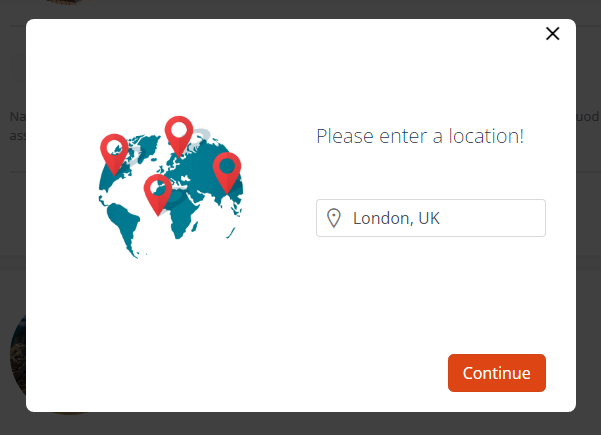
Step 2: Enter the location
The user will be requested to enter his location. If no business listing is found in the area determined by the location and the radius (that is set on the general settings), a message will be show and the process is interrupted. Otherwise the user will move to step 3.
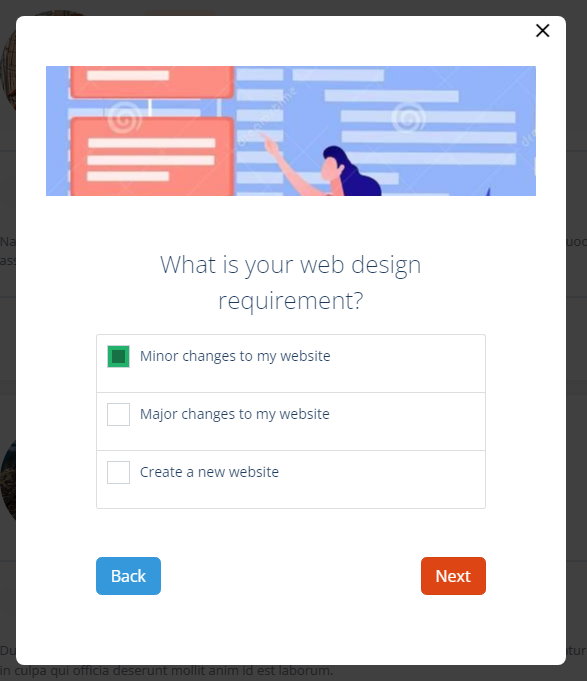
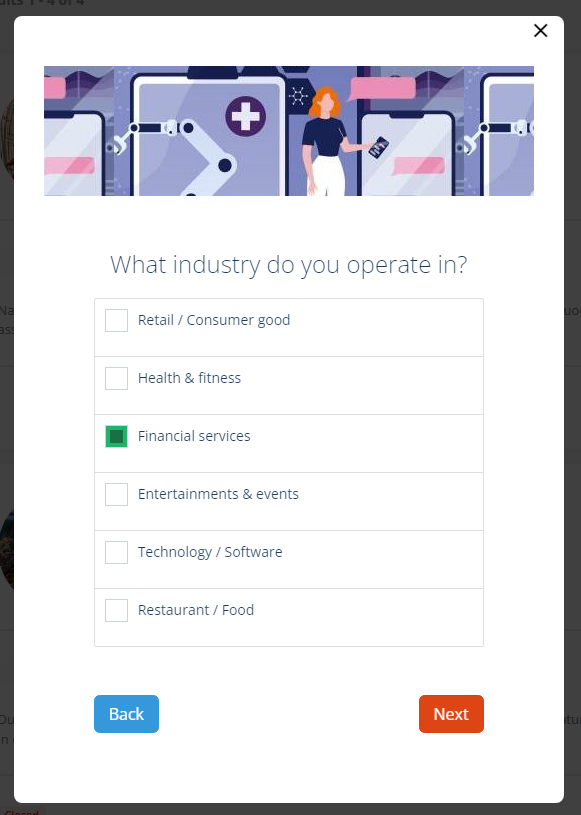
Step 3: Answer the questions
The user will be presented server questions (that are defined on the backend) and an answer has to be selected or input
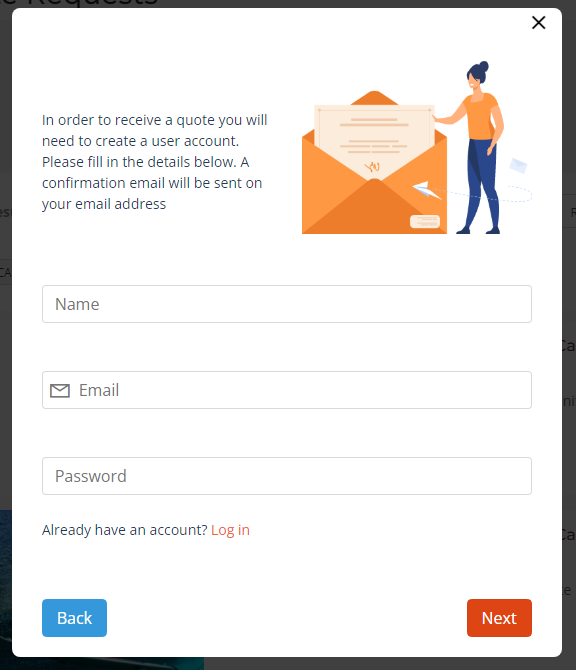
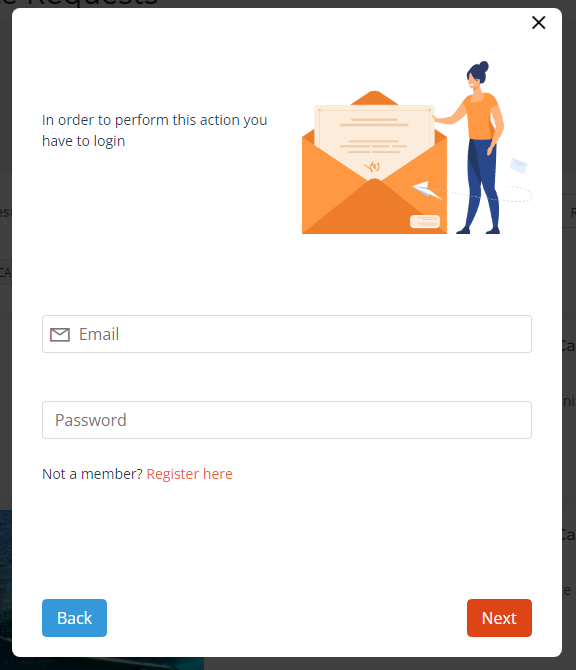
Step 4: Fill in the user details
After all questions have been answered and if the user is not logged in he will be requested to enter his name and email, and a new account will be created. If he already has an account then he can be directed on the log in form to enter his credentials.
This user will belong to the default usergroup set in the directory’s general settings.
This step won’t be shown if the user is already logged in.
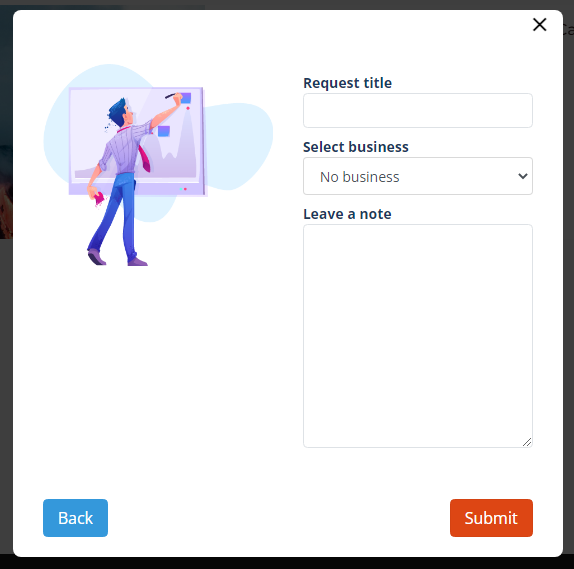
Step 5: Request notes
The user can add a title for the request at “Request title” box and then select a business on the second select box below.
The user can leave an optional note for the companies with some details that were not covered on the defined questions.
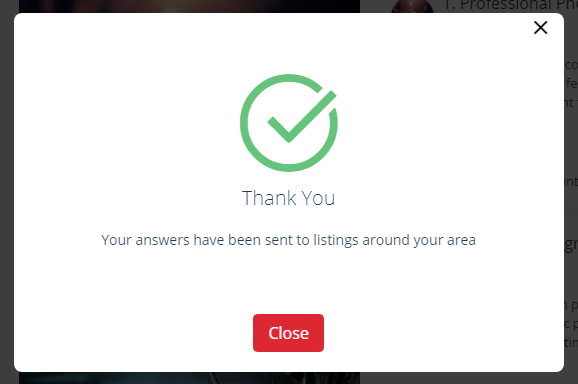
Step 6: Request confirmation
A confirmation screen will be shown to the user. All businesses from that category will receive an email to reply to the quote request and will have the possibility to reply to the request.
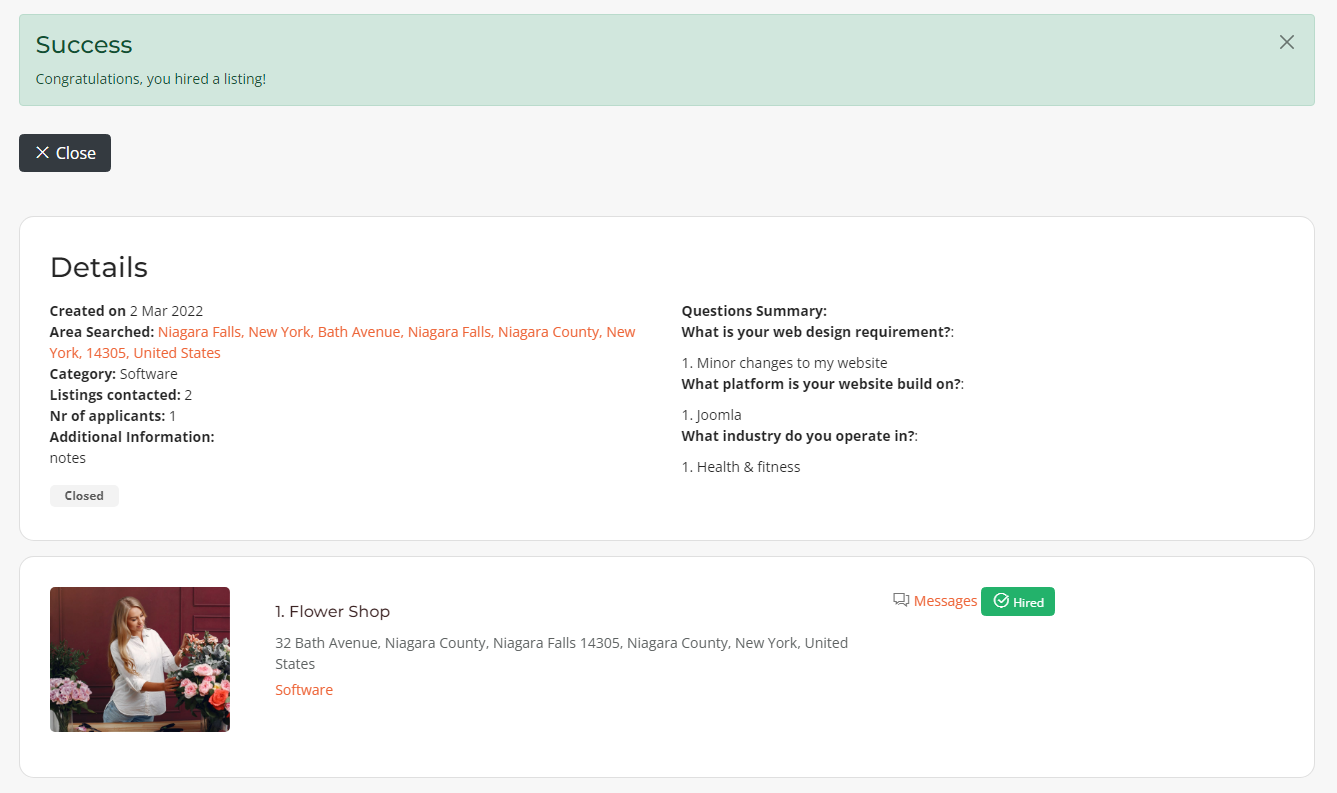
Step 7: Hire company
The client will decide for the best quote and hire the company for the job from his front-end control panel.
Request Questions
This section contains the questions that will be defined by the site admin to be used during the quote request process.
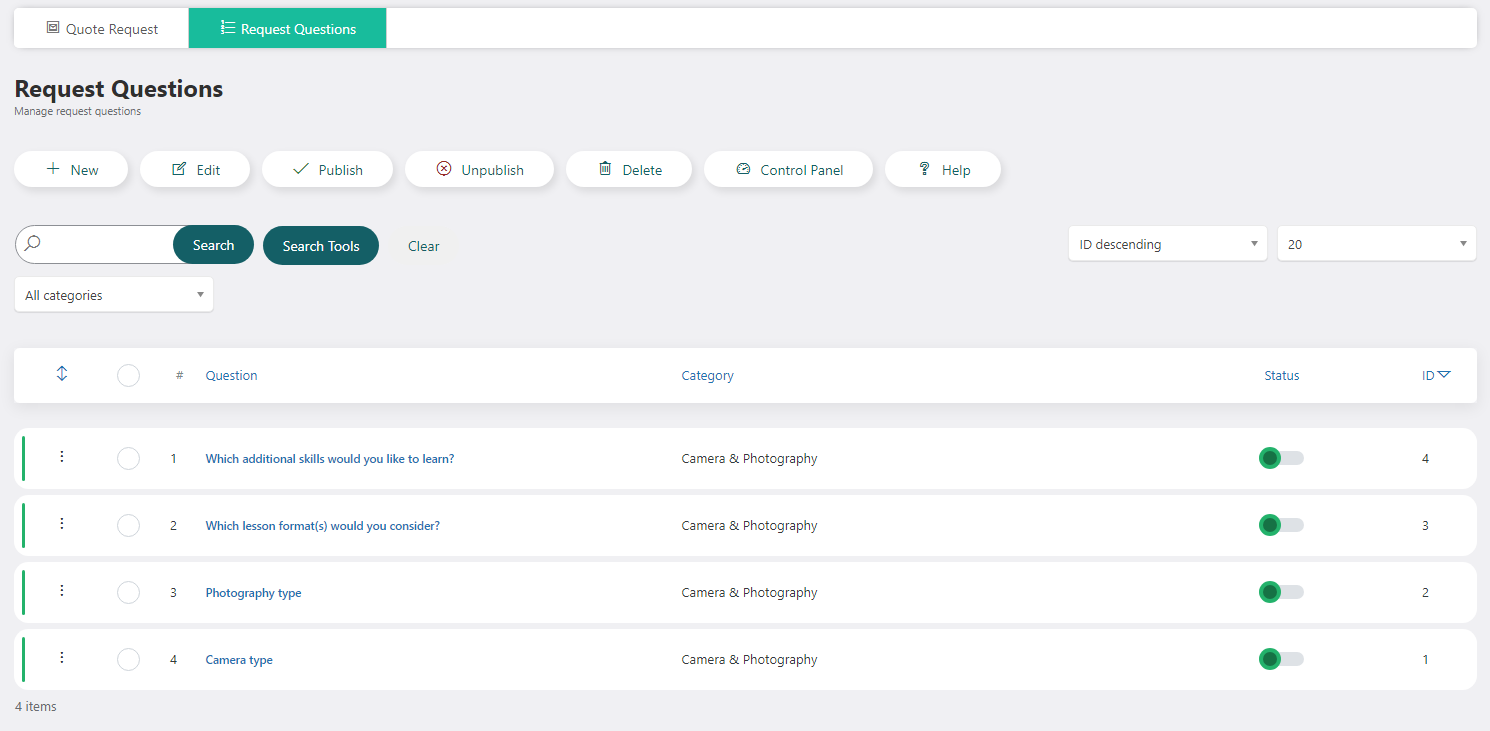
A request question contains the following details:
Name – name of the question
Category – set the category for which the question will be available
Type – the question type, radiobutton, checkbox or input field
Status – set to published or unpublished
Image – upload an image to represent the question
Question options – add as many question options as desired and set them to published or not
After all the details are filled by the admin and saved, the questions will be shown in the Request questions section.
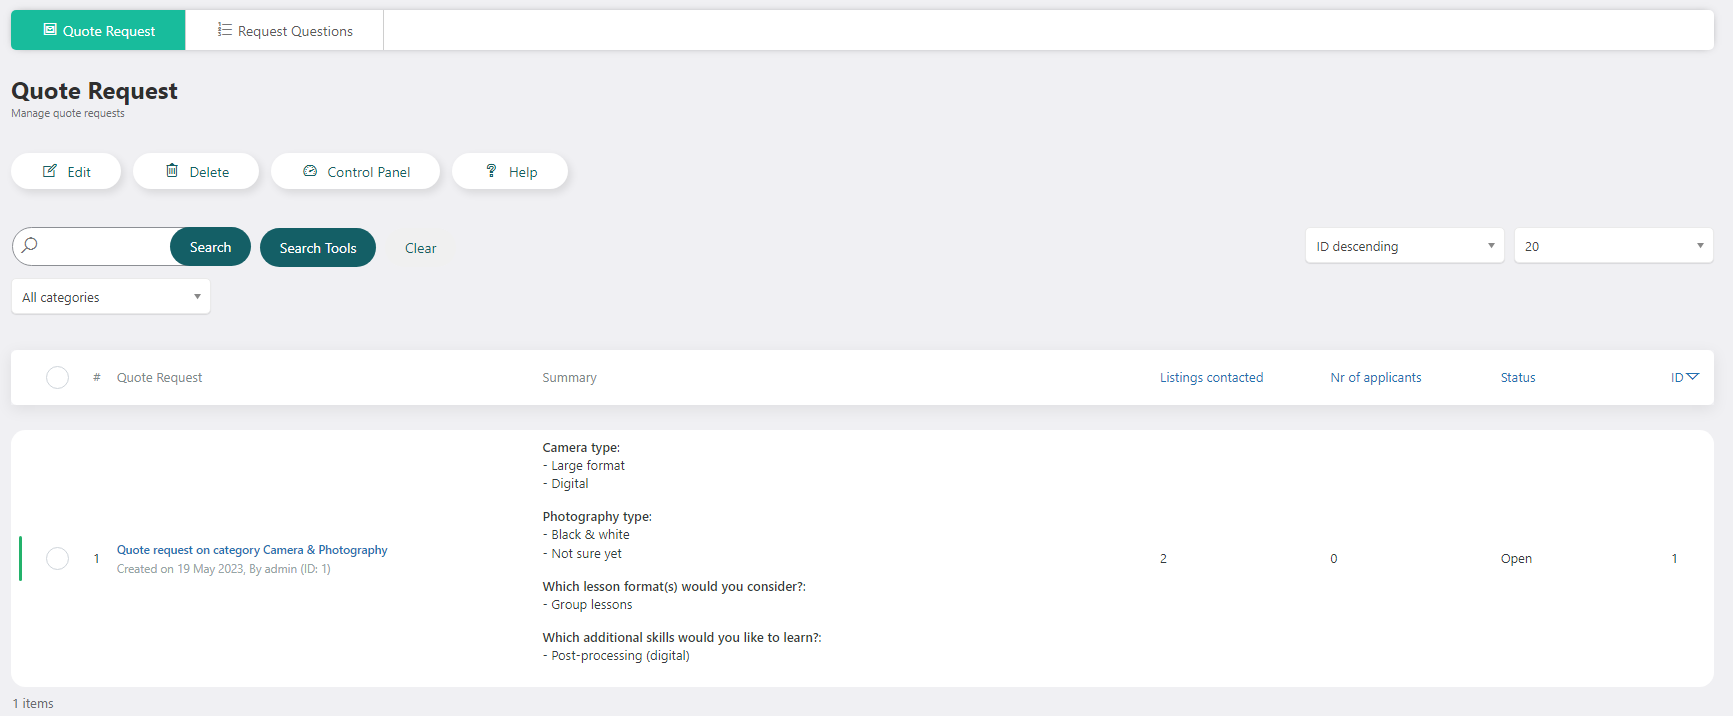
Quote Request
The requested quotes will be available on the admin section and on the user dashboard, in the front-end section.
Business Owners Section
For the company owners, all the requested quotes will be shown on the Request Quotes section in the front-end Control Panel.
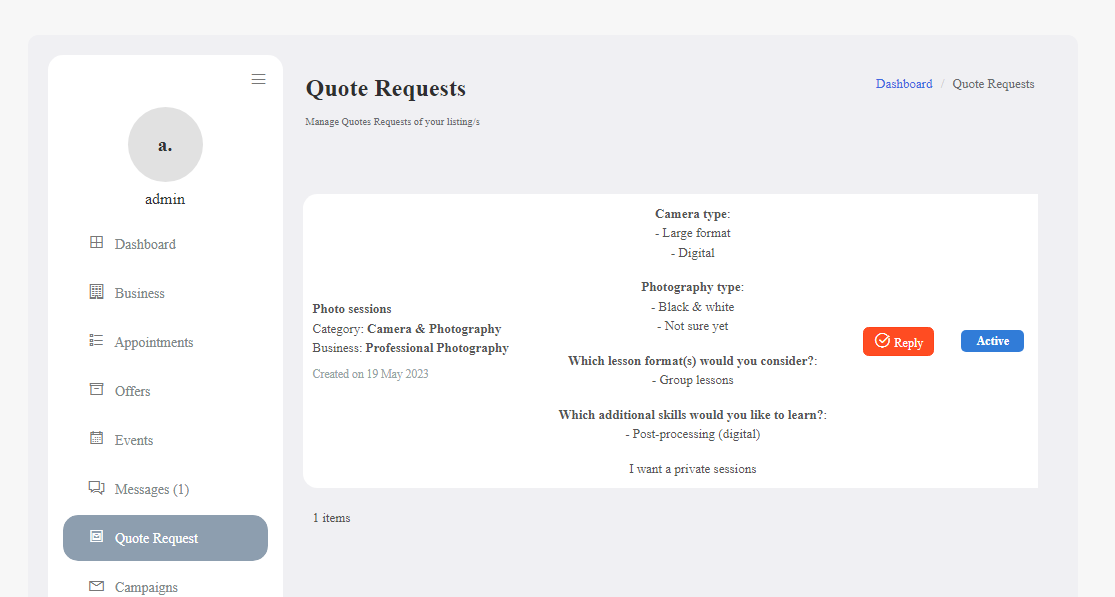
As it is seen in the above picture, when selecting the Apply button (second row), the page will be reloaded, adding the possibility for the company’s owner to chat with the client. When selecting the chat button (first row), a chat dialog box will be opened, adding the opportunity for a real-time conversation between the client and the company’s owner.
User Dashboard
All the companies that have replied will be shown in the user dashboard. The requested quote will contain:
creation date
searched area
searched category
number of replies
additional information (the optional note)
questions summary
Below all the information, will be also shown the listings that have replied to the client.
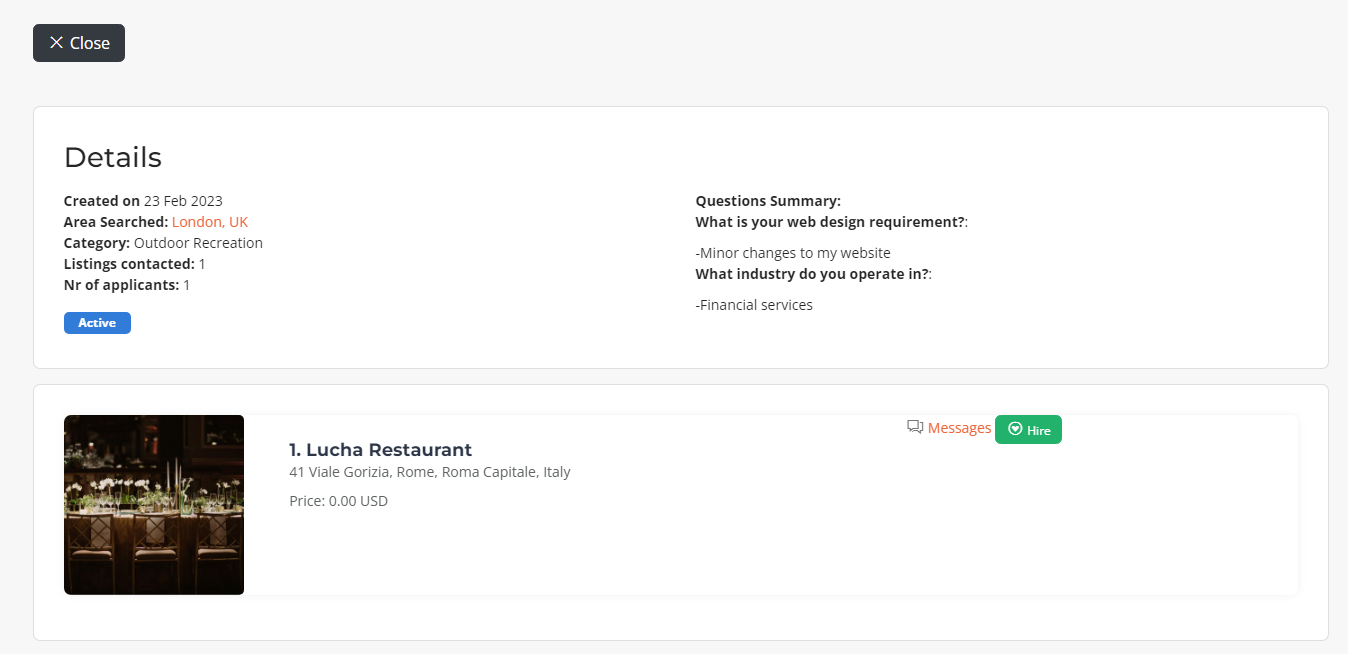
By selecting on the company name, the user can open the chat dialog box to contact the company’s owner.
After the client has made the decision, s/he can hire the desired listing.
Quote Request List View
All the created quote requests will be appearing on a new section on the front-end area which is the Quote Request List View.

If the user who has created the quote request is logged in then his quote request will have the “owned” title on the left, otherwise will appear the apply button if the user wants to apply on a new quote request.
WBD Trips
WBD Trips is an application that extends the WP-BusinessDirectory Trips functionality by adding the possibility of managing and booking a trip.
Installing the application
To begin the installation of the WP-BusinessDirectory Trips application, log in into your wordpress backend, access the directory dashboard and follow the steps as described below:
In the main menu, you will be presented with the Directory Apps section.
Click the Install button (on the bottom of the Directory Apps section).
Choose your downloaded WPBD Trips archive (wpbd-trips.zip).
You will receive a confirmation message upon successful installation completion.
Setup and configuration
When application is installed, in the general settings (Front-end tab) a new setting called “Trips search view mode” on the Trips section will be displayed.
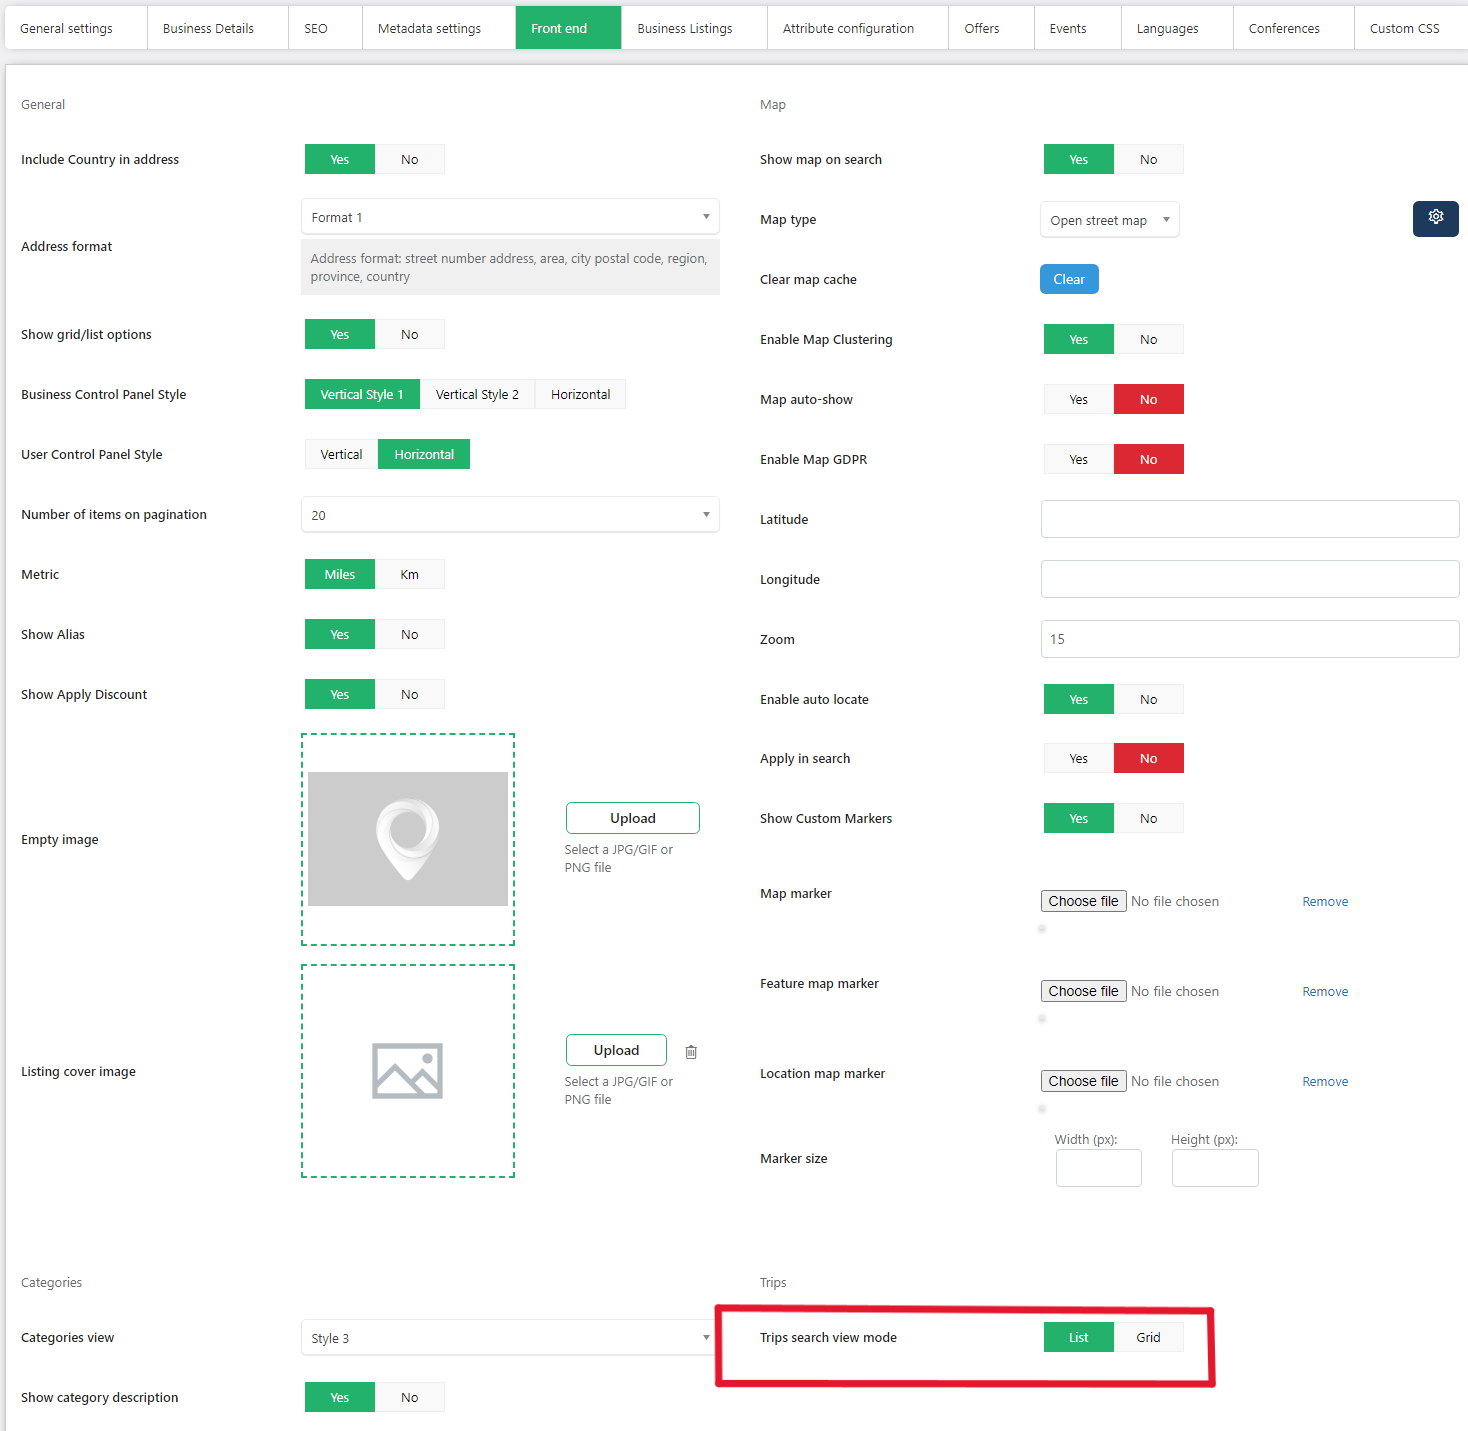
There you can select the search view mode, list or grid view.
How it works
Each business owner has the possibility to define trips in order to promote their services or products. Trips can be shown on the front-end with the help of the Trips menu item. You can add/edit and delete a trip from the Manage Trips screen.
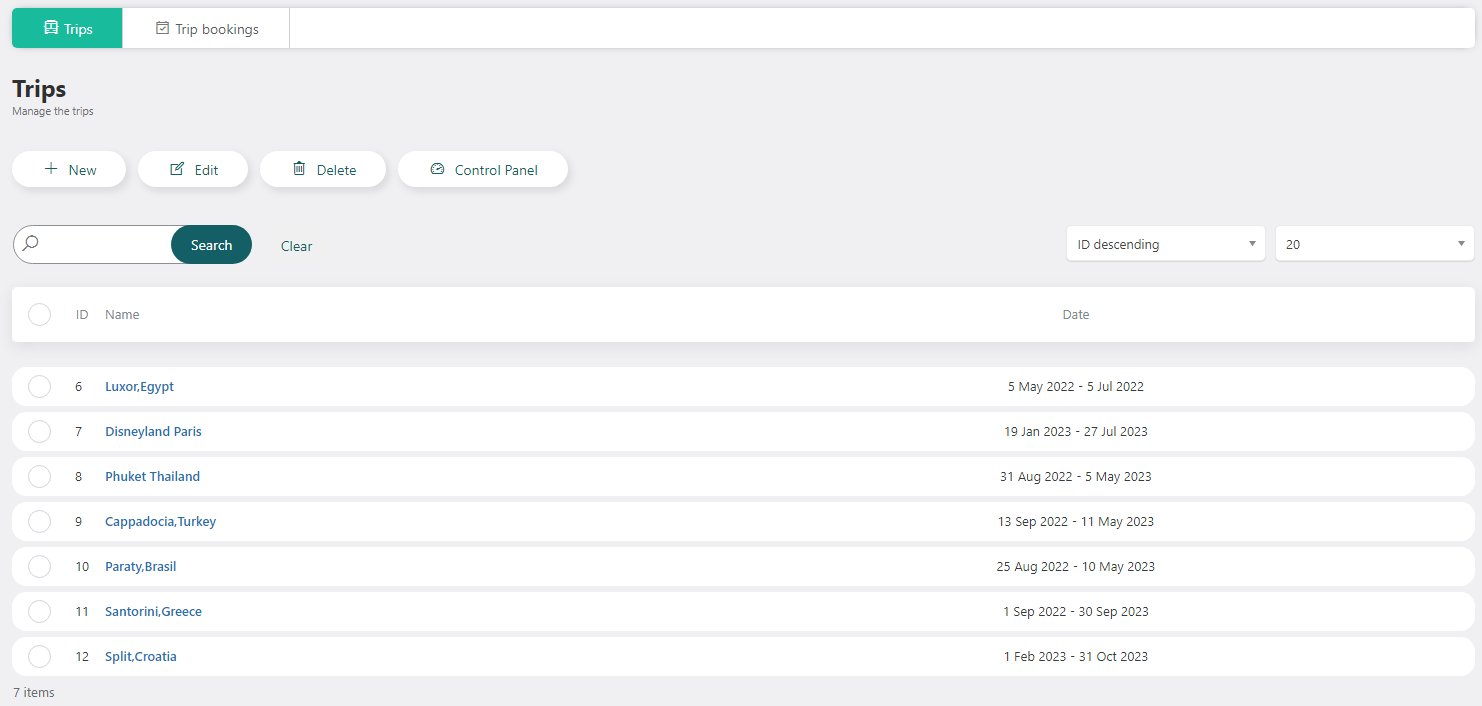
When editing/adding a new trip you’ll be presented with the following

Trip
Name - the name or the title of the trip
Alias - the alias of the trip
Description - the description of the trip
Contact Info
Organizer - the organizer of the trip
Telephone - the telephone number of the organizer
Email - the email of the organizer
Trip Dates
Start date - trip start date
End date - trip end date
Start time - trip start time
End time - trip end time
Repeat
Repeats - set the recurring method: no repeat, daily, weekly, monthly, yearly and by date (where the user can select manually the dates he wants for the trip).
Repeat every - set the recurring interval for the trip series
Start on - set the start date of the recurring series
Ends -there are 2 options available.You can set an end date or you can set the number of occurrences.The start and end date are always linked to the trip start and end date.The trips will be created until the end date is lower than the end day set on the date field or when the number of occurrences is reached.
After choosing one of the options click the apply button in order to save the changes, and all the relevant information will appear below.
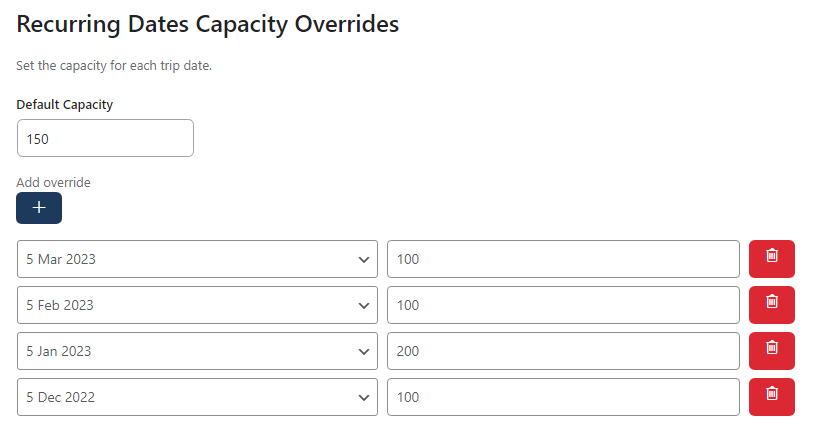
Recurring Dates Capacity Overrides
Default capacity - set the capacity of the trip dates, and it will be applied on all the dates.
Add override - otherwise you can add a specified capacity for each of the trip dates specified on the previous section.If there is no override capacity for a specific date then the default capacity will be taken into consideration.
Pictures - You can upload multiple pictures for your trip.You can upload pictures and set a description for them in this section.To upload a picture simply click the Add Files button and choose the desired picture by navigating through your content.
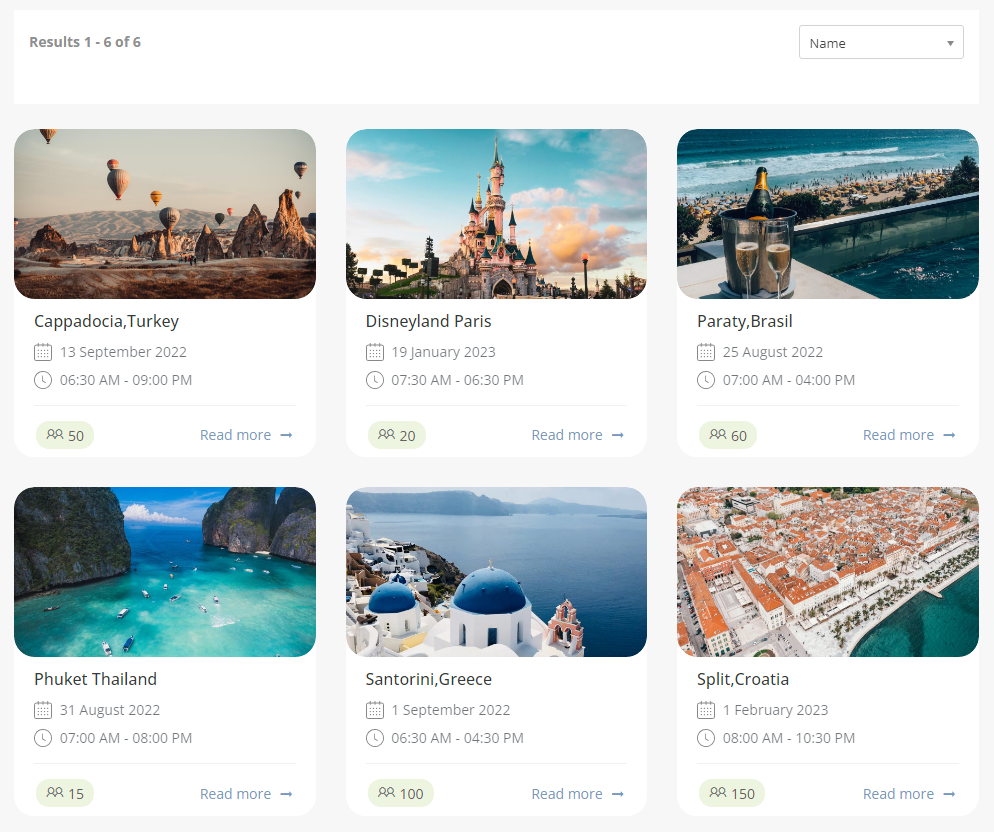
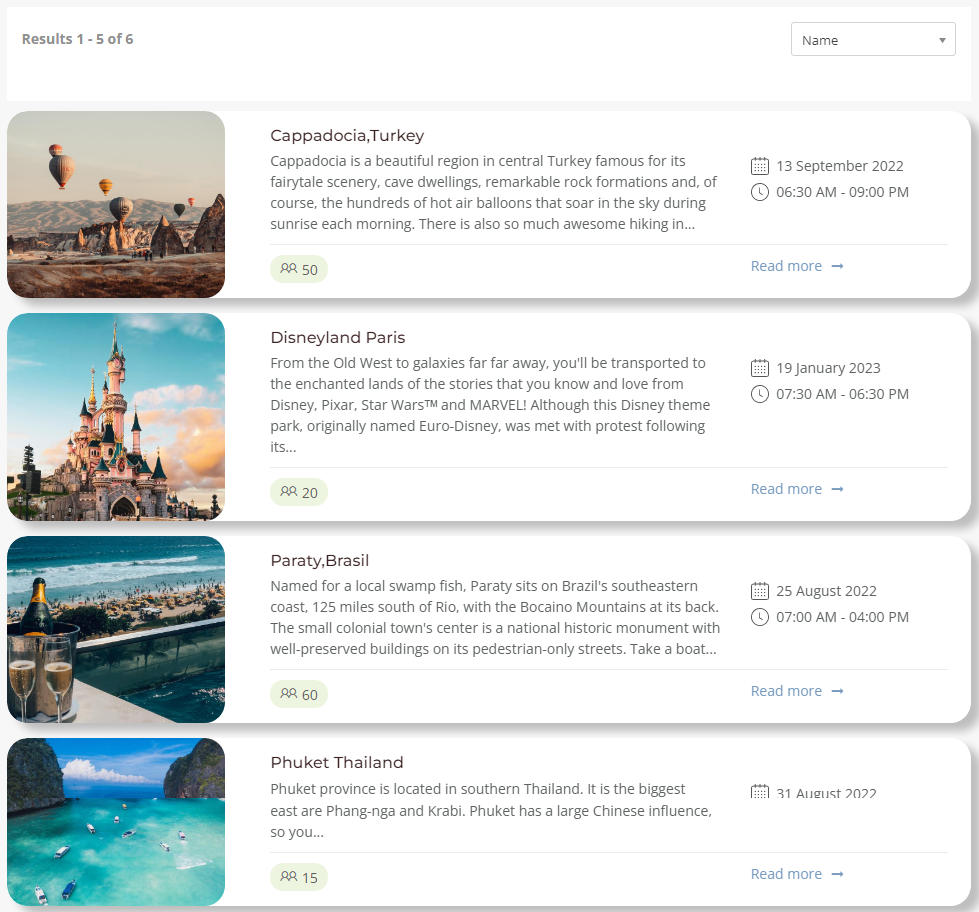
All the information will be shown on front-end on the trips section.It will be displayed through a menu item. There are two different view styles as mentioned before which can be defined on the general settings.
Grid View
List View
And the details view for each of them.
User Packages
In order to do a trip booking, each user should have a package assigned, and they are called user packages .
On the menu items settings is added a new setting called packages type where you can define what type of package you want to show.
And the creation process is the same as on the business packages.
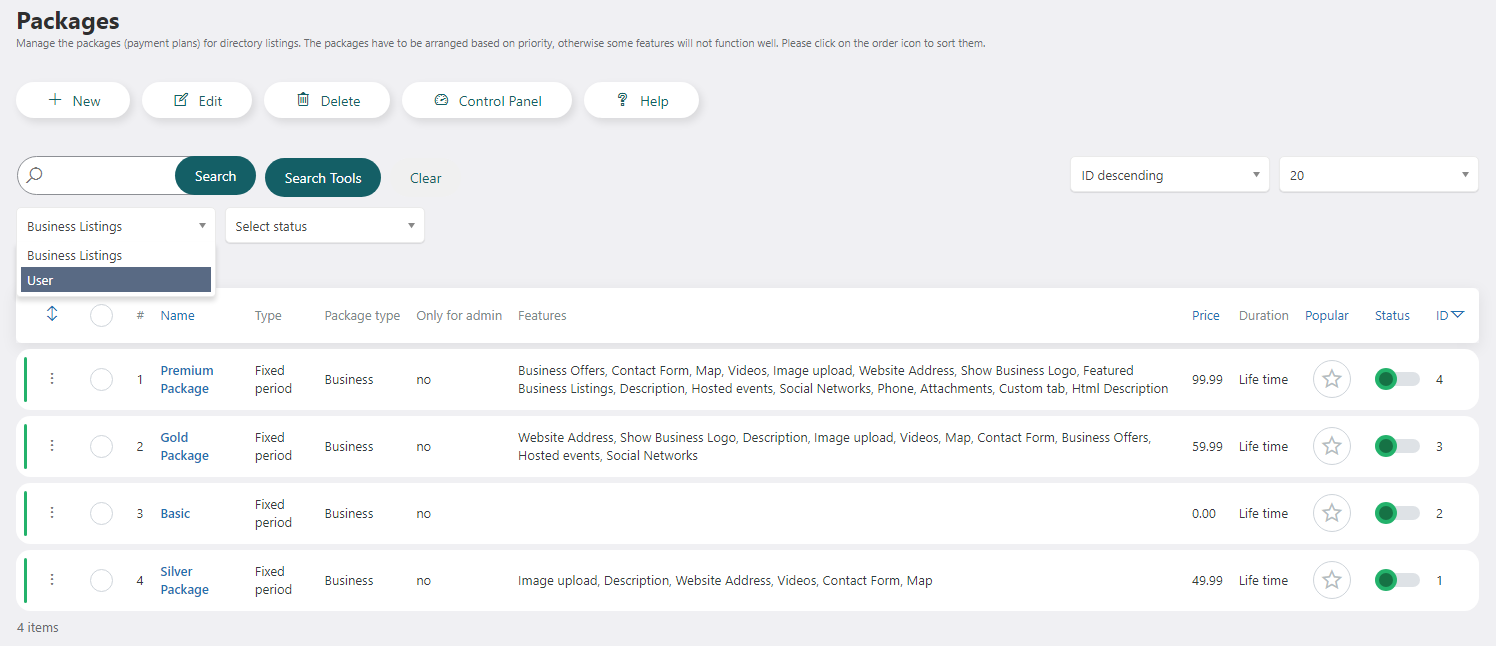
On search tools as it is shown on the image above you should select “User” if you want to create a user package and “Business Listings” if you want to create a business package.
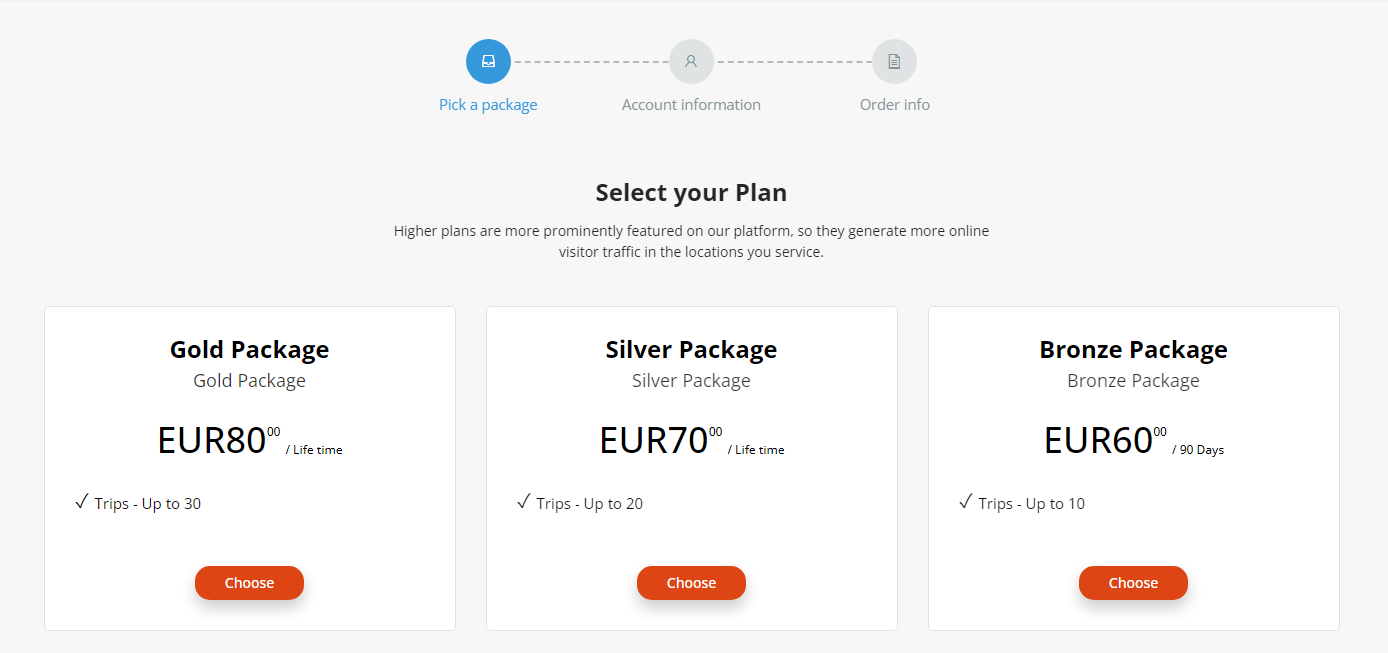
User Package Details

A user package contains the following
Name - the name of the package
Descripton - the description of the package
Price description - text that will be shown under the price
Only for admin - when set to yes, the package will not display on business plans menu item, front-end
State - you can set whether want to activate the package or not
Type - you can choose between the following types:
Lifetime - the package is available for lifetime period
Fixed period - the package is available for a fixed period of time
Recurring - – the package is available for a fixed period of time with the possibility of automatically renewing the package. The package is activated each time a recurring payment is performed. (works only with recurring payment methods)
Recurring with trial - similar with recurring time packages, but it also provides a trial period where the user can determine its duration and price. After the trial period is finished a new order is created for the recurring package with full price and duration. Otherwise if you don’t want to continue using this package you can cancel the subscription during the trial period and will be paying only the trial price, if there is any.
Price - the price you are charging for a package. The price will be displayed in the frontend.
Renewal price - a price taken into consideration if the package period is extended.
Max nr of trips - set the maximum number of trips that is allowed
Show features - set whether want to show or not the features that are included in the package.
Show not contained package features -set whether to show or not the package features that are not included in the package
Show choose button - set whether want to show choose button or not
Background button - admin can set a background color for the package
Text color - admin can set a text color for the package
Border color - admin can set a border color for the package
Package features - the features you want to assign to your package
Trips -move the trips feature from the first box to the second one in order for trip to be included on the package
Custom features - the custom features are features, that the admin can offer to customers, supplementary to the current directory features. The custom features have no functionality related to business directory.
Trip Booking
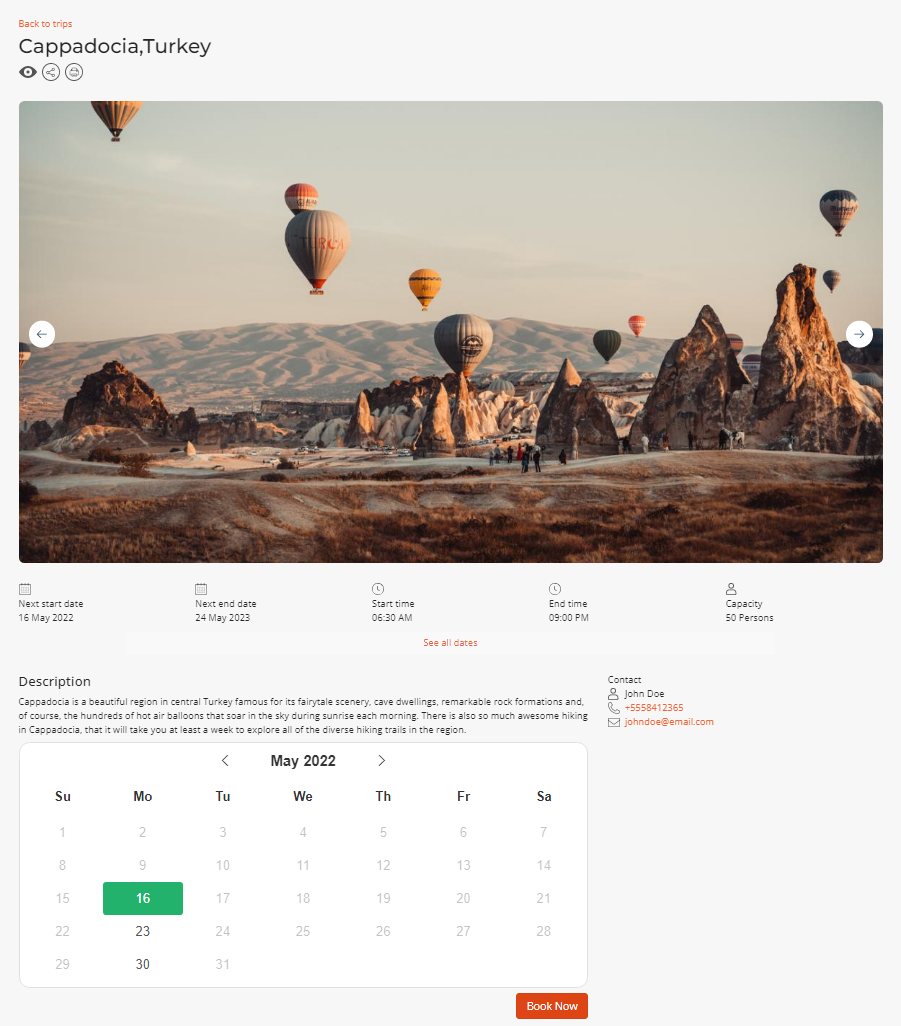
All the trips will be displayed on the trip list/grid view on the frontend.
Step 1 : Access the desired trip details page
Step 2: Before doing the booking, the user must be logged in.
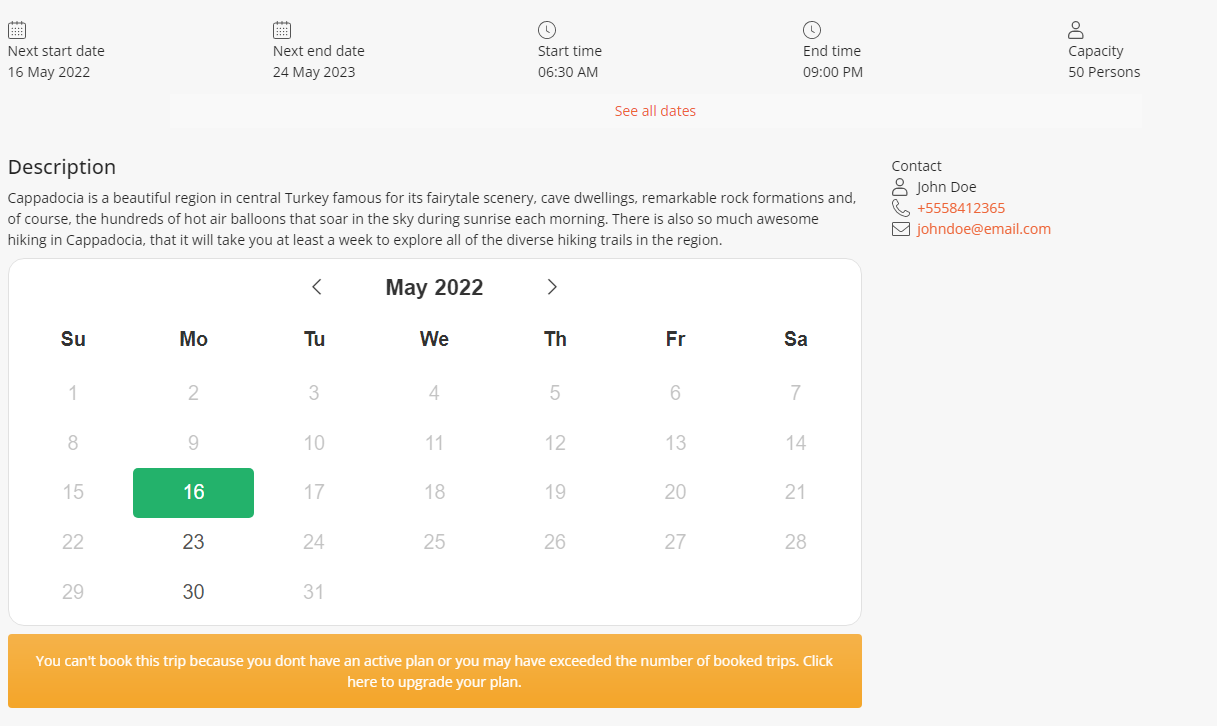
Step 3: The user should also have an active plan (user package), and if it is so the number of booked trips must not have exceeded.
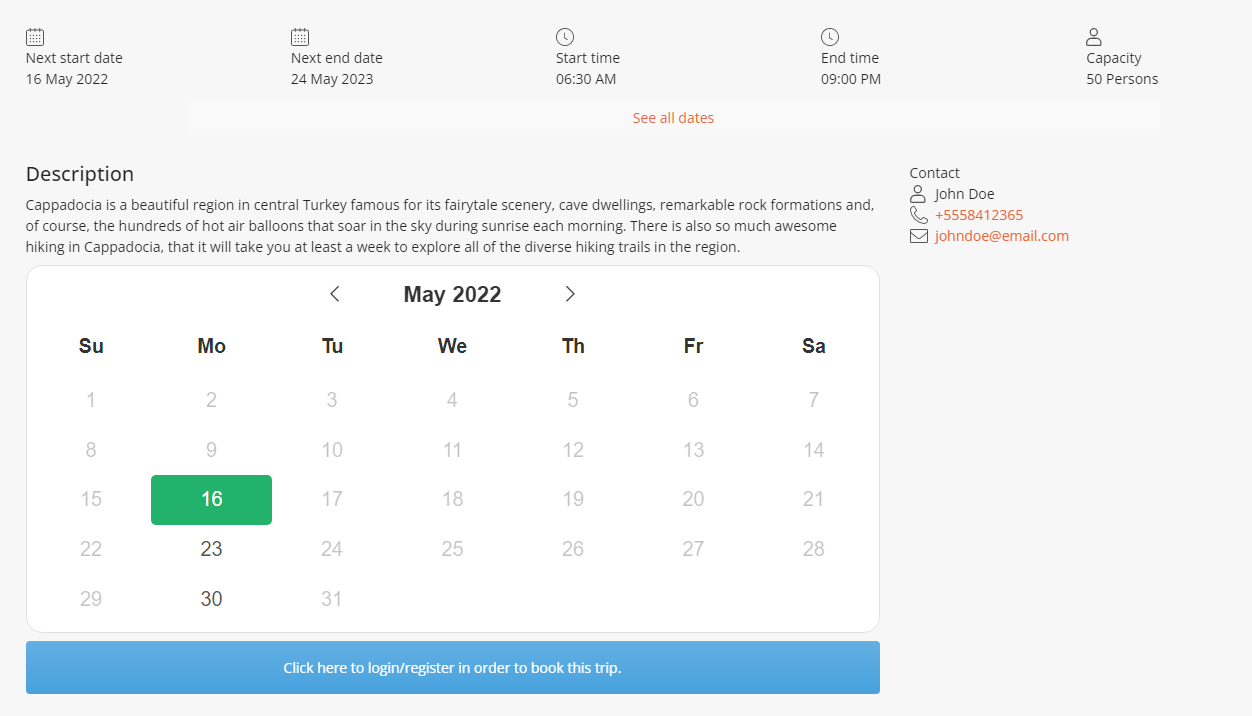
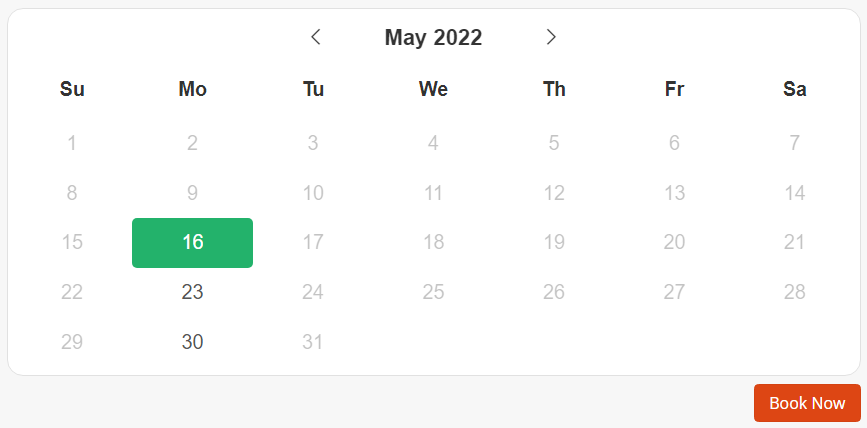
Step 4: If everything is set, then the view will be as it follows, with all the available dates in a darker color, and a book button below.
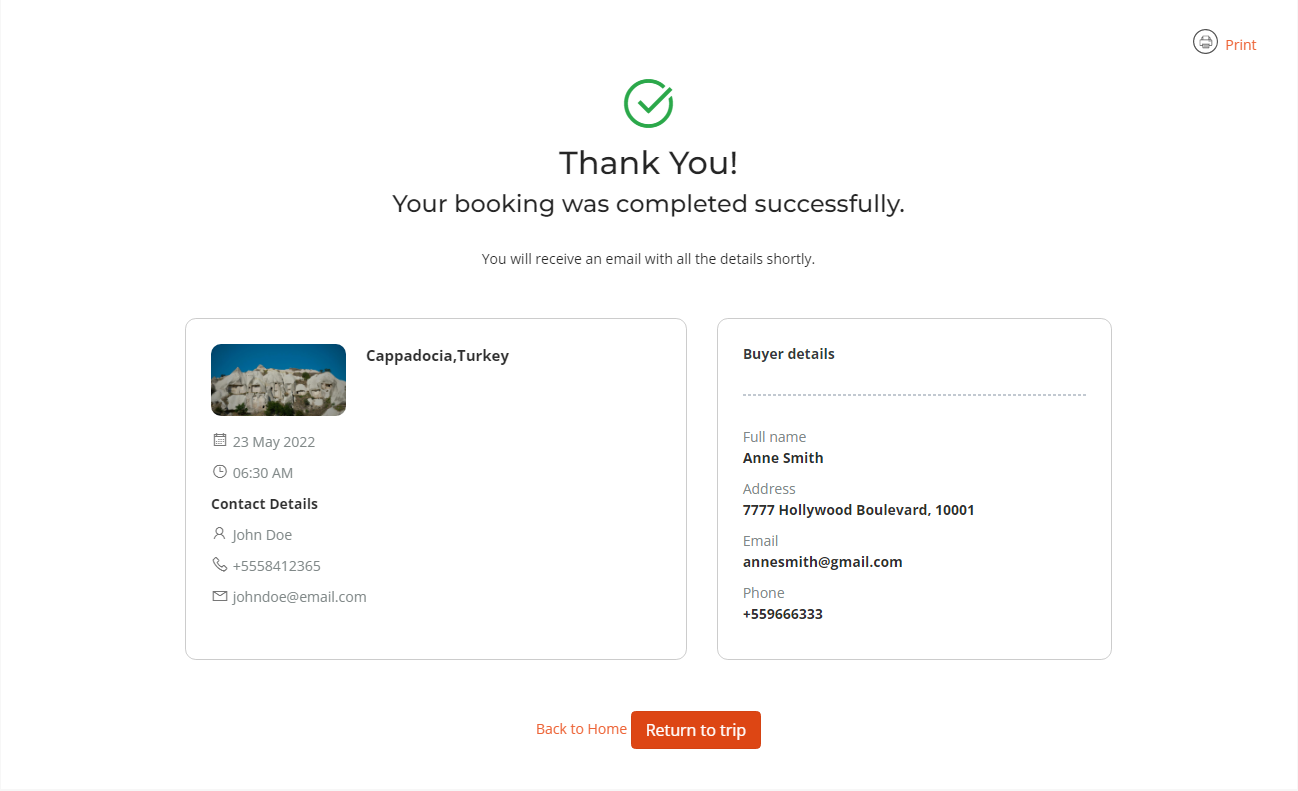
Step 5: After clicking on the “book” button the booking details will appear with all the details for the trip and for the user.
NOTE: If the user doesn’t complete the booking for the next 15 minutes, then the reservation will be cancelled.
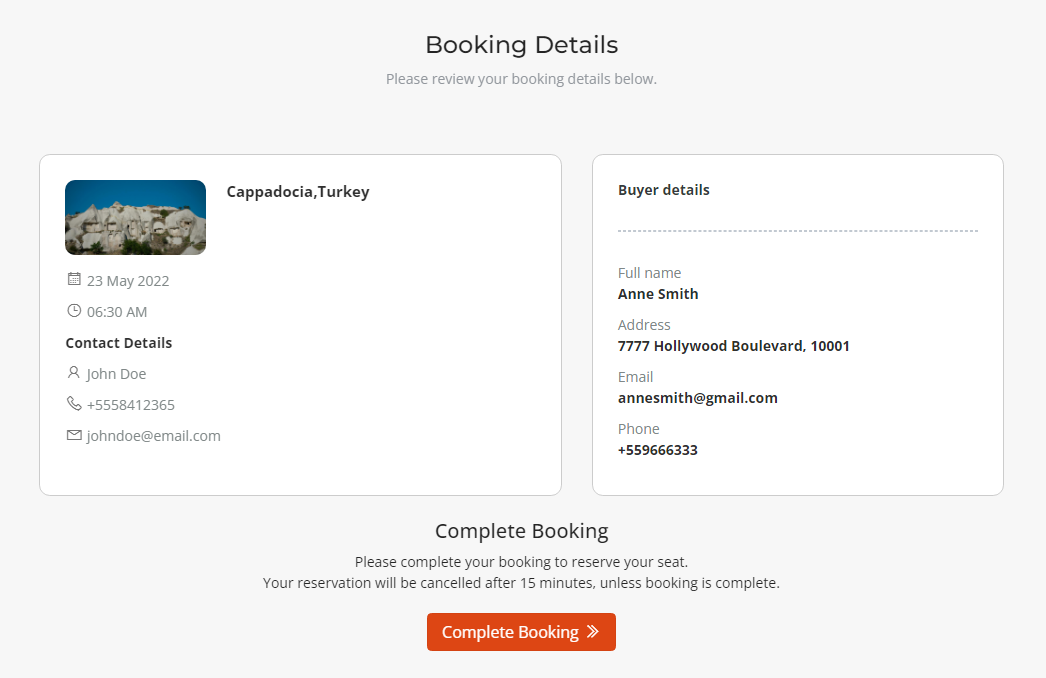
Step 6: Otherwise if the booking is complete than the reservation is made.
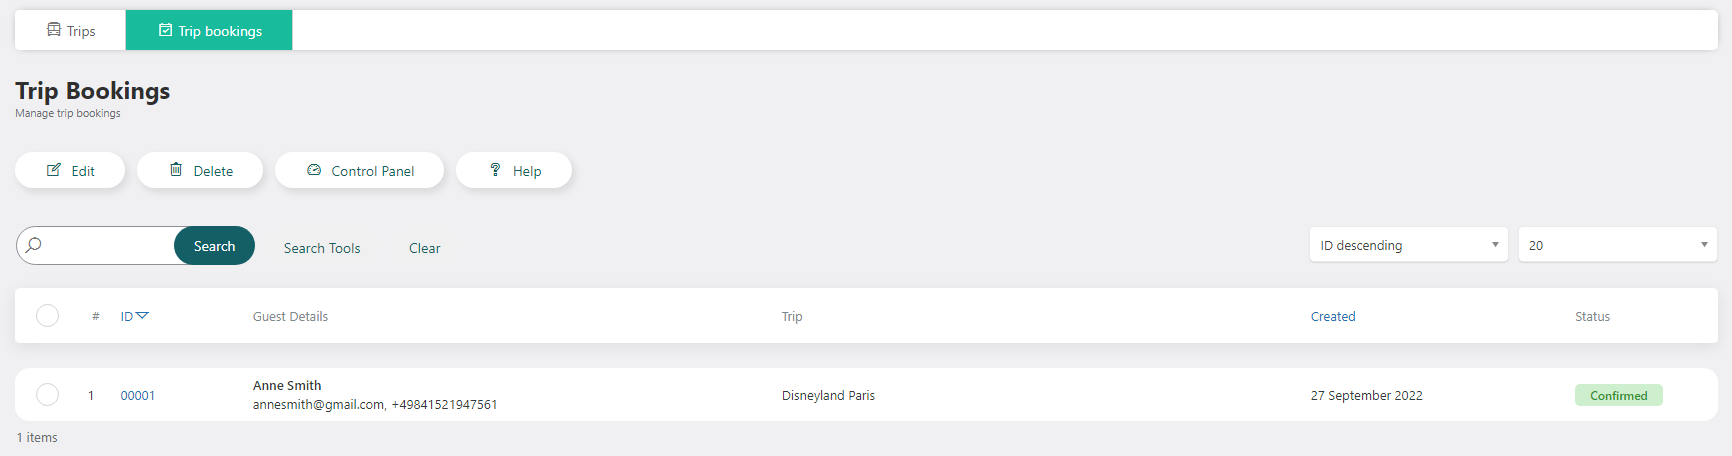
Manage Trip Bookings
All the necessary information about the packages that have been bought and the trips that have been reserved will be available on the user dashboard, on package orders and trip bookings sections.
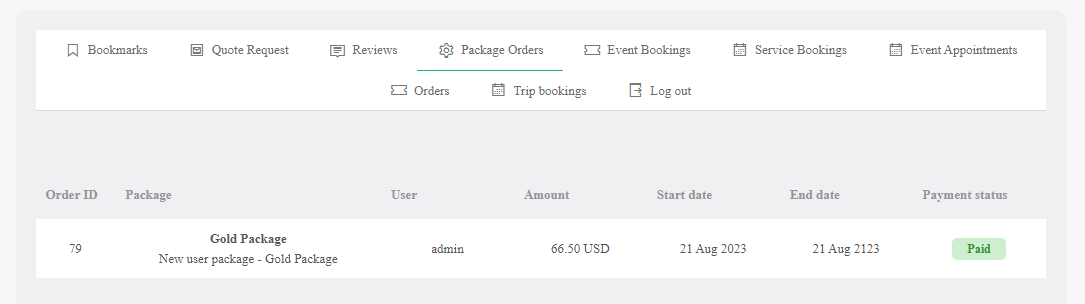
The booked trips will be listed in the trip bookings section on admin area too.
WBD Videos
WBD Videos is an application that extends the WP-BusinessDirectory Videos functionality by adding the possibility of managing and adding a video.
Installing the application
To begin the installation of the WP-BusinessDirectory Videos application, log in into your wordpress backend, access the directory dashboard and follow the steps as described below:
In the main menu, you will be presented with the Directory Apps section.
Click the Install button (on the bottom of the Directory Apps section).
Choose your downloaded WPBD Trips archive (wpbd-videos.zip).
You will receive a confirmation message upon successful installation completion.
Setup and configuration
When application is installed, in the listing features (Business Listings tab) a new setting called “Enable videos” will be displayed.
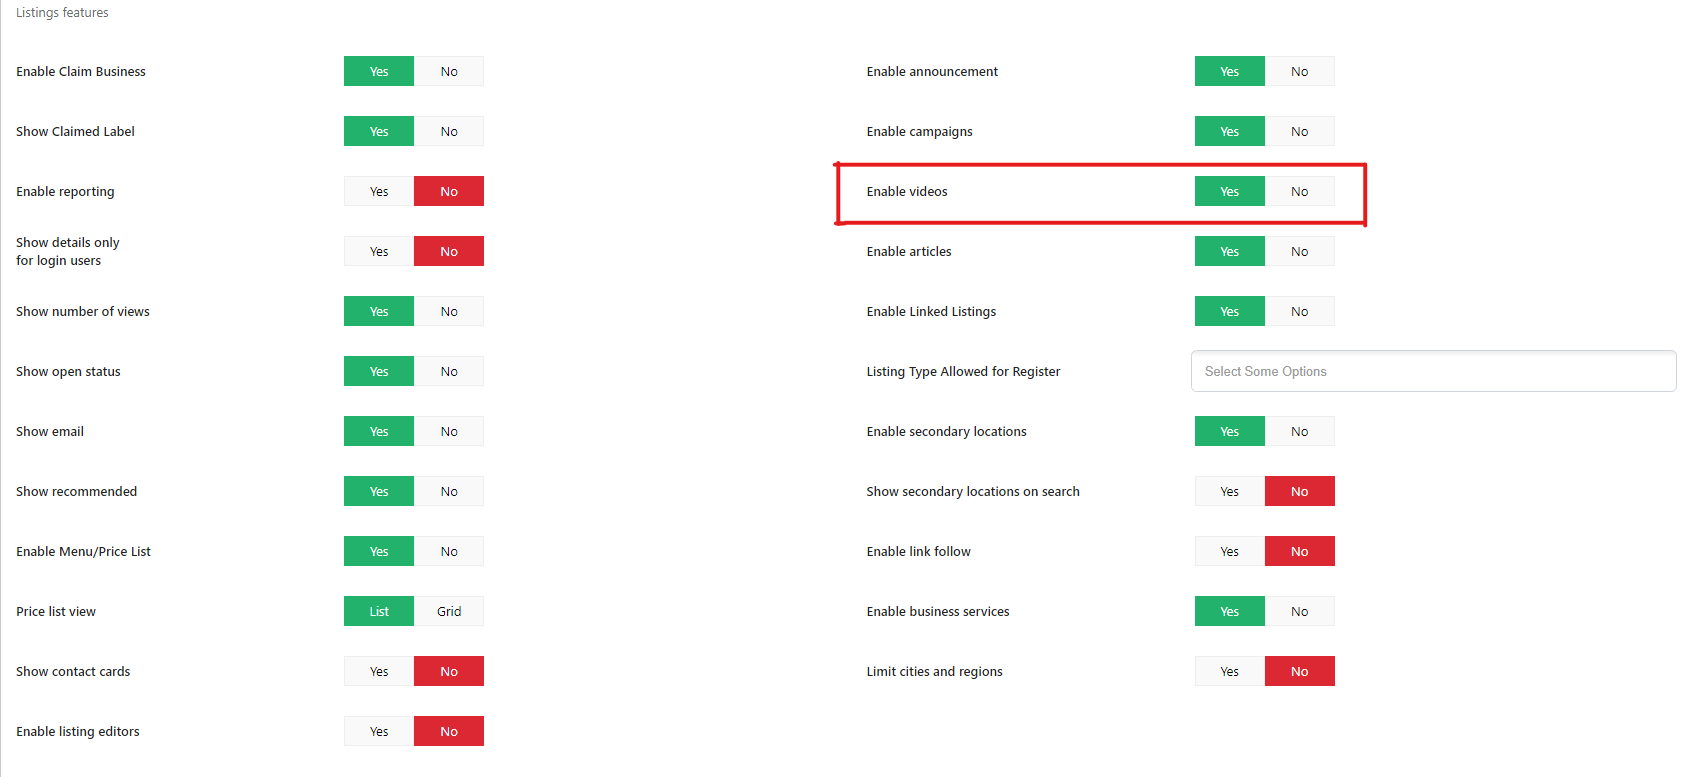
If the setting it’s enabled , the videos section will appear on the admin dashboard area.
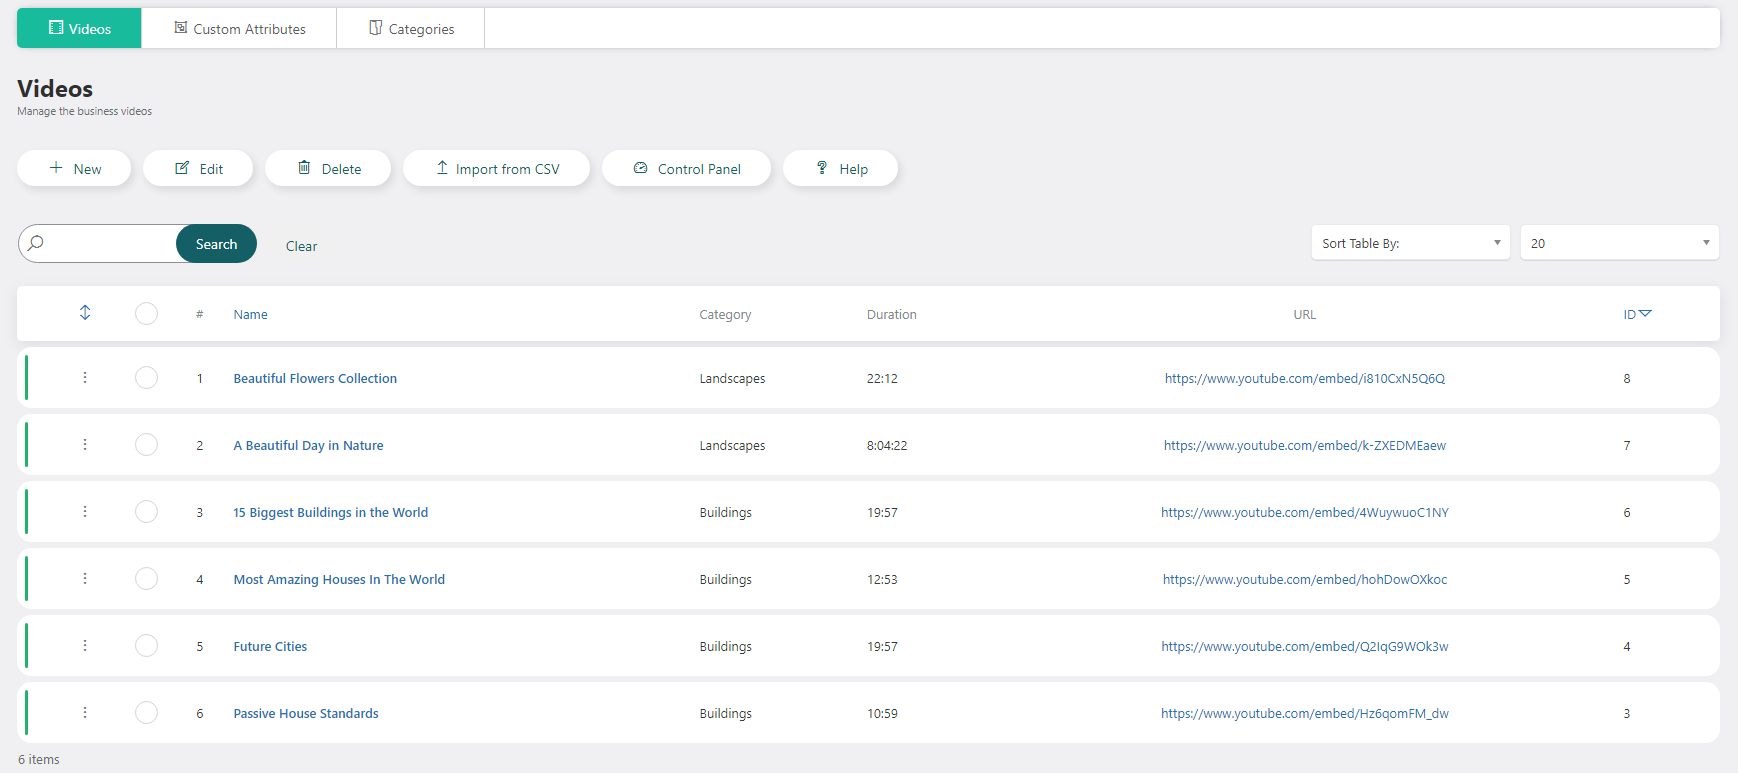
How it works
Each business owner has the possibility to define videos in order to promote their services or products. Videos can be shown on the front-end with the help of the Videos menu item. You can add/edit and delete a video from the Manage Videos screen.
When editing/adding a new video you’ll be presented with the following
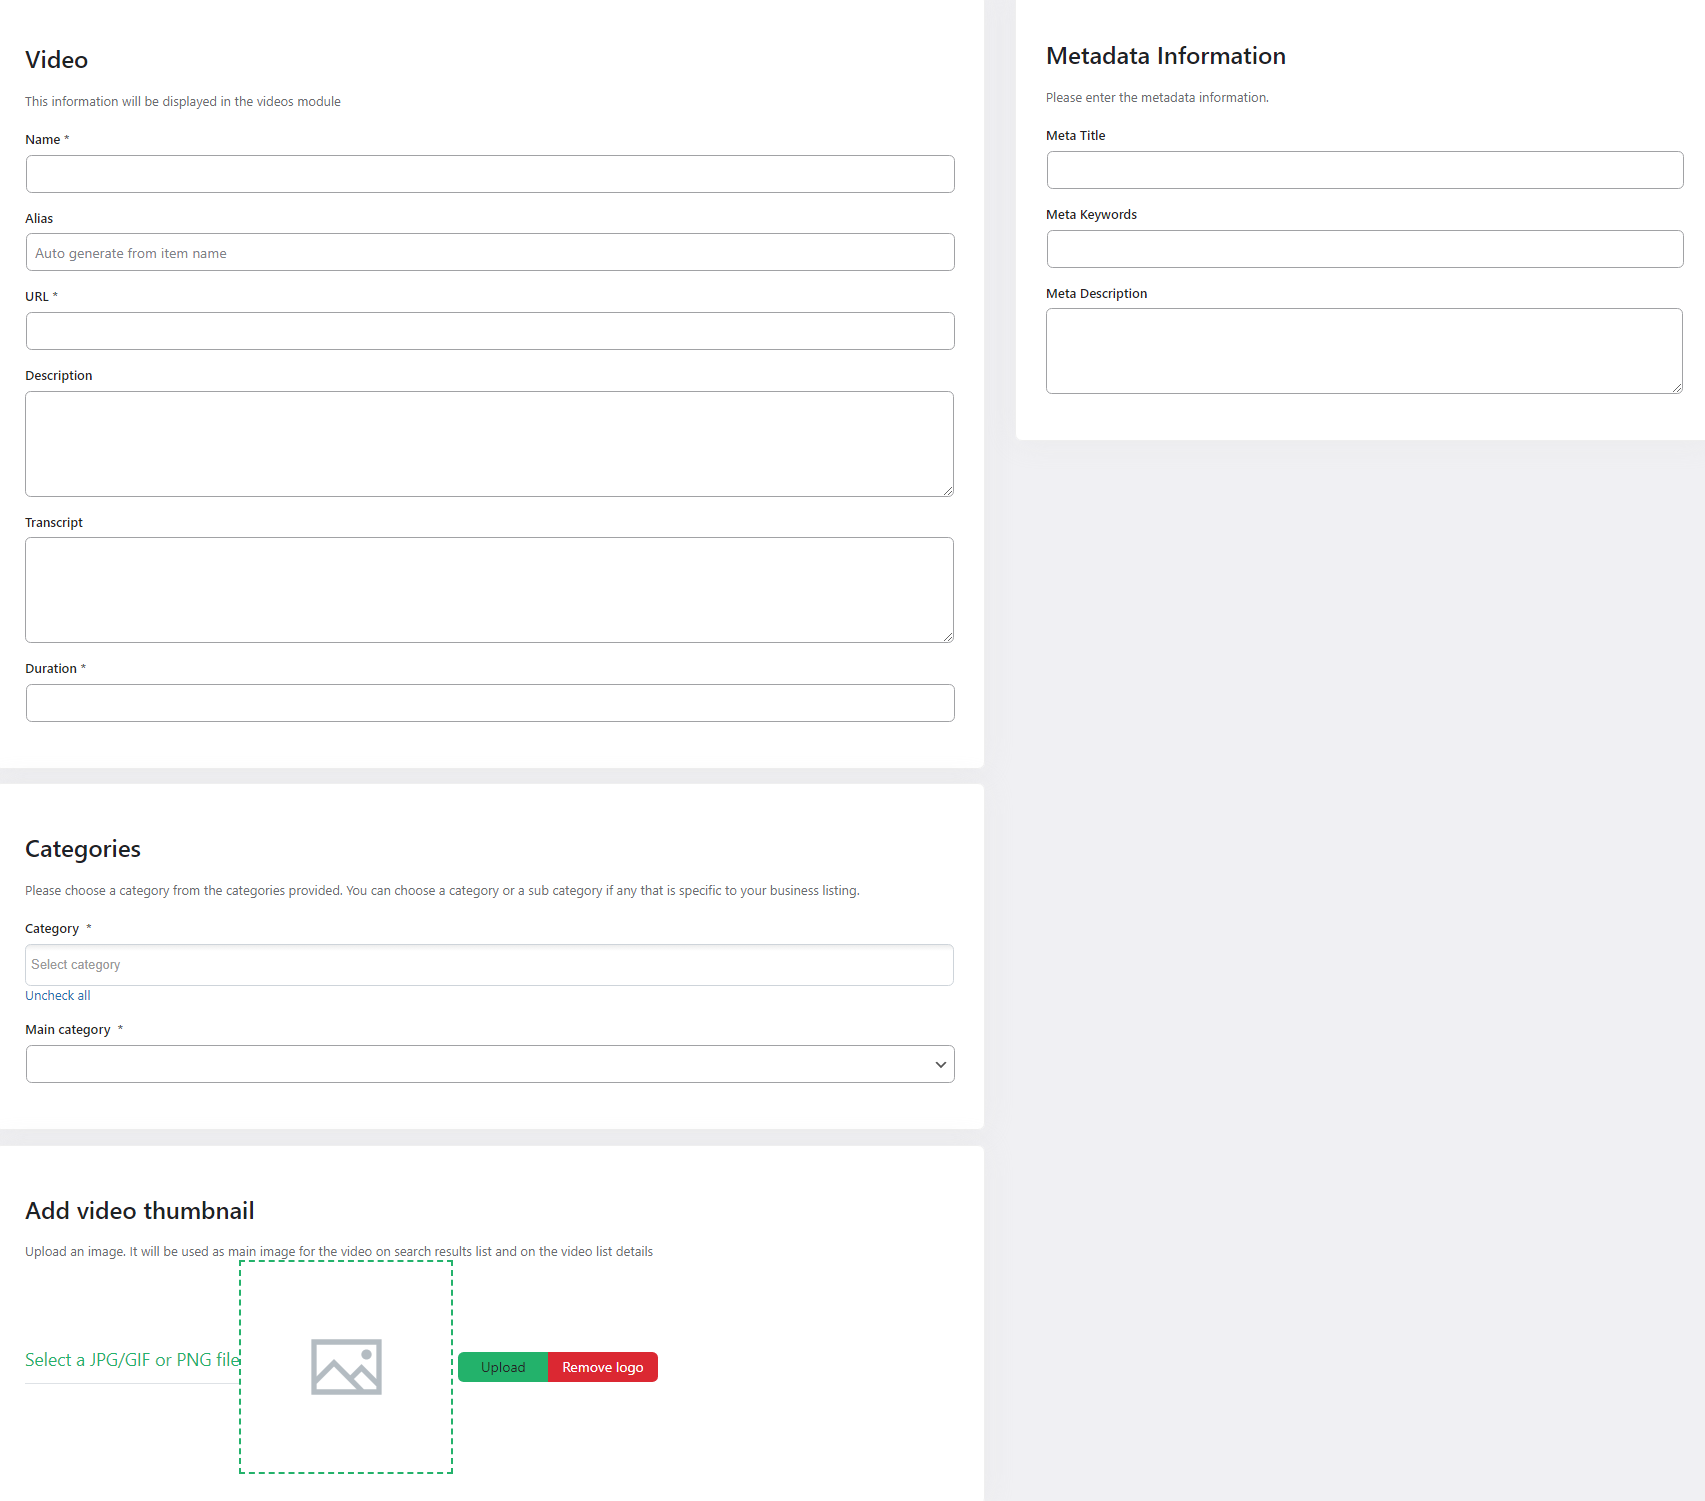
Name - the name or the title of the video
Alias - the alias of the video
URL - set the url of the video
Description - the description of the video
Transcript - you can set the text of the video
Duration - the video duration
Categories
Category - categories of the video
Main category - main categori which will be selected from all the categories above
Add video thumbnail
Upload an image. It will be used as a main image for the video on search results list and on the video list details
Custom Attributes
Please check chapter 3.3.4 Custom attributes for further details
Videos Categories
You can add/edit, delete and publish/unpublished a video category from the Manage Categories screen.
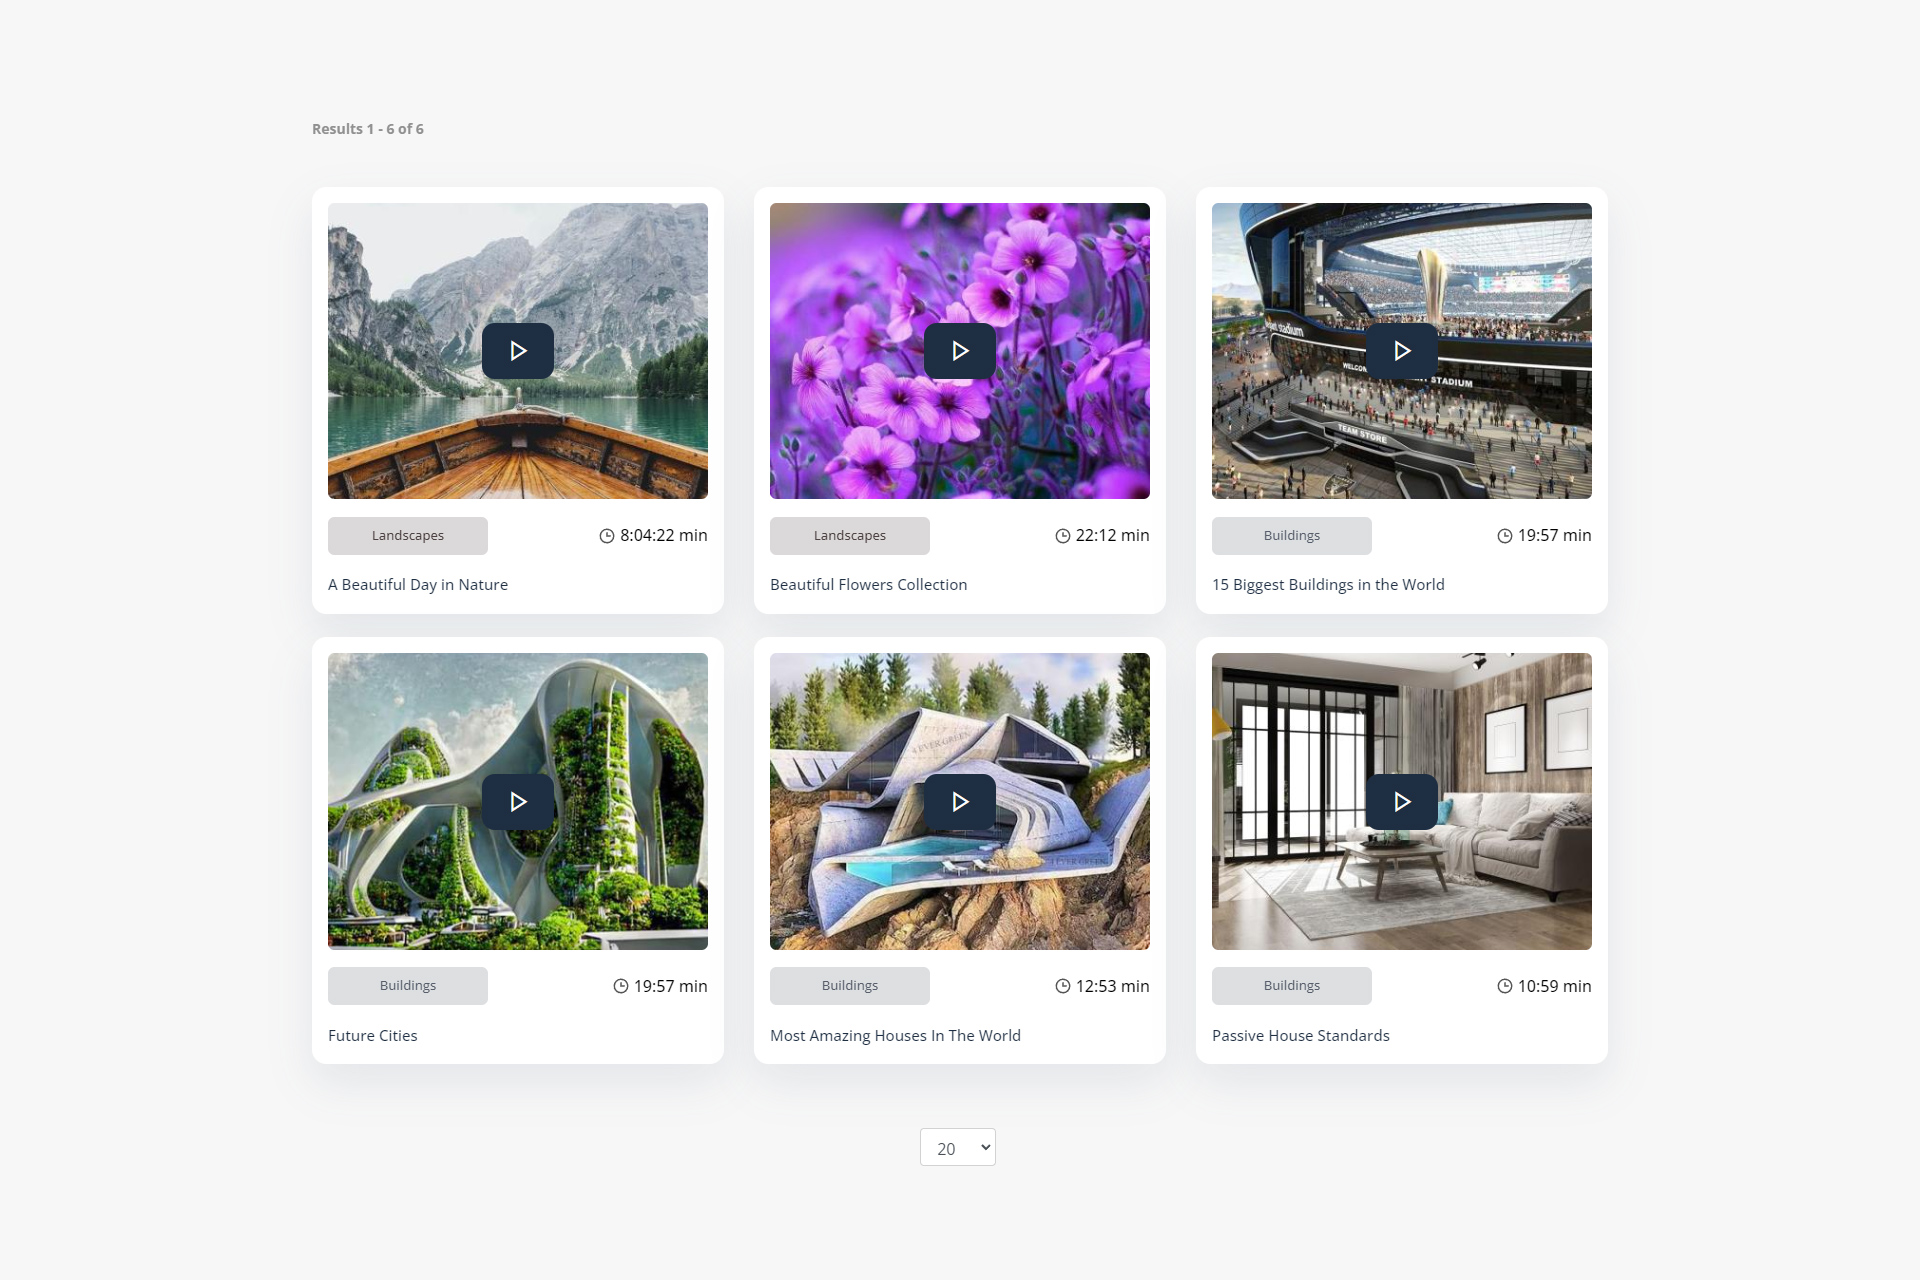
When all the details are completed, all the information will be shown on front-end on the videos section.

WBD Conference
WBD Conferences is an application that extends the WP-BusinessDirectory Conferences functionality of conferences, sessions and speakers.
Installing the application
To begin the installation of the WP-BusinessDirectory Conferences application, log in into your wordpress backend, access the directory dashboard and follow the steps as described below:
In the main menu, you will be presented with the Directory Apps section.
Click the Install button (on the bottom of the Directory Apps section).
Choose your downloaded WPBD Conference archive (wpbd-conference.zip).
You will receive a confirmation message upon successful installation completion.
Conferences
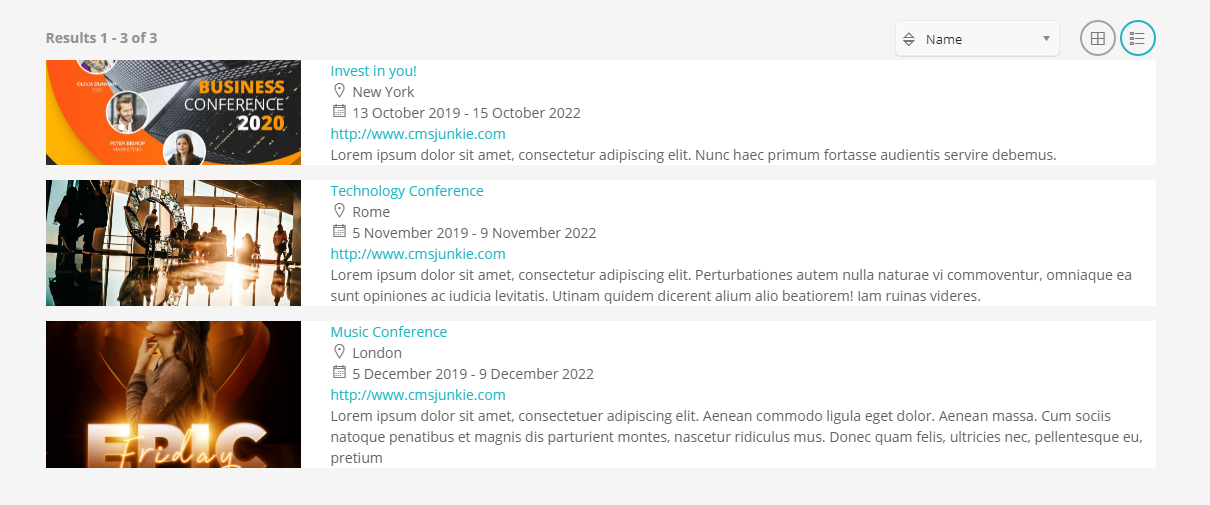
When this widget is installed, the conferences, sessions and speakers menu items will display. A conference will contain its name, description, the place where it will be held, the start/end date, the registration link, and the conference logo.
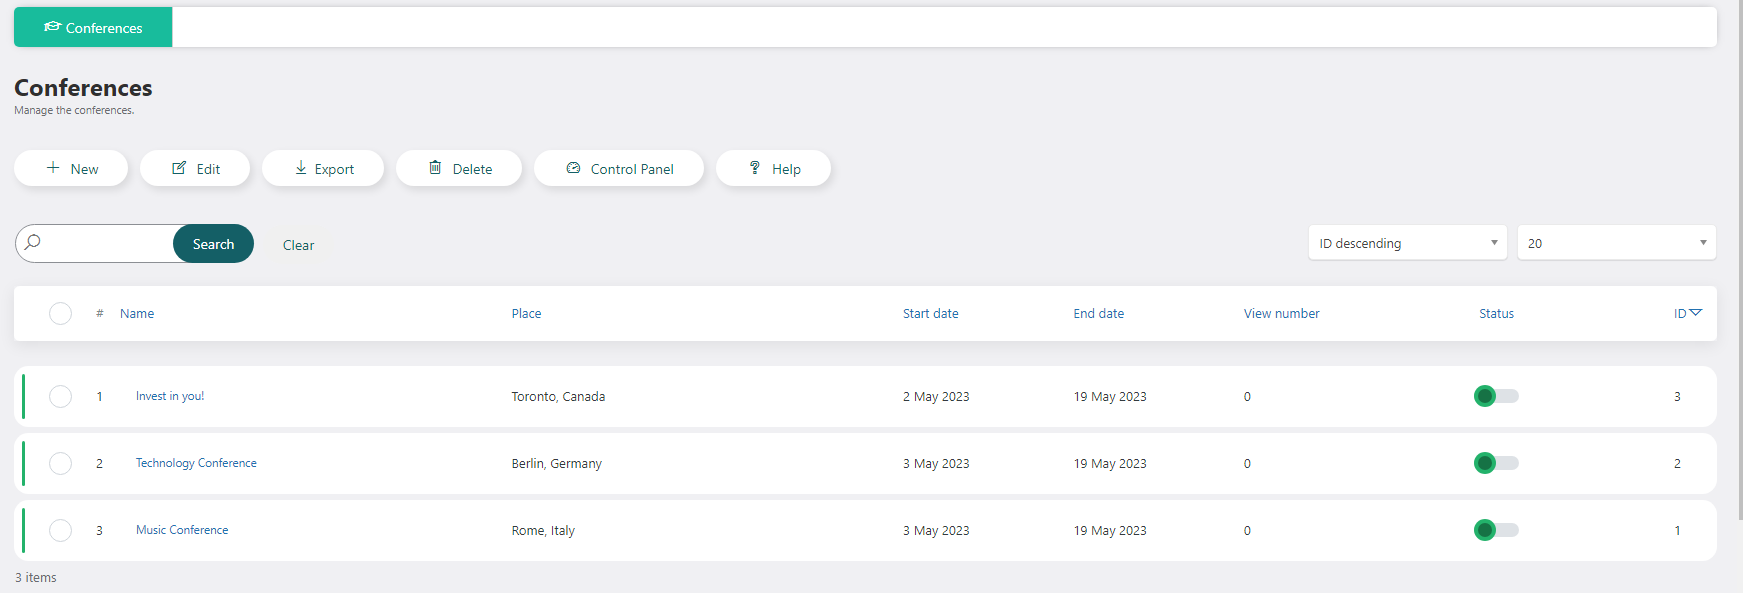
After the conferences will be saved and listed in the conference section, they will display on front – end, with all the saved details.
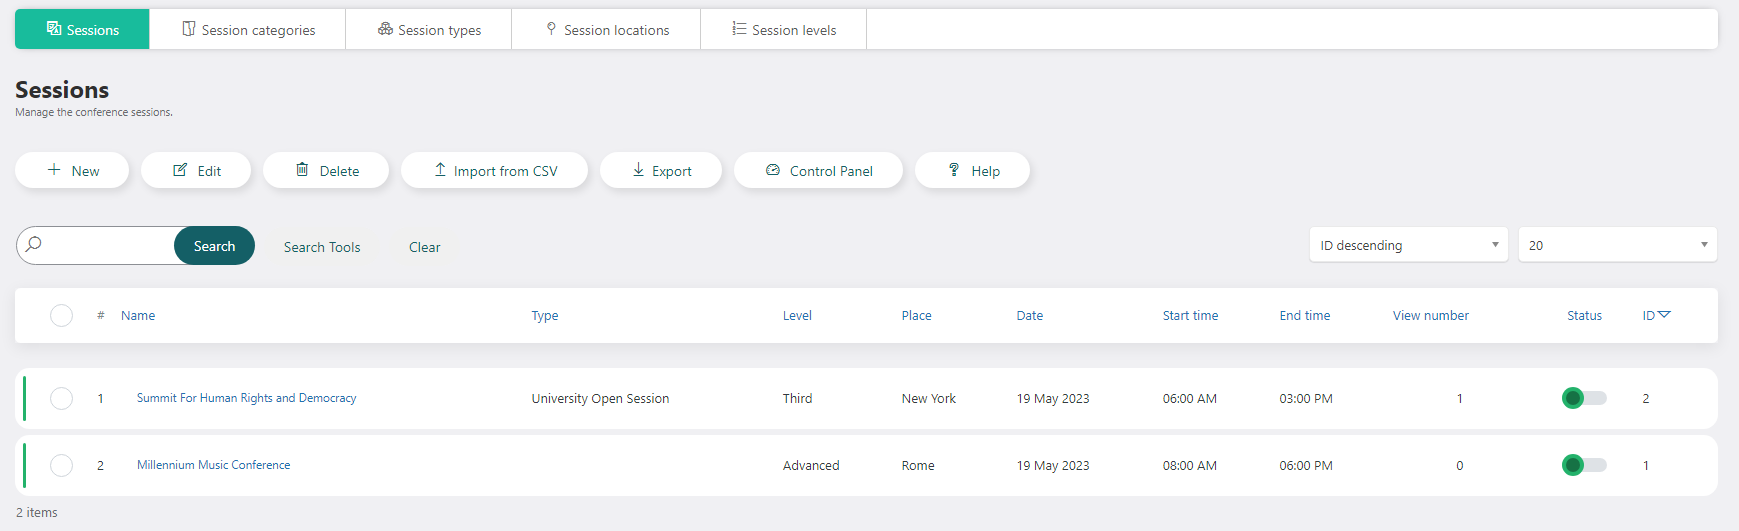
Sessions
A session will contain its name, the date in which will be held alongside the start/end time, the category, the business (which are listed from the business listings section), the speakers, the description, the session type, the session location, the session level, the conference in which this session will be part of, the registration URL, a video and several attachments. After all the details are filled and saved, the sessions will be listed in their own section.
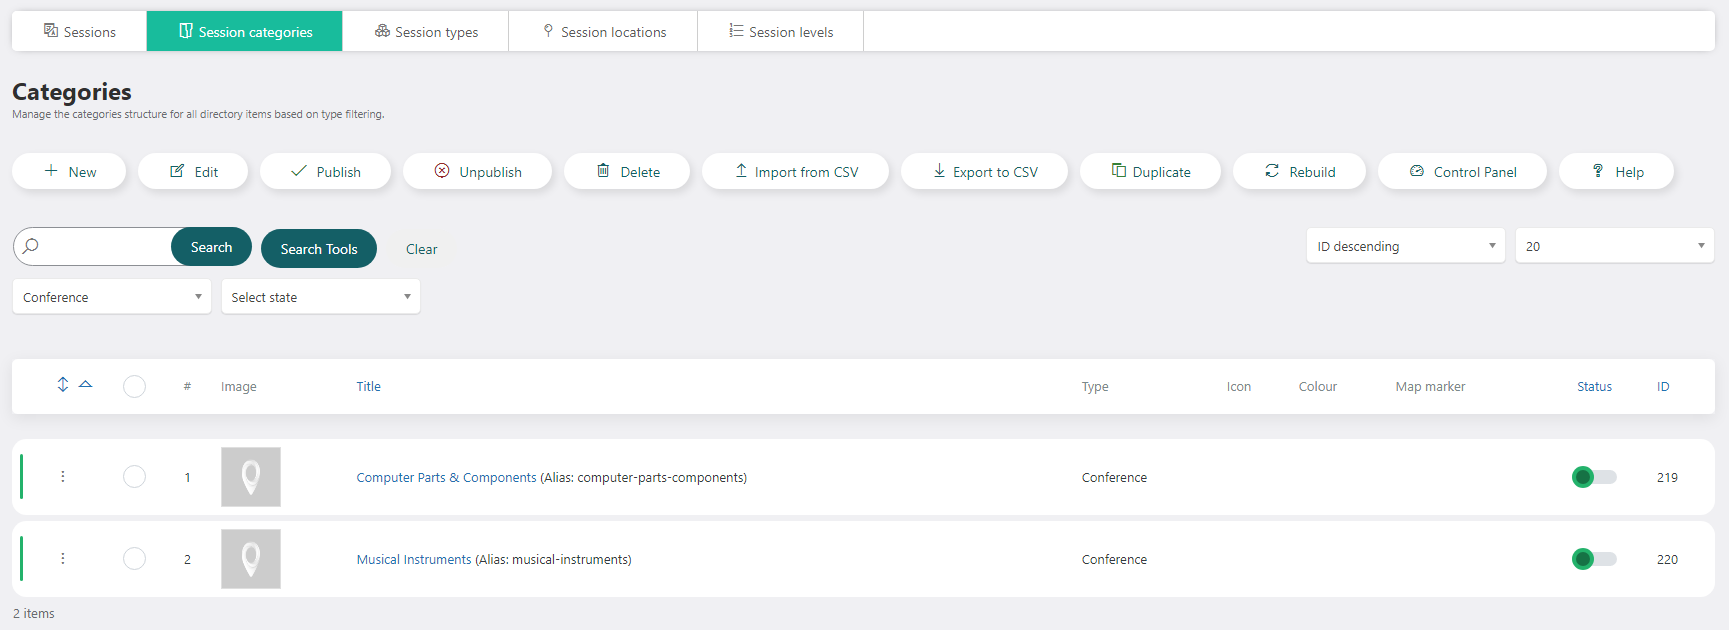
Session Categories
Session categories section works the same way as the listing categories. The created categories will be listed under this section and can be chosen in the sessions edit view.
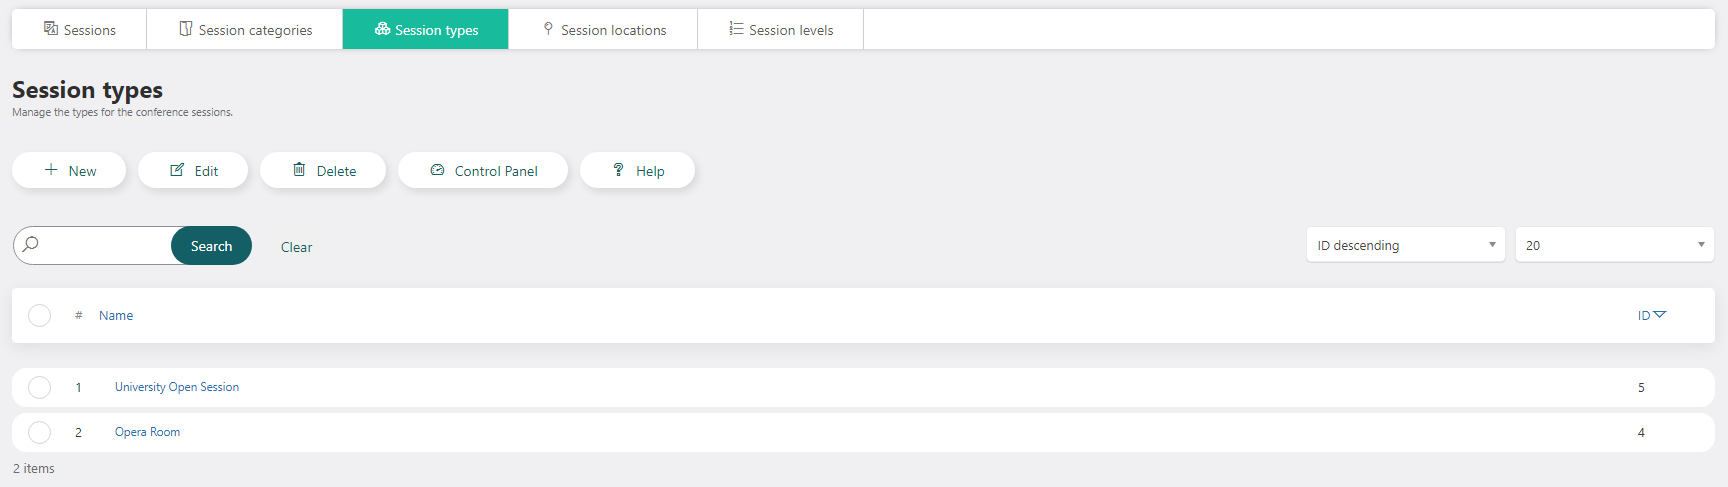
Session Types
In this section, you can define the types of sessions that are allowed/available on the created sessions. The type of sessions will also be displayed in the sessions’ section, in front – end, as filters for the available sessions.
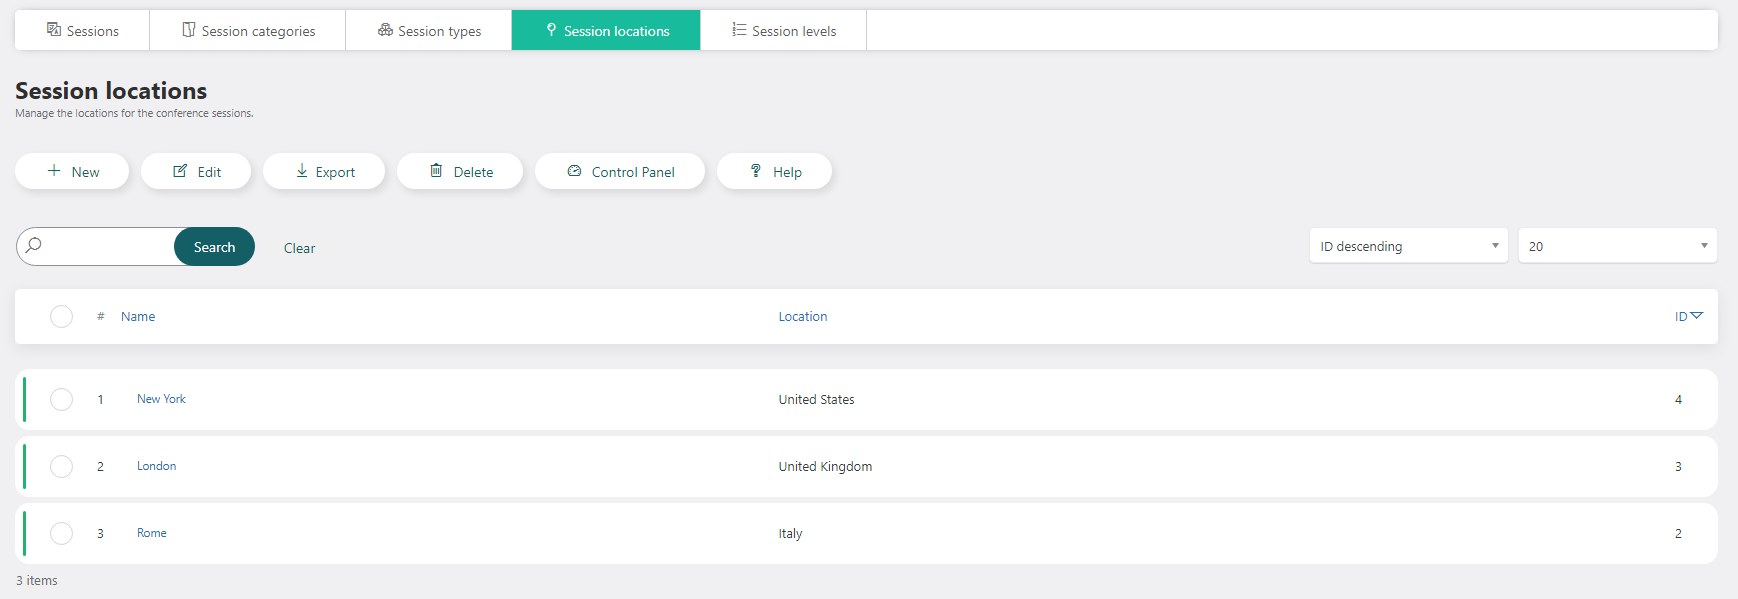
Session Locations
In this section, you can define the location of sessions that are available on the created sessions. The location of sessions will also be displayed in the sessions’ section, in front – end.
Session Levels
In this section, you can define the level of sessions that are available on the created sessions.
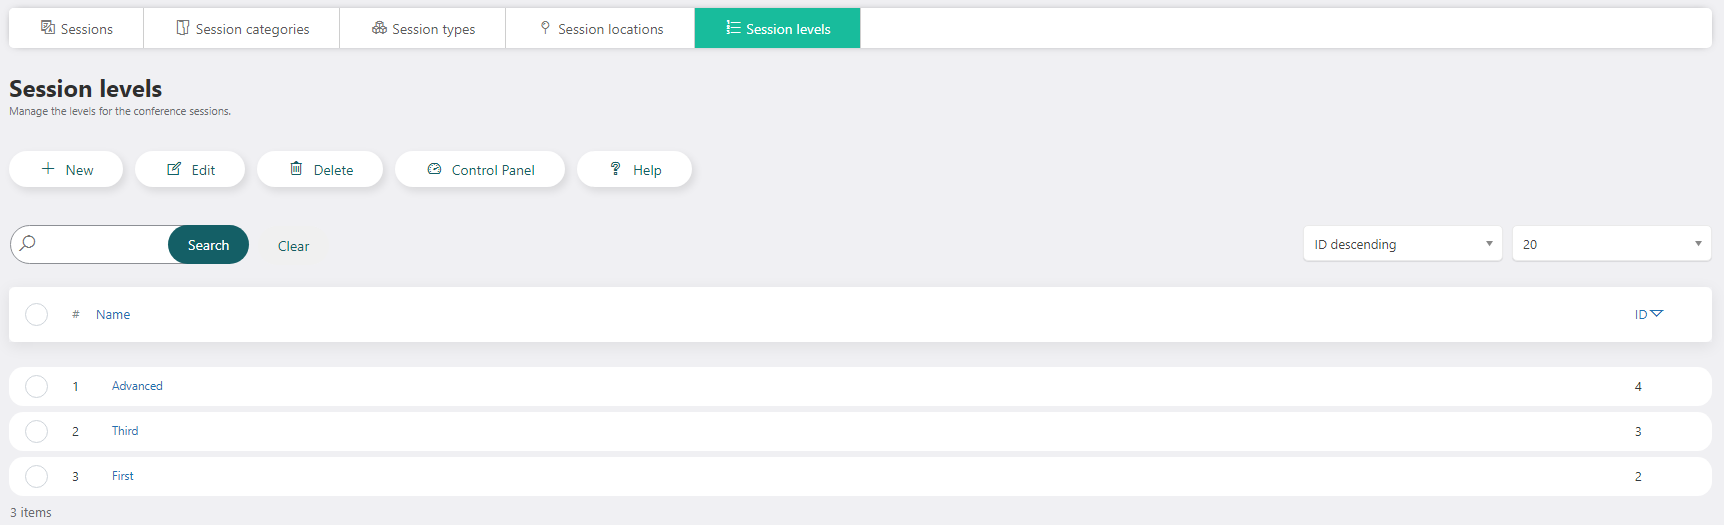
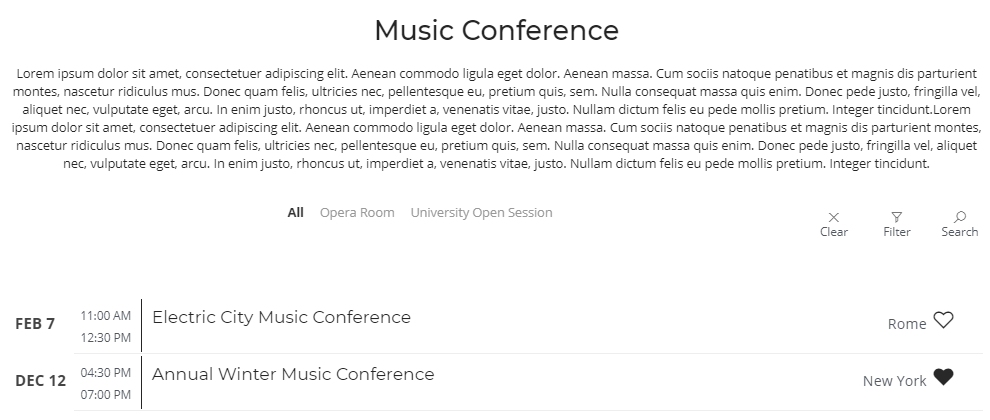
After all information is saved and also completed on the session section, all the available sessions will display in the front – end section.
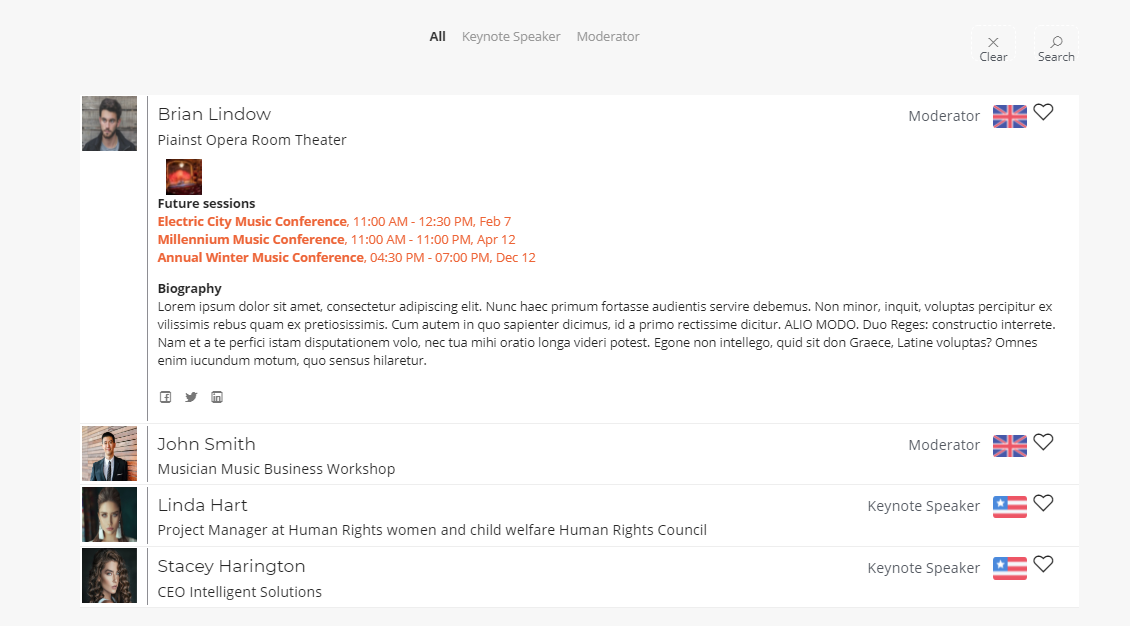
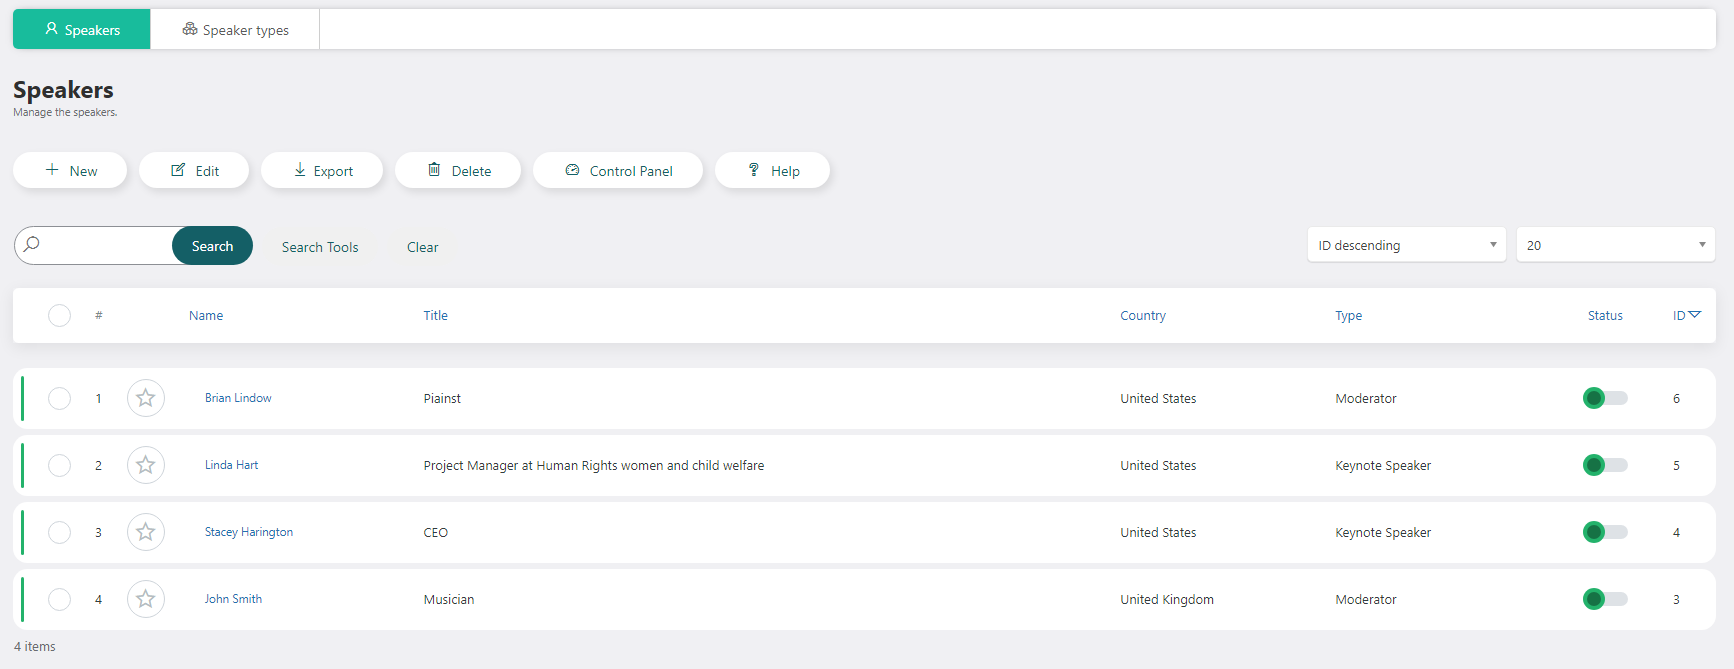
Speakers
A speaker will contain his own name, his title, the business in which he works alongside the business logo, the country where he’s from, his biography, the session for which he will be a speaker, the speaker type, email and telephone number, social network pages, additional info in the form of link or text and an image.
Multiple speakers can belong to one session and only one speaker can be chosen for one conference. After all the details are filled and saved, the speakers will be listed in their own section.
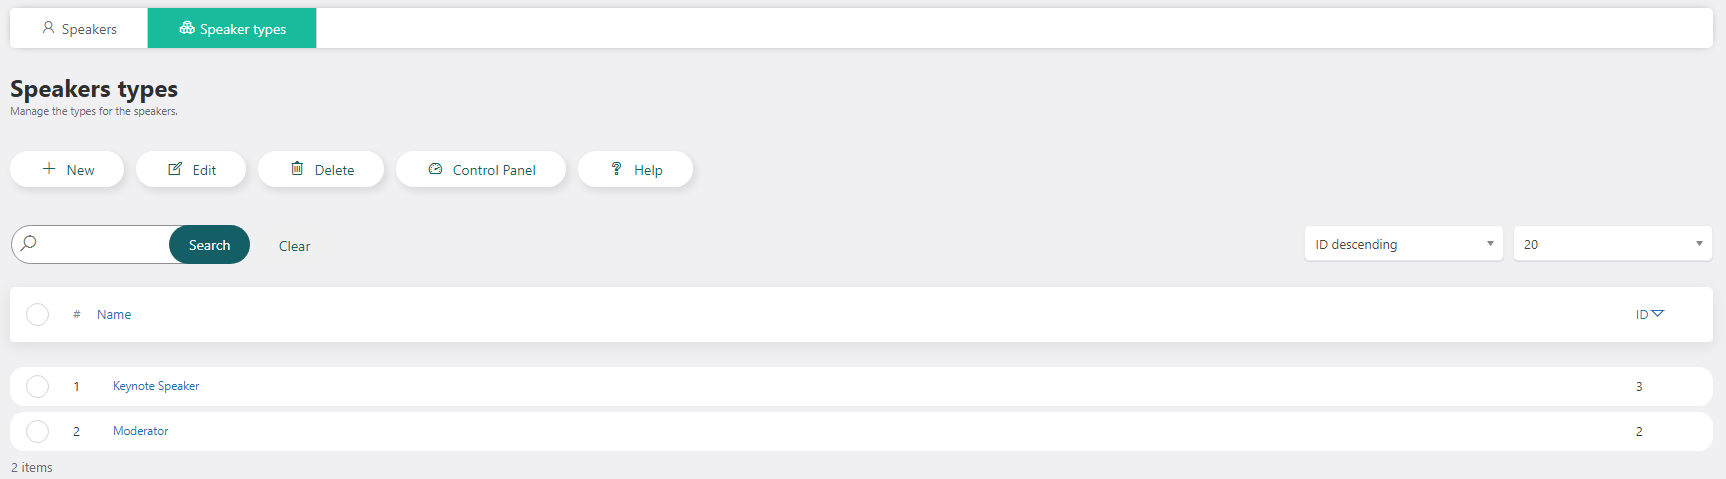
Speaker Types
In this section, you can define the types of speakers that are allowed/available on the created speakers. The type of speakers will also be displayed in the speakers’ section, in front – end, as filters for the available speakers.
After all information is saved and also completed on the speakers section, all the available speakers will display in the front – end section.